In this tutorial, we will show you how to install phpMyAdmin on Ubuntu 20.04. We will also be configuring MySQL Server to work with phpMyAdmin.

Databases are very important for any application, and many projects use MySQL or MariaDB to meet this need. Managing MySQL and MariaDB database from command-line is a time-consuming task for any developer. PhpMyAdmin is a free, open-source, and web-based application that provides the administration of a MySQL or MariaDB database from a comfortable web interface. It comes with an advanced SQL editor that makes it easier to build and test complex SQL queries. It helps you to perform several database operations including, creating, deleting, querying, database, tables, columns, etc. It is most widely used by web hosting companies and enable the webmaster to create and manage databases on their own.
Requirements
- For the purposes of this tutorial, we will be using an Ubuntu 20.04 VPS.
- You will also need a working LAMP stack in your server.
- Full SSH root access or a user with sudo privileges is also required.
Table of Contents
1. Connect to Your Server
Before starting, you need to connect to your server via SSH as the root user or any other user with sudo privileges.
To connect to your server as the root user, use the following command:
ssh root@IP_ADDRESS -p PORT_NUMBER
Make sure to replace IP_ADDRESS and PORT_NUMBER with your actual server IP address and SSH port number.
Once logged in, make sure that your server is up-to-date by running the following commands:
apt-get update -y
apt-get upgrade -y
2. Configure MySQL Server
By default, the MySQL root user is set to authenticate using the auth_socket plugin by default rather than with a password in Ubuntu 20.04 running MySQL 5.7 or later versions. So you will need to change this default authentication method from auth_socket to mysql_native_password in order to log in to phpMyAdmin as MySQL root user.
To do so, login to MySQL shell with the following command:
mysql
After login, check the authentication method of all of your users run the following command:
mysql> SELECT user,plugin FROM mysql.user;
You should get the following output:
+------------------+-----------------------+
| user             | plugin                |
+------------------+-----------------------+
| debian-sys-maint | caching_sha2_password |
| mysql.infoschema | caching_sha2_password |
| mysql.session    | caching_sha2_password |
| mysql.sys        | caching_sha2_password |
| root             | auth_socket           |
+------------------+-----------------------+
Now, change the authentication plugin from auth_socket to mysql_native_password for your root user with the following command:
mysql> ALTER USER 'root'@'localhost' IDENTIFIED WITH mysql_native_password BY 'secure-password';
Next, flush the privileges to apply the changes:
mysql> FLUSH PRIVILEGES;
Next, verify the authentication method again with the following command:
mysql> SELECT user,plugin FROM mysql.user;
You should see the following output:
+------------------+-----------------------+
| user             | plugin                |
+------------------+-----------------------+
| debian-sys-maint | caching_sha2_password |
| mysql.infoschema | caching_sha2_password |
| mysql.session    | caching_sha2_password |
| mysql.sys        | caching_sha2_password |
| root             | mysql_native_password |
+------------------+-----------------------+
Now, exit from the MySQL shell with the following command:
mysql> EXIT;
At this point, your MySQL server is configured to use mysql_native_password authentication method.
3. Install PhpMyAdmin from Ubuntu 20.04 repository
By default, phpMyAdmin is available in the Ubuntu 20.04 default repository. You can install it by running the following command:
apt-get install phpmyadmin -y
During the installation, you will be asked to choose a web server as shown below:
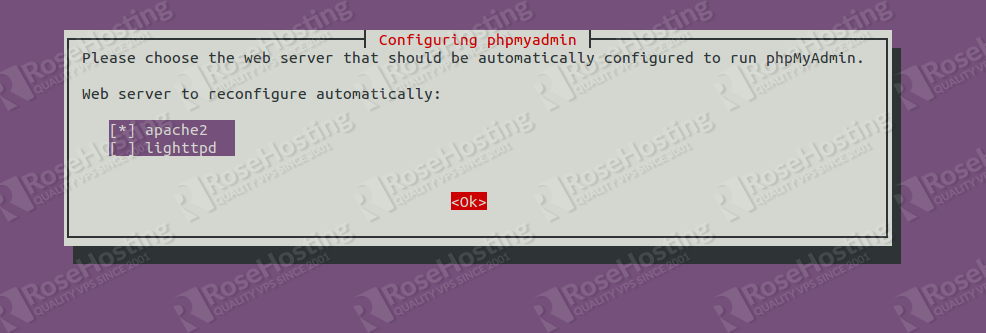
Select the Apache web server and click on the Ok button. You will be asked to configure a database for phpMyAdmin with dbconfig-common as shown below:
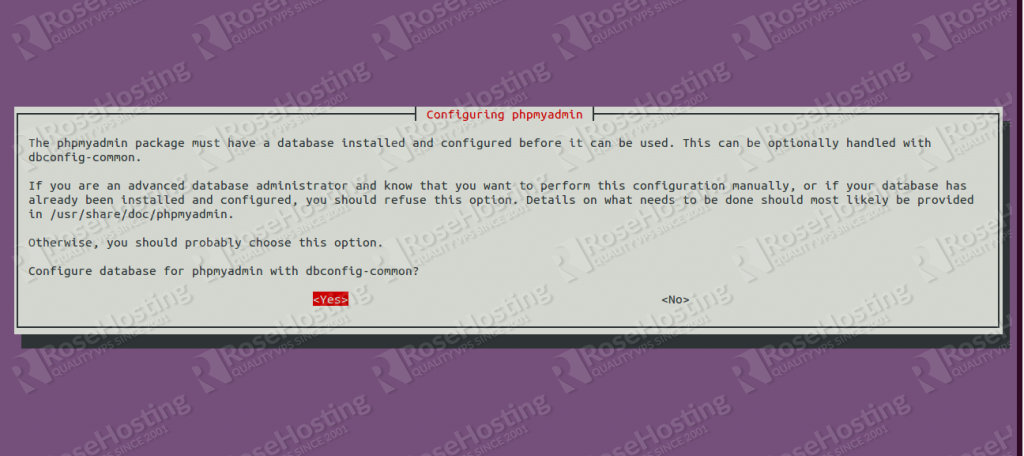
Select Yes and hit enter. You will be asked to provide a MySQL application password for phpMyAdmin as shown below:
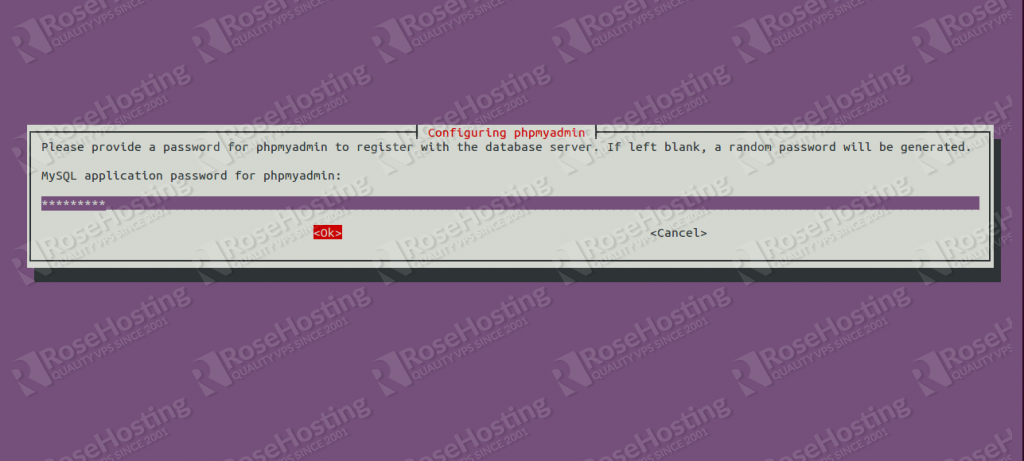
Provide your password and click on the Ok button to finish the installation.
Next, restart the Apache service to apply the changes:
systemctl restart apache2
At this point, phpMyAdmin is installed in your server.
4. Access the phpMyAdmin web interface
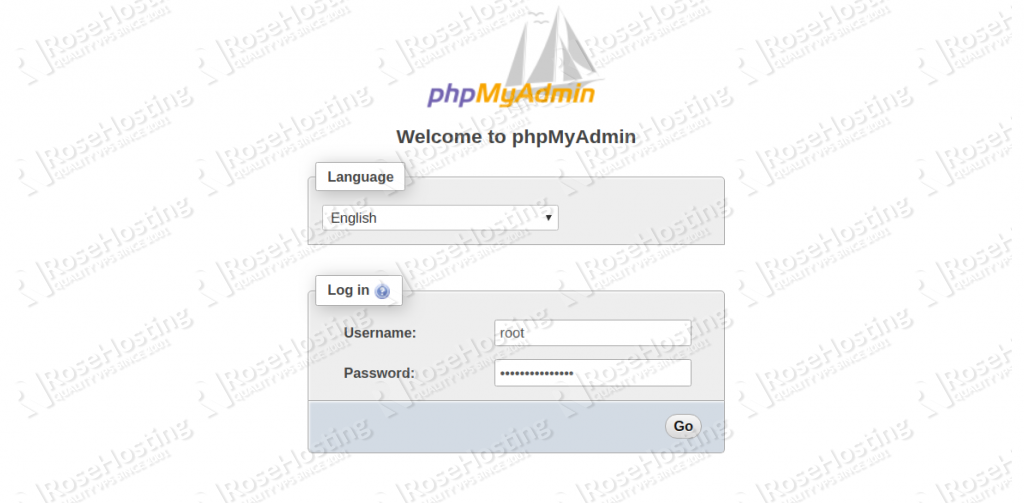
Now, open your web browser and access phpMyAdmin using the URL http://your-server-ip/phpmyadmin. You will be redirected to the phpMyAdmin login page:
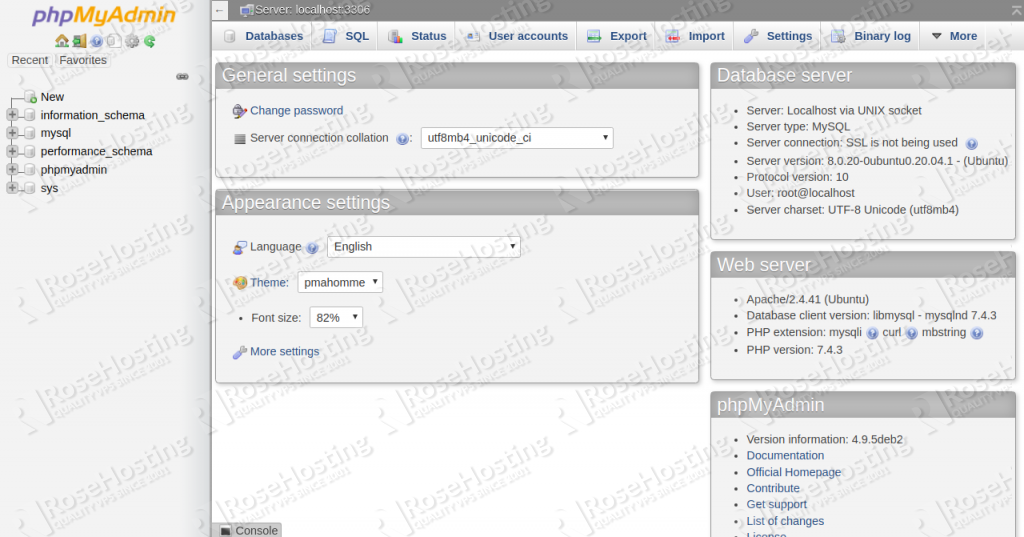
Provide your MySQL root username, password and click on the Go button. You should see the phpMyAdmin management interface in the following screen:
5. Secure phpMyAdmin on Ubuntu 20.04
Because of its popularity, phpMyAdmin is the first target for attackers. So you should take extra care to prevent unauthorized access.
To do so, you should use Apache’s built-in .htaccess authentication and authorization functionalities.
First, enable the use of .htaccess file by editing the file phpmyadmin.conf:
nano /etc/apache2/conf-available/phpmyadmin.conf
Add the line AllowOverride All within the <Directory /usr/share/phpmyadmin> section:
<Directory /usr/share/phpmyadmin>
Options SymLinksIfOwnerMatch
DirectoryIndex index.php
AllowOverride All
Save the file then restart the Apache service to apply the changes:
systemctl restart apache2
Next, create a .htaccess file inside the phpMyAdmin root directory:
nano /usr/share/phpmyadmin/.htaccess
Add the following lines:
AuthType Basic
AuthName "Restricted Files"
AuthUserFile /etc/phpmyadmin/.htpasswd
Require valid-user
Save and close the file. Then, create a password file with a user named user1 using the htpasswd utility:
htpasswd -c /etc/phpmyadmin/.htpasswd user1
You will be asked to set the password as shown below:
New password:
Re-type new password:
Adding password for user user1
Now, your phpMyAdmin is secured with additional authentication.
Open your web browser and type the URL http://your-server-ip/phpmyadmin.
You will be prompted to the additional account name and password as shown below:
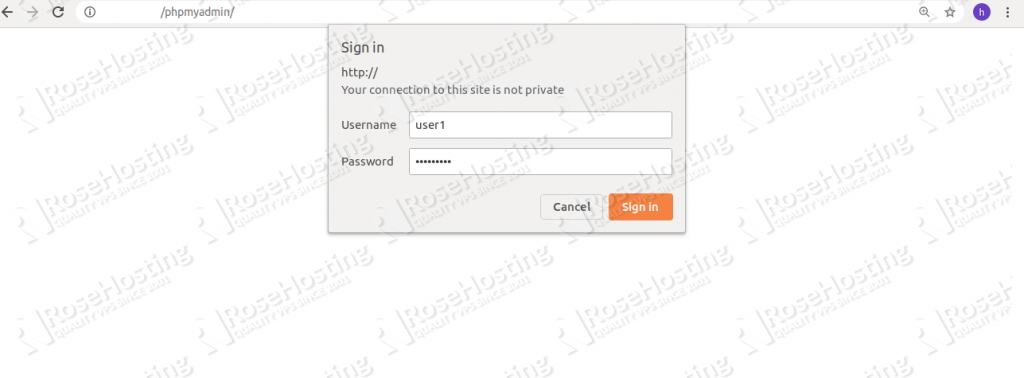
Provide the username and a password you just configured, and click on the Log in button. You will be redirected to the regular phpMyAdmin authentication page:
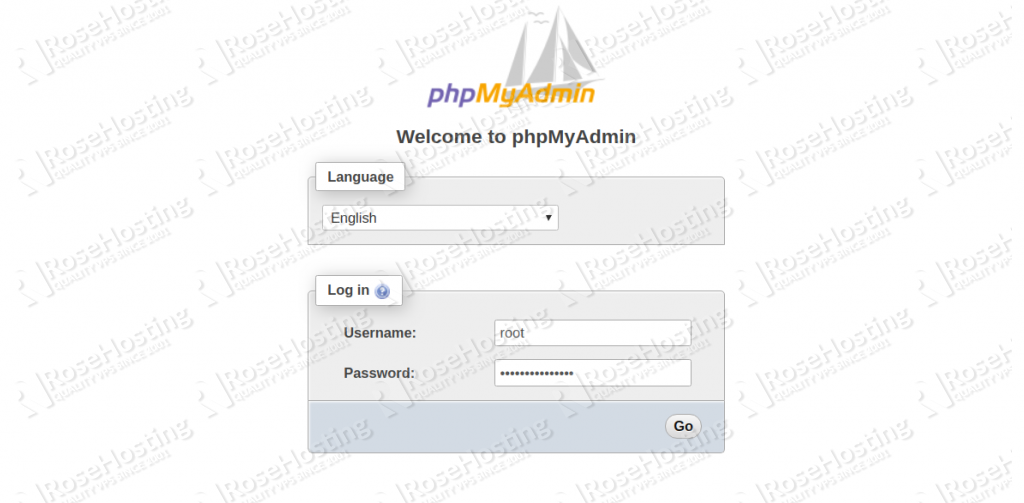
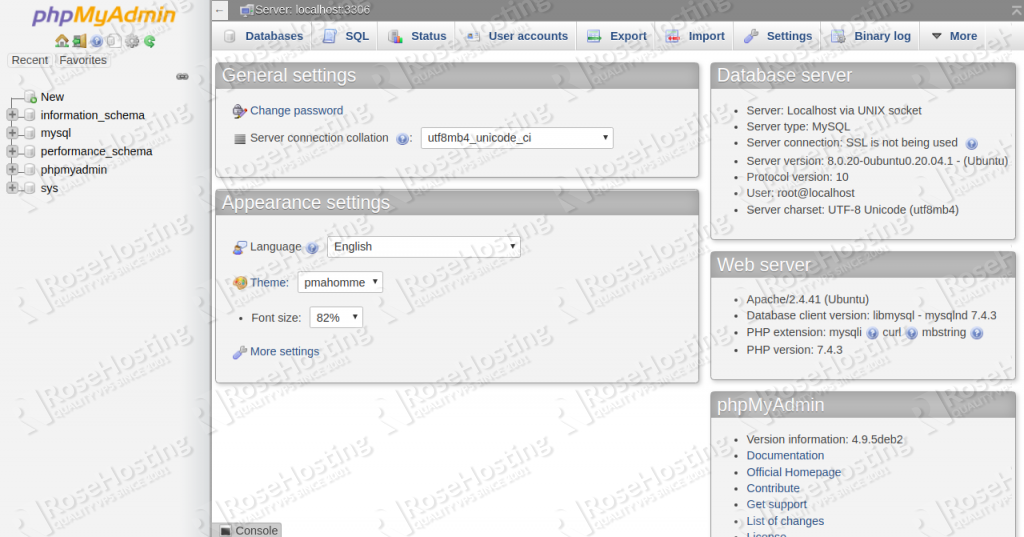
Provide your MySQL root username, password, and click on the Go button. You should see the phpMyAdmin management interface as shown below:

Of course, if you are one of our Managed Ubuntu Hosting customers, you don’t have to install phpMyAdmin on your Ubuntu 20.04 VPS – simply ask our admins, sit back, and relax. Our admins will install phpMyAdmin (and even PHP if it isn’t already installed) on Ubuntu 20.04 for you immediately.
PS. If you liked this post about how to install phpMyAdmin on Ubuntu 20.04 VPS, please share it with your friends on the social networks using the buttons below, or simply leave a comment in the comments section. Thanks.
It’s a great article. Add a reminder to change secure-password in the statement: mysql> ALTER USER ‘root’@’localhost’ IDENTIFIED WITH mysql_native_password BY ‘secure-password’;
It took me some time to figure out why I could not login to mysql at the command prompt as well as login to phpmyadmin.