Magento is a highly popular open-source e-commerce platform written in PHP. It is completely customizable to every user’s requirements, thus allowing them to create and launch a fully functional online store in minutes, making it an excellent choice for businesses looking to have an online shop set up without hassle.

Magento offers a community and a commercial version of its platform – the community version is free and is designed primarily for individuals and/or small businesses. On the other hand, the enterprise version is mainly aimed at medium to large businesses and more of an enterprise environment. In this tutorial, we will show you how to install Magento 2.4.3 on Ubuntu 20.04.
Table of Contents
Prerequisites
- Ubuntu 20.04
- root SSH access or a regular user with sudo privileges
1. Log in via SSH and update the system
Log in to your Ubuntu 20.04 VPS with SSH as a root user or as a regular user with sudo privileges
ssh master@IP_Address -p Port_number
Remember to replace IP_Address and Port_Number with your server’s actual IP address and SSH port number respectively.
You can check whether you have the proper Ubuntu version installed on your server with the following command:
$ lsb_release -a
You should get this output:
No LSB modules are available.
Distributor ID: Ubuntu
Description: Ubuntu 20.04.3 LTS
Release: 20.04
Codename: focal

Then, run the following command to make sure that all installed packages on the server are updated to the latest available version
$ sudo apt update && sudo apt upgrade
2. Install PHP
Magento 2.4.3 is fully compatible with PHP 7.4. To install the latest stable version of PHP 7.4 and all necessary modules, run:
$ sudo apt install php7.4-{bcmath,common,curl,fpm,gd,intl,mbstring,mysql,soap,xml,xsl,zip,cli}
Once completed, we can increase some PHP variable values to meet Magento’s minimum requirements.
$ sudo sed -i "s/memory_limit = .*/memory_limit = 768M/" /etc/php/7.4/fpm/php.ini
$ sudo sed -i "s/upload_max_filesize = .*/upload_max_filesize = 128M/" /etc/php/7.4/fpm/php.ini
$ sudo sed -i "s/zlib.output_compression = .*/zlib.output_compression = on/" /etc/php/7.4/fpm/php.ini
$ sudo sed -i "s/max_execution_time = .*/max_execution_time = 18000/" /etc/php/7.4/fpm/php.ini
3. Install Web server
In this tutorial, we are going to use nginx the web server, you can check our other blog posts if you want to use Apache.
$ sudo apt install nginx
Now, we need to create an nginx server block for our domain.
$ sudo nano /etc/nginx/sites-enabled/magento.conf
Then insert the following into the configuration file.
upstream fastcgi_backend {
server unix:/run/php/php7.4-fpm.sock;
}

server {
server_name yourdomain.com;
listen 80;
set $MAGE_ROOT /opt/magento2;
set $MAGE_MODE developer; # or production

access_log /var/log/nginx/magento2-access.log;
error_log /var/log/nginx/magento2-error.log;

include /opt/magento2/nginx.conf.sample;
}
Save the file then exit. To test the configuration file we can run this command
$ sudo nginx -t
If everything is okay and no error message, we can reload nginx.
$ sudo systemctl reload nginx
4. Install MariaDB Server
Run the following command to install the latest MariaDB server from the official Ubuntu repositories:
$ sudo apt install mariadb-server
Once installed, we can proceed with creating a new database and its user for our Magento website.
$ sudo mysql
The command above will bring you to MySQL/MariaDB shell without a password because by default root does not have a password. If you want to secure your MariaDB installation, you can run the following command to improve the security of your MySQL server installation (answering with ‘Y’ to every prompt is highly recommended):
$ mysql_secure_installation
If you prefer to run the mysql_secure_installation, then you need to run the command below to log in to MySQL/MariaDB shell.
$ mysql -u root -p
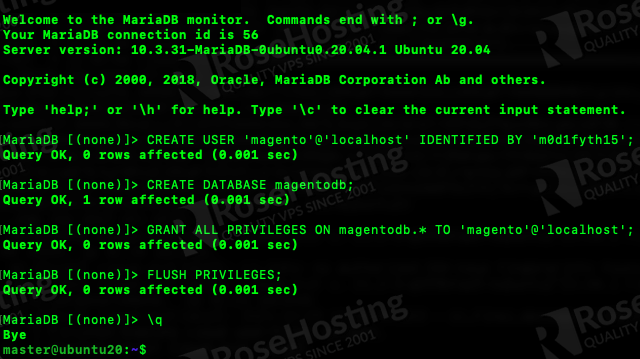
You will be asked for the password you created earlier when running mysql_secure_installation, type the password then hit enter. Once logged in, we can issue these commands below to create a database and password for our Magento website. Remember, you would want to replace ‘m0d1fyth15‘ with a stronger password.
mysql> CREATE USER 'magento'@'localhost' IDENTIFIED WITH mysql_native_password BY 'm0d1fyth15';
mysql> CREATE DATABASE magentodb;
mysql> GRANT ALL PRIVILEGES ON magentodb.* TO 'magento'@'localhost';
mysql> FLUSH PRIVILEGES;
mysql> \q

5. Install Elastic Search
Add Elasticseach Repository
Starting Magento 2.4, all Magento installations must be configured to use Elasticsearch as the catalog search solution. And since Elasticsearch is not available in the Ubuntu 20.04 repository, we will need to add the Elasticsearch repository to our system.
First, install the required dependencies with the following command:
$ sudo apt install apt-transport-https ca-certificates gnupg2 -y
Then, we need to import the GPG key with the following command:
$ wget -qO - https://artifacts.elastic.co/GPG-KEY-elasticsearch | sudo apt-key add -
At last, we can run the following command to add the Elasticsearch repository:
sudo sh -c 'echo "deb https://artifacts.elastic.co/packages/7.x/apt stable main" > /etc/apt/sources.list.d/elastic-7.x.list'
Install Elasticsearch
We need to update the repository cache to be able to install the Elasticsearch with the following command:
$ sudo apt update -y
$ sudo apt install elasticsearch -y
That’s it, elasticsearch has been successfully installed. We can enable the service and start it by running this command below:
$ sudo systemctl --now enable elasticsearch
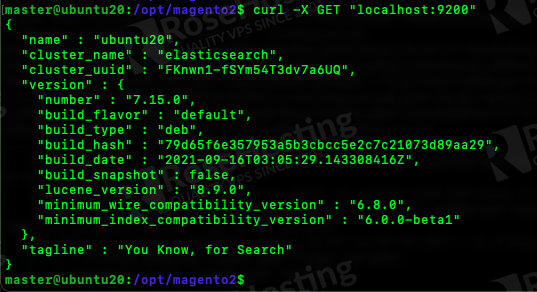
To verify whether Elasticsearch is running or not we can run the following command:
$ curl -X GET "localhost:9200"
You will be presented with a message like this.
{
"name" : "ubuntu20",
"cluster_name" : "elasticsearch",
"cluster_uuid" : "FKnwn1-fSYm54T3dv7a6UQ",
"version" : {
"number" : "7.15.0",
"build_flavor" : "default",
"build_type" : "deb",
"build_hash" : "79d65f6e357953a5b3cbcc5e2c7c21073d89aa29",
"build_date" : "2021-09-16T03:05:29.143308416Z",
"build_snapshot" : false,
"lucene_version" : "8.9.0",
"minimum_wire_compatibility_version" : "6.8.0",
"minimum_index_compatibility_version" : "6.0.0-beta1"
},
"tagline" : "You Know, for Search"
}

6. Install Composer
The installation of Composer is fairly easy and straightforward.
$ curl -sS https://getcomposer.org/installer -o composer-setup.php
$ sudo php composer-setup.php --install-dir=/usr/local/bin --filename=composer
That’s it. You have successfully installed Composer on your system and have made it available for global use by storing it to /usr/local/bin/. To check the Composer version you can run the following command:
$ composer -V
7. Download and Install Magento
In this tutorial, we will install Magento 2.4.3 using composer, it is the recommended installation method for most situations. To proceed with this, you need to create an access key. You can create an account at the magento.com website and navigate to https://marketplace.magento.com/customer/accessKeys/ to create an access key.
Once an access key is created, you can run this command in your SSH session.
$ composer create-project --repository-url=https://repo.magento.com/ magento/project-community-edition=2.4.3 /opt/magento2
Running the command above, you will be asked for your username and password. This is the information you need to fill.
Username: YOUR_PUBLIC_KEY
Password: YOUR_PRIVATE_KEY
Please note, when typing or pasting the password/private key, you would not see the password string, just paste it and hit ENTER and composer with start downloading Magento 2. Magento files will be downloaded to directory /opt/magento2, if you want to use another path you can edit the command above and use another location.
Once downloaded, you can start the installation by running the command below.
$ cd /opt/magento2
Before running the command below, you would want to edit the domain name, email address, and admin password.
$ sudo bin/magento setup:install \
--base-url=http://yourdomain.com \
--db-host=localhost \
--db-name=magentodb \
--db-user=magento \
--db-password=magento \
--admin-firstname=admin \
--admin-lastname=admin \
--admin-email=admin@admin.com \
--admin-user=admin \
--admin-password=admin123 \
--language=en_US \
--currency=USD \
--timezone=America/Chicago \
--use-rewrites=1
Wait for the installation process until it finishes.
You should see the following output:
[SUCCESS]: Magento installation complete.
[SUCCESS]: Magento Admin URI: /admin_1iwnbd
Now, let’s correct the permissions.
$ sudo chown -R www.data. /opt/magento2
By default, two-factor authentication is enabled. If you want to disable it, you can run the command below
$ sudo -u www-data bin/magento module:disable Magento_TwoFactorAuth
$ sudo -u www-data bin/magento cache:flush
8. Setup Cron jobs
Magento requires its cron jobs to run to automate its important system functions. Let’s create the following cron job:
$ sudo -u www-data bin/magento cron:install
9. Install an SSL Certificate
We’re going to use and generate a free SSL certificate from Let’s Encrypt. Install the required packages by running the following command:
$ sudo apt install certbot python3-certbot-nginx
Then run this command to install a new SSL certificate for your domain name, making sure that you replace 'yourdomain.com' to your actual domain or subdomain name:
$ sudo certbot --nginx -d yourdomain.com -d www.yourdomain.com
Please select ‘2’ and choose to redirect HTTP traffic to HTTPS:
- - - - - - - - - - - - - - - - - - - - - - - - - - - - - - - - - - - - - - - - - - - - - - - - - - - - - - - - - - - - - - - -
1: No redirect - Make no further changes to the webserver configuration.
2: Redirect - Make all requests redirect to secure HTTPS access. Choose this for
new sites, or if you're confident your site works on HTTPS. You can undo this
change by editing your web server's configuration.
- - - - - - - - - - - - - - - - - - - - - - - - - - - - - - - - - - - - - - - - - - - - - - - - - - - - - - - - - - - - - - - -
Select the appropriate number [1-2] then [enter] (press 'c' to cancel): 2
Use the following Magento 2 CLI commands to update the Magento base-URL and the base-URL-secure values:
$ cd /opt/magento2/
$ sudo -u www-data bin/magento setup:store-config:set --base-url="https://yourdomain.com/"
$ sudo -u www-data bin/magento setup:store-config:set --base-url-secure="https://yourdomain.com/"
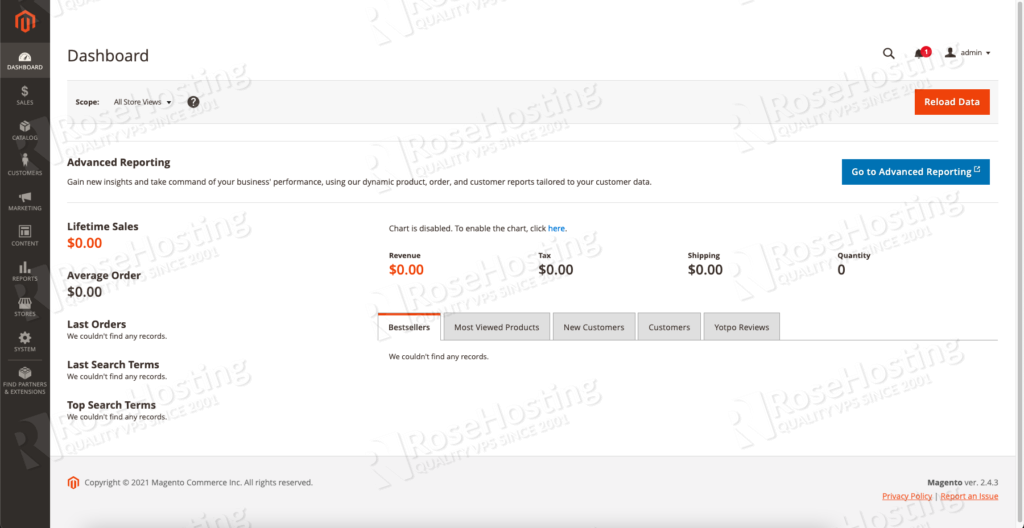
That’s it! You have successfully installed Magento 2.4.3 on your Ubuntu 20.04 server, you can navigate to your https://yourdomain.com

And access Magento backend at https://yourdomain.com/admin_1iwnbd. Please remember that your Magento Admin URI is provided when installing Magento using composer in the previous step.

Of course, you don’t have to install Magento 2.4.3 on your Ubuntu 20.04 server if you have a server with us, in which case you can simply ask our expert Linux hosting admins to set all of this up for you, quickly and easily. They are available 24×7 and will respond to your request immediately.
PS. If you liked this post, please share it with your friends on social networks or simply leave a comment down in the comments section. Thank you.