RainLoop Webmail is a simple, modern, and fast web-based email client. Written in PHP, RainLoop provides an easy way to check your emails using your web browser. It comes with full support of IMAP and SMTP protocols (SSL, STARTTLS), sieve scripts support, integration with Facebook, Google, Twitter, and Dropbox, a multi-level caching system, plugins support, keyboard shortcuts support, and many other additional features.
The installation is quite simple. If you follow our instructions carefully, you can finish the RainLoop Webmail installation in less than 10 minutes. Let’s get started.
Table of Contents
Requirements:
- For the purposes of this tutorial, we will be using an Ubuntu 18.04 VPS.
- You will also need a working LAMP or LEMP (Linux, Apache/Nginx, MySQL, PHP) stack.
- Full SSH root access or a user with sudo privileges is also required.
Step 1: Connect to Your Server
Before we begin, you need to connect to your server via SSH as the root user or any other user with sudo privileges.
To connect to your server as the root user, use the following command:
ssh root@IP_ADDRESS -p PORT_NUMBER
Make sure to replace IP_ADDRESS and PORT_NUMBER with your actual server IP address and SSH port number.
Once logged in, make sure that your server is up-to-date by running the following commands:
sudo apt update
sudo apt upgrade
Step 2: Install RainLoop Webmail
There are two RainLoop Webmail editions available for download: Community Edition (under the AGPL v3 license) and Standard Edition (under the RainLoop software license)
For the purposes of this tutorial, we will install the free and open source community edition.
To download the latest RainLoop Webmail community version, run the following command:
wget http://www.rainloop.net/repository/webmail/rainloop-community-latest.zip
Next, let’s create a new directory for our RainLoop webmail installation. In our example, we will use /var/www/rainloop, but you can also choose a different location.
To create the rainloop directory, run the following command:
sudo mkdir /var/www/rainloop
To extract the files into this new directory, run the following command:
unzip rainloop-community-latest.zip -d /var/www/rainloop
Step 3: Set Permissions
Once the installation is completed, you will need to set the correct file and directory permissions.
To set the proper read/write permissions, run the following commands:
cd /var/www/rainloop
find . -type d -exec chmod 755 {} \;
find . -type f -exec chmod 644 {} \;
The owner of the files needs to be the user of the web server running on your system. In our example, we are using the Apache web server and Apache runs under the “www-data” user on Ubuntu. To change the owner of the files, you can then run the following commands:
cd /var/www/rainloop
chown -R www-data:www-data .
Step 3: Configure Apache/Nginx
In this step, we will show you how to create a virtual host file in Apache or Nginx – the procedure depends on which web server you have running on your system. This is so that you can access your RainLoop installation from your browser.
Apache
Create the virtual host file by executing the following command:
nano /etc/apache2/sites-available/rainloop.conf
Then enter the following information:
<VirtualHost *:80>
  ServerName webmail.mydomain.com
  DocumentRoot "/var/www/rainloop/"

  ErrorLog "/var/log/apache2/rainloop_error_log"
  TransferLog "/var/log/apache2/rainloop_access_log"

  <Directory />
    Options +Indexes +FollowSymLinks +ExecCGI
    AllowOverride All
    Order deny,allow
    Allow from all
    Require all granted
  </Directory>

  <Directory /var/www/rainloop/data>
    Options -Indexes
    Deny from all
  </Directory>
</VirtualHost>
In our example, we decided to use a subdomain called webmail.mydomain.com for accessing our RainLoop. Make sure to replace mydomain.com with your actual domain name.
To enable the new RainLoop virtual host, run the following command:
a2ensite rainloop.conf
You should see the following output:
Enabling site rainloop.
To activate the new configuration, you need to run:
systemctl reload apache2
Reload your Apache in order to activate the new configuration:
systemctl reload apache2
Nginx
Create the virtual host file by executing the following command:
nano /etc/nginx/sites-available/rainloop.conf
server {
  listen 80;

  server_name webmail.mydomain.com;
  root /var/www/rainloop;

  index index.php;

  access_log /var/log/nginx/rainloop_access.log;
  error_log /var/log/nginx/rainloop_error.log;

  location / {
    try_files $uri $uri/ /index.php?$query_string;
  }

  location ~ \.php$ {
    fastcgi_index index.php;
    fastcgi_split_path_info ^(.+\.php)(.*)$;
    fastcgi_keep_conn on;
    fastcgi_pass unix:/var/run/php/php7.2-fpm.sock;
    include /etc/nginx/fastcgi_params;
    fastcgi_param SCRIPT_FILENAME $document_root$fastcgi_script_name;
  }
  location ~ /\.ht {
    deny all;
  }

  location ^~ /data {
    deny all;
  }
}
In our example, we decided to use a subdomain called webmail.mydomain.com for accessing our Rainloop. Make sure to replace mydomain.com with your actual domain name.
To enable the server configuration that we just created, run the following command:
ln -s /etc/nginx/sites-available/rainloop.conf /etc/nginx/sites-enabled/rainloop.conf
To check for any Nginx configuration errors, run the following command:
nginx -t
If there are no errors, you should get the following output:
nginx: the configuration file /etc/nginx/nginx.conf syntax is ok
nginx: configuration file /etc/nginx/nginx.conf test is successful
You can now reload Nginx in order to activate the new configuration:
systemctl reload nginx
Step 4: Accessing RainLoop Webmail
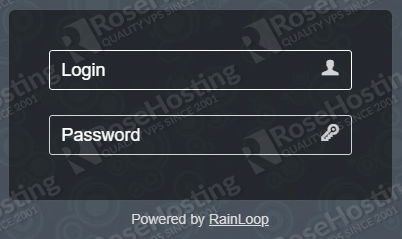
To access your RainLoop Webmail admin panel, open your browser and enter http://webmail.mydomain.com/?admin (replace this with the actual domain name you used in your web server configuration).
The default admin login credentials are:
Username: admin
Password: 12345
You will be taken to the RainLoop admin panel, from which you can manage your RainLoop setup and configure your email server settings. It is also highly recommended to change your admin password as soon as you log in.
If you followed the steps correctly, then you should have a successful copy of RainLoop Webmail running on your server.
Of course, you don’t have to install RainLoop Webmail on Ubuntu 18.04 if you have an Ubuntu VPS with us. You can simply ask our support team to install RainLoop Webmail on Ubuntu 18.04 for you. They are available 24/7 and will be able to help you with the installation. We also published a guide on How to Install RainLoop on Ubuntu 20.04.
PS. If you enjoyed reading this blog post on how to install RainLoop Webmail on Ubuntu 18.04, feel free to share it on social networks using the shortcuts below, or simply leave a comment in the comments section. Thanks.


I followed your article, but still unable to get this to work, do i need to have the webmail setup in my DNS?
Hi Peter,
Yes, you have to create the subdomain in the DNS zone file of your domain.