High availability and performance are the key aspects when choosing the web hosting provider. If you have a heavy website, there are a lot of processing like importing, exporting, calculations, etc. As a result, chances to max out the CPU and disk are the mortal enemy of real-time transactions. Your website visitors also demand a fast loading time, and if you are unable to resolve this issue, this leads to loss of interest from your visitors, loss of sales and loss of SEO rank.
This is the place where Automatic Scaling and High Availability comes into the picture. RoseHosting cloud provides an Enterprise WordPress Clustering solution that helps you handle the high load and performance, save maintenance costs, zero downtime, and offers an excellent user experience.
In this tutorial, we will show you how to set up a WordPress cluster with LightSpeed and a highly available MariaDB Galera cluster. We will also show you how to enable Premium CDN and install a free Let’s Encrypt SSL certificate with automatic renewal.
Table of Contents
WordPress Enterprise Cluster Components
RoseHosting cloud provides the following components for WordPress Cluster:
LiteSpeed Web Server
It is a simple, lightweight, high-performance and low footprint web server. It provides browser caching, CDN, WAF, HTTP/3 support, Geo-DNS, reCAPTCHA protection and anti-DDoS protection. LiteSpeed Web Server supports dynamic content written in PHP, Perl, Ruby, Python, and Java and all applications are run as external engines. It also allows unlimited concurrent connections and supports the brotli lossless-compression algorithm which reduces both file size and page load time.
Let’s Encrypt SSL
Let’s Encrypt SSL is a free add-on that uses the ACME protocol to provide free TLS/SSL certificates to any compatible client. You can easily integrate it to your application server and enable fully automated certificate renewal.
Premium CDN
CDN Add-On is an extra feature that you can integrate into your WordPress application. This will utilize a global network with caching, modern HTTP/3 support and massive bandwidth capacity these will fast your WordPress sites.
Web Application Firewall
RoseHosting cloud provides a built-in web application firewall in the LiteSpeed Web Server packages. It comes with a Comodo ruleset and also supports ModSecurity rules to protect your websites from different kinds of attacks.
Redis
Redis is an in-memory data structure store and high-performance database management system. It stores all data in the RAM as a result it will decrease data access latency, increase throughput, and ease the load off your relational or NoSQL database and application.
MariaDB Galera
MariaDB Galera Cluster is a synchronous multi-master cluster for MariaDB and supports the XtraDB/InnoDB storage engines. It has the ability to provide protection against data loss without any delay in replication.
Install and Setup WordPress Cluster
Installing and setting up a WordPress cluster is a very difficult and time-consuming process. But, with RoseHosting cloud, all the setup is done by the platform. You don’t need to set up it manually.
First, log in to the RoseHosting cloud platform as shown below:
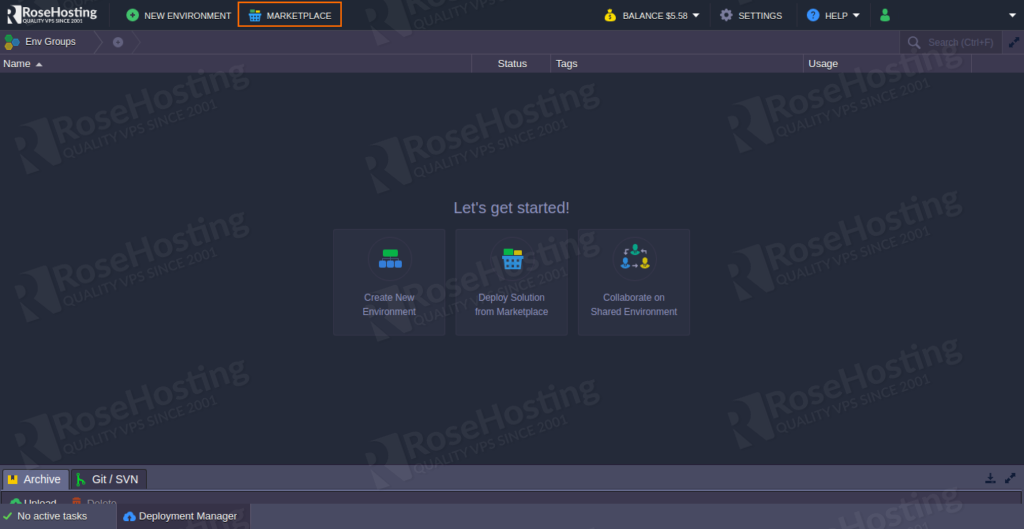
Now, click on the MARKETPLACE button. You should see the following screen:
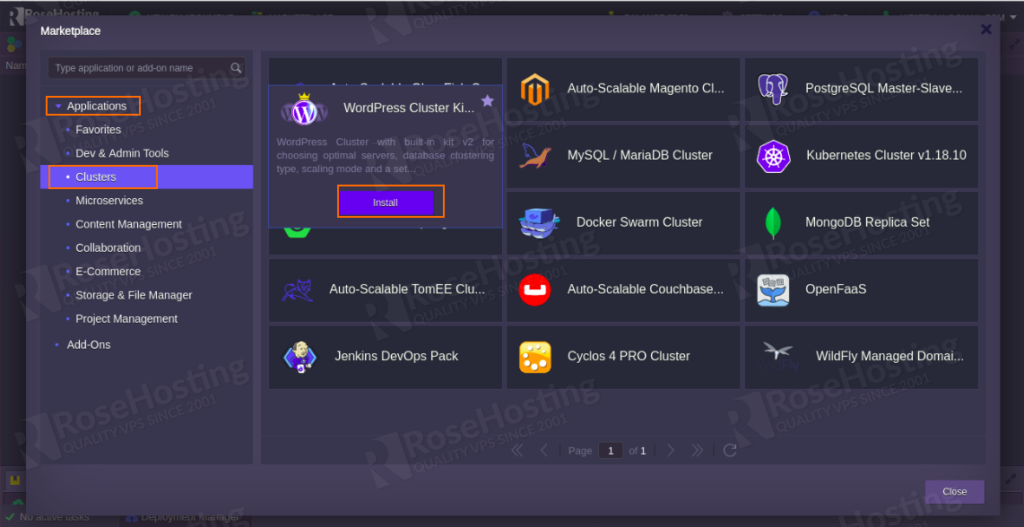
Now, click on the Applications => Cluster Management => WordPress Cluster Kit and click on the Install button to start the installation. This will open the customization window as shown below:
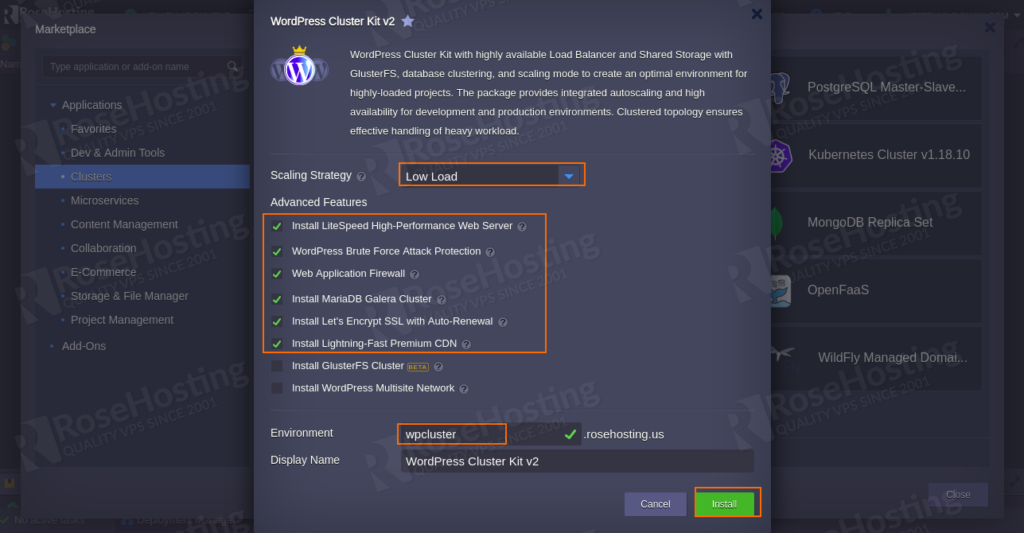
There is three option for choosing your Scaling Strategy. A brief explanation of each is shown below:
- Low Load: This will adds 1 application server node if the workload is greater than 70% and removes 1 application server node if the workload is lower than 20%.
- Medium Load: This will adds 1 application server node if the workload is greater than 50% and removes 1 application server node if the workload is lower than 20%.
- High Load: This will adds 2 application server node if the workload is greater than 30% and removes 1 application server node if the workload is lower than 10%.
Select your preferred Scaling Strategy, Features, Provide your environment name and click on the Install button. Once the WordPress cluster has been deployed, you should see the following screen:
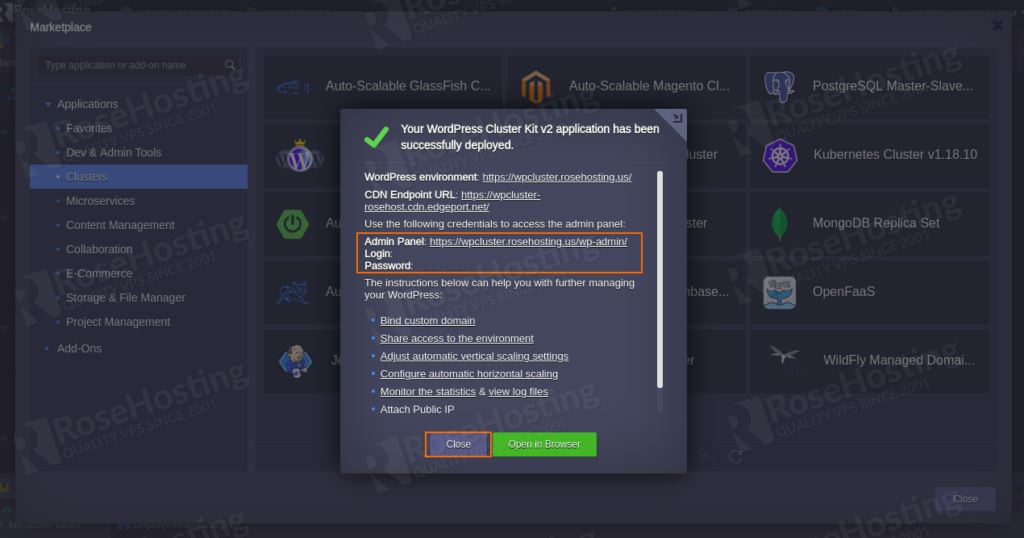
You can use the credentials provided in the above screen to manage your WordPress application. Now, click on the Close button. You should see your WordPress cluster environment in the following screen:
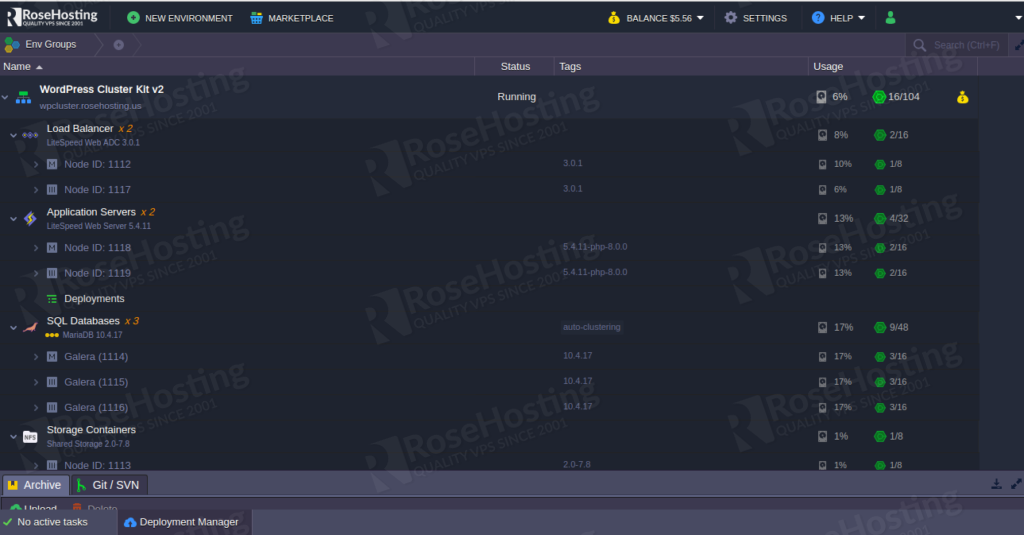
Setup Domain and SSL Certificate
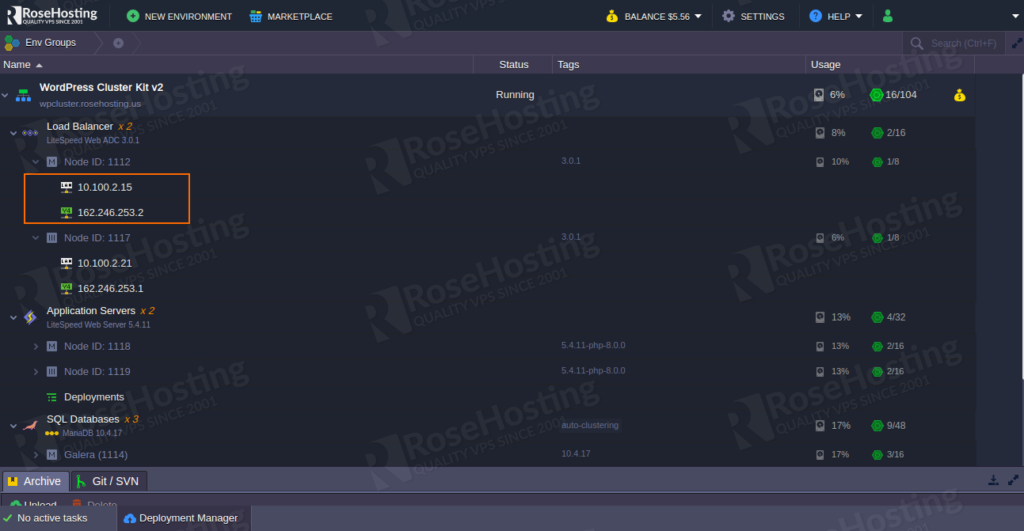
After the installation, you should also get a public IP address and custom domain name that you can use to access your website over the internet.
If you have selected the Let’s Encrypt SSL Add-On during the installation, the public IP address will be added to the Load Balancer node automatically as shown below:
Next, you will need to bind a domain name to the environment and install a Let’s Encrypt SSL for this domain.
You can follow the below steps to complete the process:
Step 1: On the WordPress Cluster dashboard, click on the Add-Ons among the Load Balancer as shown below:
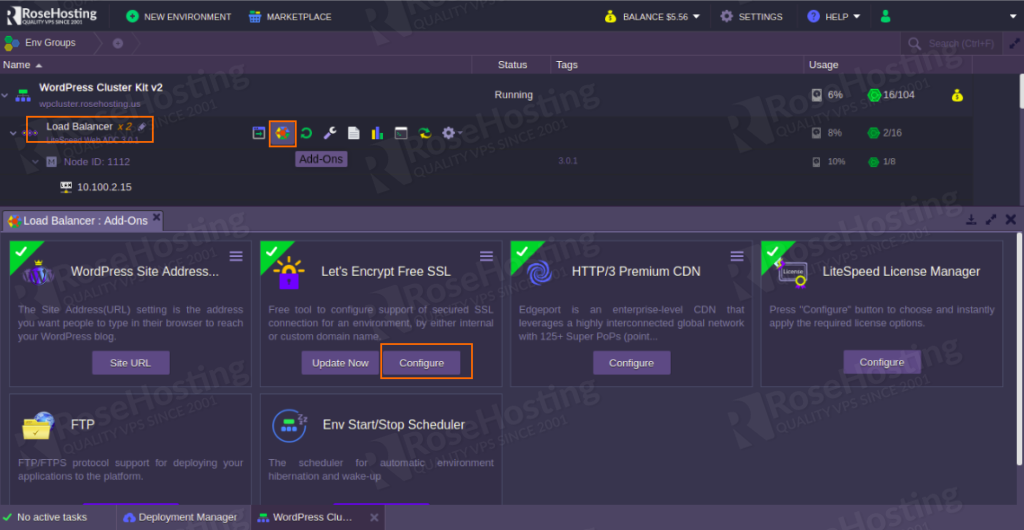
Step 2: Click on the Configure button among the Let’s Encrypt Free SSL. You should see the following screen:

Step 3: Provide your custom domain name and click on the Apply button. Once the certificate has been installed. You should be informed via email.
Step 4: Next, you will need to open the WordPress admin console and point your WordPress application to the custom domain as shown below:
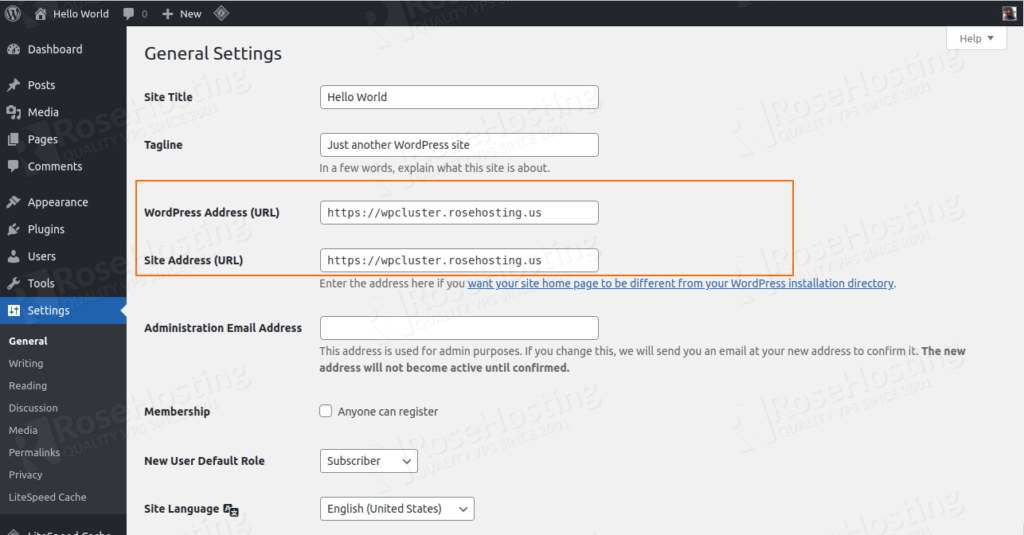
Step 5: Once you are finished, click on the Save Changes button to apply the changes.
Step 6: Now, open your WordPress application with a new domain address. You should see your WordPress Hello world! page:
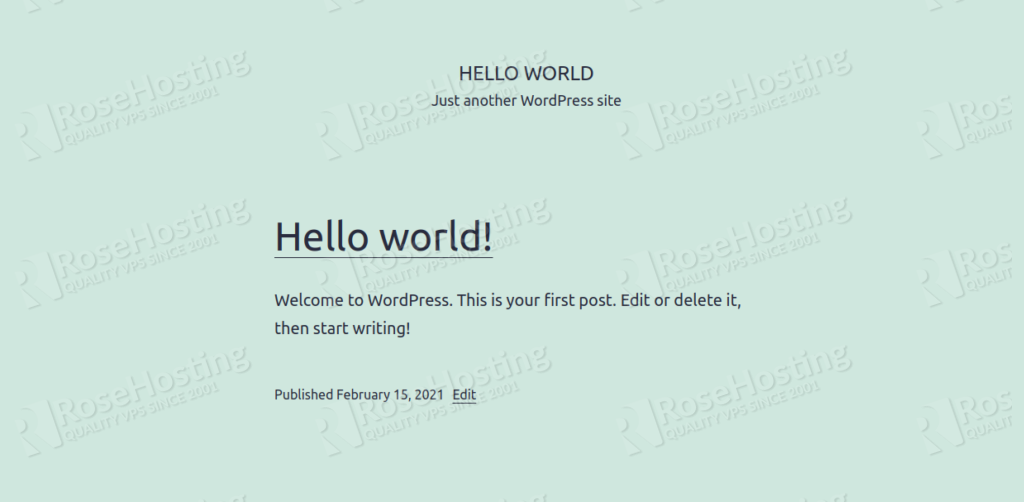
Congratulations! you have successfully set up a high-availability and high-performance WordPress cluster on the RoseHosting cloud platform. Your cluster is now bundled with powerful components including, WAF, LiteSpeed application servers, MariaDB Galera, CDN, Let’s Encrypt SSL, and load balancer with fast HTTP/3 protocol support.
You don’t have to do all of the above if you use our managed cloud hosting, in which case you can simply ask our support admins to install and configure it for you.
