At the time of writing this tutorial, the latest stable version of Railo web application server is 4.2 and it requires Apache Web Server 2.0 later. This install guide assumes that Apache is already installed and configured on your Railo virtual server.
Download the latest version of Railo available at http://www.getrailo.org/index.cfm/download/ to the ‘/opt’ directory on the server:
cd /opt
wget -O railo-4.2.1.008-pl0-linux-x64-installer.run http://www.getrailo.org/down.cfm?item=/railo/remote/download42/4.2.1.008/tomcat/linux/railo-4.2.1.008-pl0-linux-x64-installer.run&thankyou=true
The Installer creates a stand-alone instance of Railo server, Tomcat, and Java runtime environment specifically for use with Railo. To add an additional layer of security, it is a good idea to create a separate system user which will run the Tomcat server:
useradd -r railo --shell /bin/false
Make the installer file executable and run it:
chmod 755 railo-4.2.1.008-pl0-linux-x64-installer.run
./railo-4.2.1.008-pl0-linux-x64-installer.run --mode text
Then, follow the easy instructions: select the installation language, specify the directory where Railo server will be installed, set the Railo administrator and web administrator password, specify the Tomcat web server port (e.g. 8080), enter the system user account that Tomcat will run under (e.g. railo), choose Railo server to start up automatically whenever the system boots up and set it to install the Apache connector, then wait a couple of minutes while setup installs Railo on your virtual server.
Once you receive a message that the installer has finished installing Railo on your server, edit the ‘/opt/railo/tomcat/bin/setenv.sh’ file and modify the initial Java heap size, maximum Java heap size and the Java PermGen size:
vi /opt/railo/tomcat/bin/setenv.sh
and change:
JAVA_OPTS="-Xms256m -Xmx512m -XX:MaxPermSize=128m -javaagent:lib/railo-inst.jar";
to
JAVA_OPTS="-Xms512m -Xmx1024m -XX:MaxPermSize=256m -javaagent:lib/railo-inst.jar";
Depending on the nature of your application and its usage, you may need to change these settings and add some additional JVM arguments accordingly.
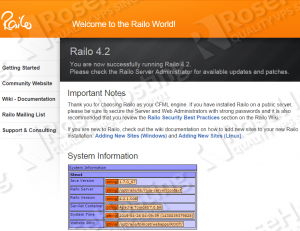
Open http://your-server-IP:8080 in your favorite web browser and you should see the Railo welcome screen:
The default Railo server administrator page is available at http://your-server-IP:8080/railo-context/admin/server.cfm and the default Railo web administrator page is available at http://your-server-IP:8080/railo-context/admin/web.cfm .
That is it. The Railo server installation is now complete. You should now check out the wiki documentation on how to add new sites to your new Railo installation.
Of course you don’t have to do any of this if you use one of our Linux VPS Hosting services, in which case you can simply ask our expert Linux admins to install Railo for you. They are available 24×7 and will take care of your request immediately.
PS. If you liked this post please share it with your friends on the social networks using the buttons on the left or simply leave a reply below. Thanks.

Hi guys,
I found that mod_perl isn’t installed by default on CentOS 7 since it’s been replaced by PSGI/plack. A list of dependencies here would be have been useful. :)
The install procedure is pretty simple:
yum install -y epel-release
yum install -y mod_perl
Thanks!