CodeIgniter is an open-source PHP development framework for building dynamic websites. It is based on the MVC (Model-View-Controller) pattern and is known as one of the fastest PHP frameworks.
In this blog post, we will install Apache as a web server and PHP 8.1.
Installing Codeigniter on Ubutu 22.04 is a straightforward process that may take up to 15 minutes. Let’s get started!
Table of Contents
Prerequisites
- A server with Ubuntu 22.04 as OS
- User privileges: root or non-root user with sudo privileges
Step 1. Update the System
Before we start with the installation of the CodeIgniter, we need to update the system packages to the latest versions available.
sudo apt-get update -y && sudo apt-get upgrade -y
Step 2. Install Apache Web Server
To install the Apache Web server, it executes the following command:
sudo apt install apache2 -y
Once installed, start and enable the service.
sudo systemctl enable apache2 && sudo systemctl start apache2
Check if the service is up and running:
sudo systemctl status apache2
You should receive the following output:
root@host:~# sudo systemctl status apache2
● apache2.service - The Apache HTTP Server
     Loaded: loaded (/lib/systemd/system/apache2.service; enabled; vendor preset: enabled)
     Active: active (running) since Wed 2023-07-19 08:58:22 CDT; 4s ago
       Docs: https://httpd.apache.org/docs/2.4/
    Process: 119547 ExecStart=/usr/sbin/apachectl start (code=exited, status=0/SUCCESS)
   Main PID: 119576 (apache2)
      Tasks: 6 (limit: 4557)
     Memory: 15.8M
        CPU: 556ms
     CGroup: /system.slice/apache2.service
Step 3. Install PHP8.1 with dependencies
Next is PHP, along with its extensions. To install the PHP8.1 along with extensions, execute the following command:
sudo apt-get install php8.1 php8.1-cli php8.1-common php8.1-imap php8.1-redis php8.1-snmp php8.1-xml php8.1-zip php8.1-mbstring php8.1-curl libapache2-mod-php
To check the installed PHP version, execute the following command:
php -v
You should get the following output:
root@host:~# php -v
PHP 8.1.2-1ubuntu2.13 (cli) (built: Jun 28 2023 14:01:49) (NTS)
Copyright (c) The PHP Group
Zend Engine v4.1.2, Copyright (c) Zend Technologies
    with Zend OPcache v8.1.2-1ubuntu2.13, Copyright (c), by Zend Technologies
Step 4. Install Composer
We need to install the Composer responsible for installing all the CodeIgniter components.
curl -sS https://getcomposer.org/installer | php -- --install-dir=/usr/bin --filename=composer
Check the Composer installation:
composer
You should receive the following output:
   ______
  / ____/___  ____ ___  ____  ____  ________  _____
 / /   / __ \/ __ `__ \/ __ \/ __ \/ ___/ _ \/ ___/
/ /___/ /_/ / / / / / / /_/ / /_/ (__  )  __/ /
\____/\____/_/ /_/ /_/ .___/\____/____/\___/_/
                    /_/
Composer version 2.5.8 2023-06-09 17:13:21

Usage:
  command [options] [arguments]

Options:
  -h, --help                     Display help for the given command. When no command is given display help for the list command
  -q, --quiet                    Do not output any message
  -V, --version                  Display this application version
Step 5. Create CodeiIgniter application using Composer
Finally, we can create a CodeIgniter start application with the following command:
cd /var/www/html

composer create-project codeigniter4/appstarter my-first-app
After this command, you should allow some time for the application to be installed.
Continue as root/super user [yes]? yes
Creating a "codeigniter4/appstarter" project at "./my-first-app"
Info from https://repo.packagist.org: #StandWithUkraine
Installing codeigniter4/appstarter (v4.3.6)
  - Downloading codeigniter4/appstarter (v4.3.6)
  - Installing codeigniter4/appstarter (v4.3.6): Extracting archive
Created project in /var/www/html/my-first-app
Loading composer repositories with package information
Once installed, set the right permissions:
cd /var/www/html/my-first-app

chown -R www-data:www-data .
Step 6. Create Apache Virtual Host File
Go into the Apache directory where the configuration files are stored and create a configuration file for the CodeIgniter application.
cd /etc/apache2/sites-available/

touch codeigniter.conf
Paste the following lines of code, save the file and close it.
<VirtualHost *:80>
ServerName yourdomain.com
DocumentRoot /var/www/html/my-first-app/public

<Directory /var/www/html/my-first-app>
AllowOverride All
</Directory>

ErrorLog ${APACHE_LOG_DIR}/error.log
CustomLog ${APACHE_LOG_DIR}/access.log combined

</VirtualHost>
Enable the Apache configuration for CodeIgniter.
a2ensite codeigniter.conf
Check the syntax:
apachectl -t
You should receive the following output:
root@vps:~# apachectl -t
Syntax OK
If the syntax is OK, restartd the Apache service.
systemctl reload apache2
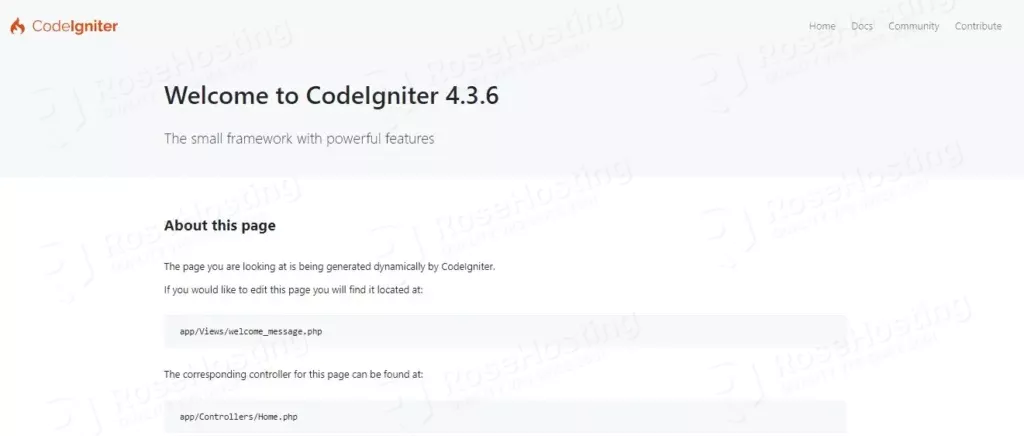
Once the Apache service is restarted, you can access the CodeIgniter website at http://yourdomain.com

Congratulations! You successfully installed and configured CodeIgniter on Ubuntu 22.04 with Composer and Apache as a web server.
Of course, if you find some difficulties while installing CodeIgniter, you can always contact our system admins and with their expertise, they will install CodeIgniter on Ubuntu 22.04 for you. All you need to do is to contact our support. We are available 24/7.
If you liked this post on how to install CodeIgniter on Ubuntu 22.04, please share it with your friends on social networks or simply leave a reply below. Thanks.
Hi,
It is a nice and simple tutorial.
Unfortunately, it did not work for a newbie like me.
I think your tutorial is missing few things.
1- The (my-first-app/app/Config/App.php) file still has the default baseURL = http://localhost:8080
2- The (my-first-app/env) is still the same and not renamed to (.env)
3- No instructions about Apache rewrite-mod.
I can see many error messages in the /var/log/apache2/error.log like these:
/var/www/html/my-first-app/app/.htaccess: Require not allowed here
/var/www/html/my-first-app/app/.htaccess: Options not allowed here
I hope that you can help with more info or someone else can assist to make the tutorial usable.
Regards,
Thas
Please double-check your configuration. Everything works as expected on Ubuntu 22.04 OS.