Building a highly-available clustered infrastructure is one of the most commonly used solutions to achieve 100% uptime for your application. In a clustered environment, there is a number of interconnected instances running the same stack and operating the same data. So cluster is able to handle more load than a single server. It will also add more servers automatically to the cluster as per application demand.
In this guide, we will show you how to deploy Java EE applications using Glassfish and Payara auto-clustering on the RoseHosting Cloud platform.
Table of Contents
1. Create GlassFish Environment
First, log in to RoseHosting cloud platform at https://app.rosehosting.cloud as shown below:
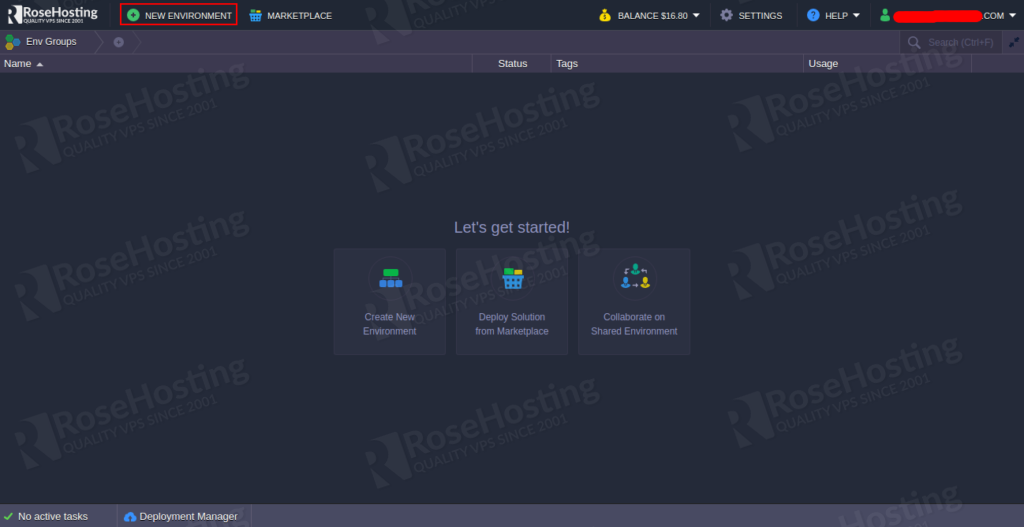
Click on the NEW ENVIRONMENT button. You should see the following page:
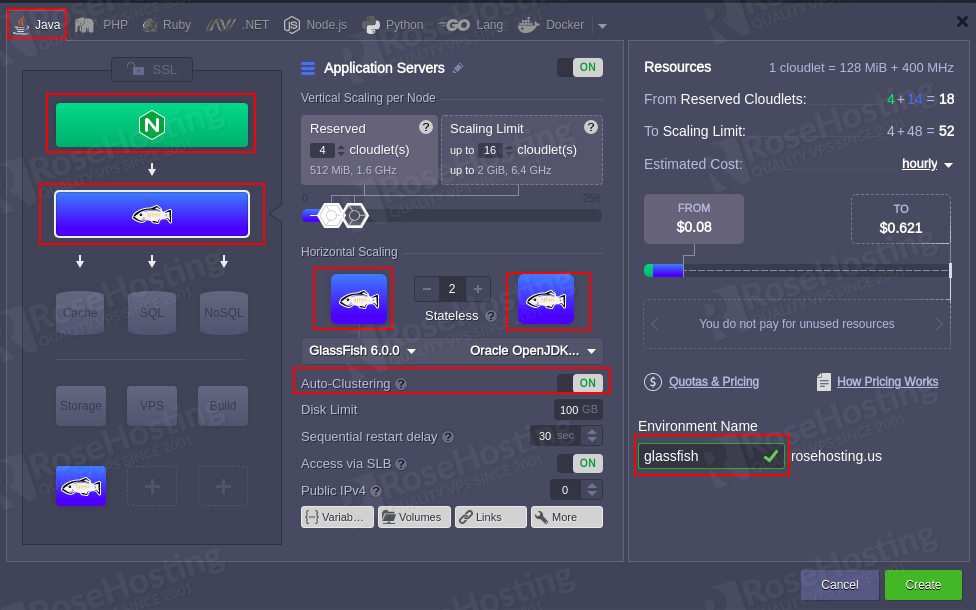
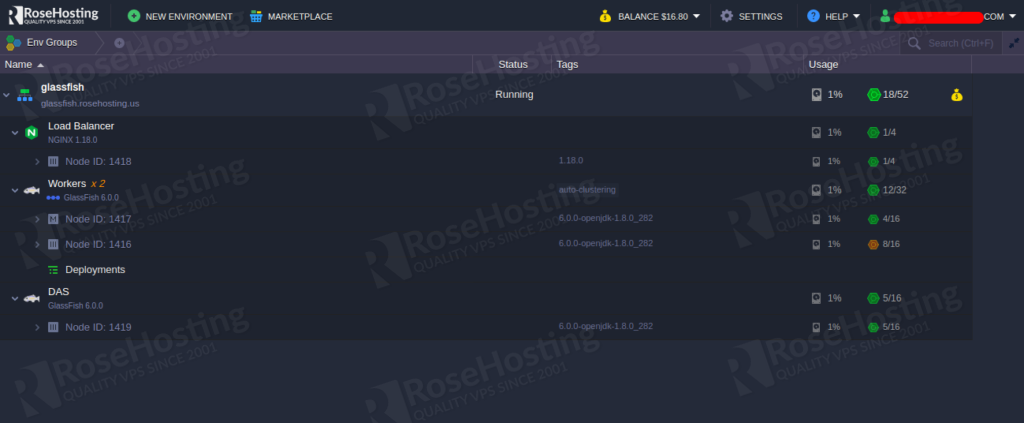
Click on the Java tab then choose Nginx and GlassFish or Payara application server. Then, define appropriate cloudlets, enable Auto-Clustering, provide your environment name and click on the Create button. Once the environment has been created successfully, you should see the following page:
You should also receive an email with the necessary credentials to access the Glassfish server as shown below:
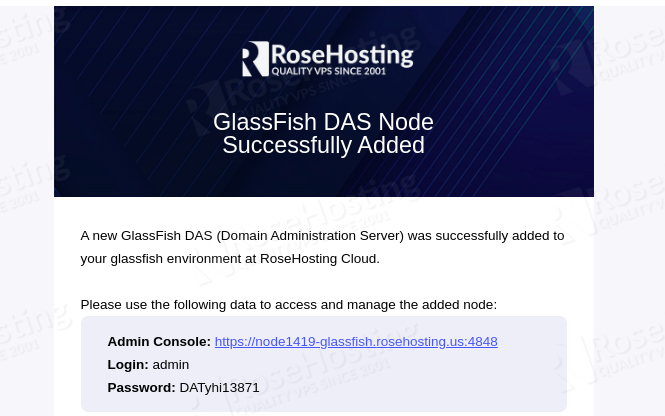
The above environment topology will do the following things:
- Create two Glassfish server instances with an Nginx load balancer to handle the incoming requests and distribute them among worker nodes.
- Add a dedicated Domain Administration Server(DAS) to control all cluster nodes and interact between them via SSH.
- DAS server is linked to all other worker nodes with the DAS alias hostname. It will be used by worker nodes for interaction.
2. Deploy a Java Application
In order to test the high availability of Glassfish auto-clustering environment. you will need to deploy a Java application and test the high availability.
Follow the below steps to deploy a Java application:
Step 1 – On the Gassfish node, click on the Open in Browser button as shown below:

You should see the Glassfish server page:

Step 2 – Click on the “go to the Administration Console” to access the Glassfish admin interface:
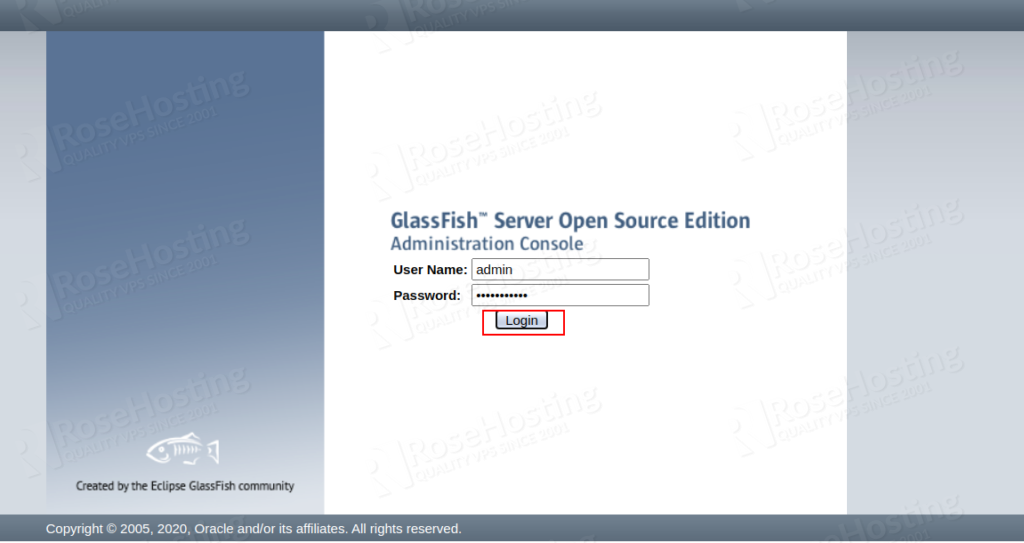
Provide the admin username and password which you received in the email and click on the Login button. You should see the Glassfish admin console in the following page:
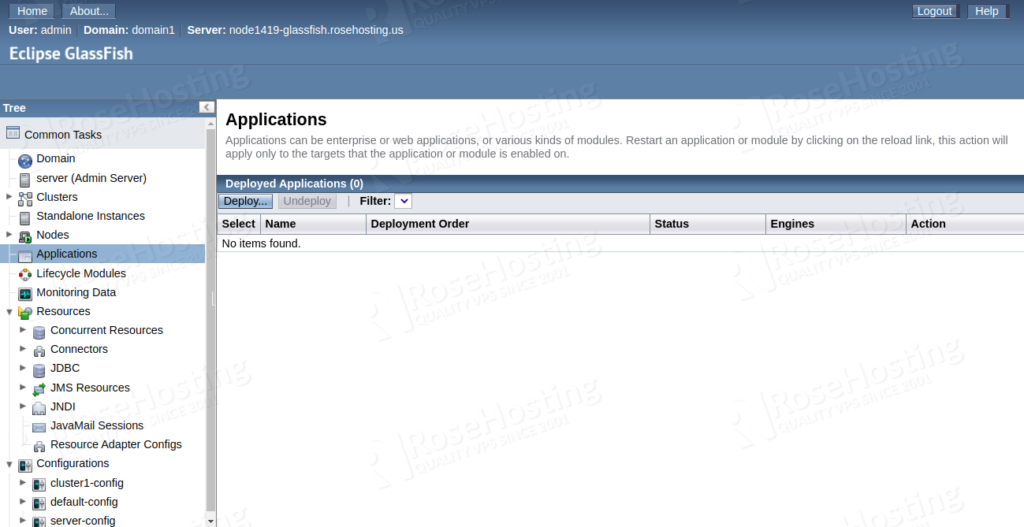
Step 3 – Next, download the clusterjsp.ear application to your Desktop.
Step 4 – Next, click on the Applications section. You should see the following page:
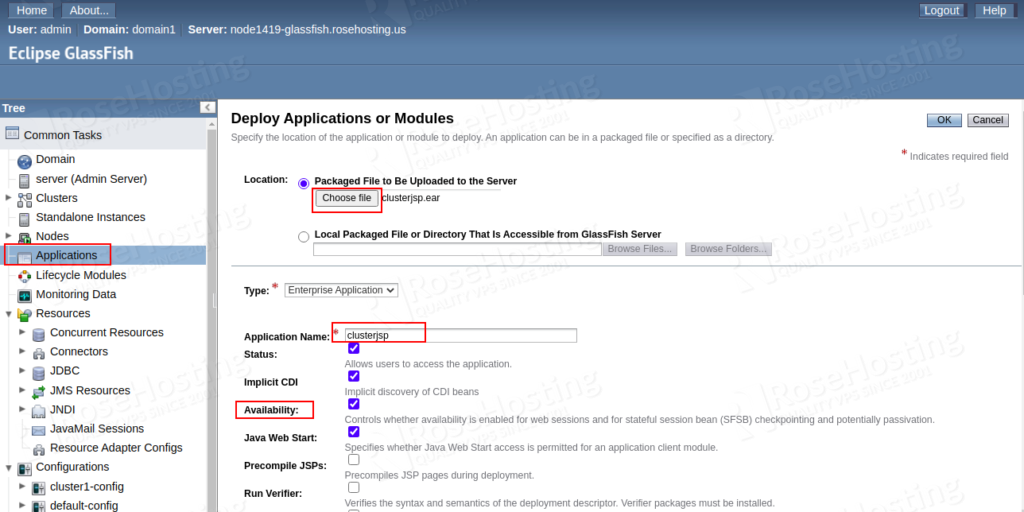
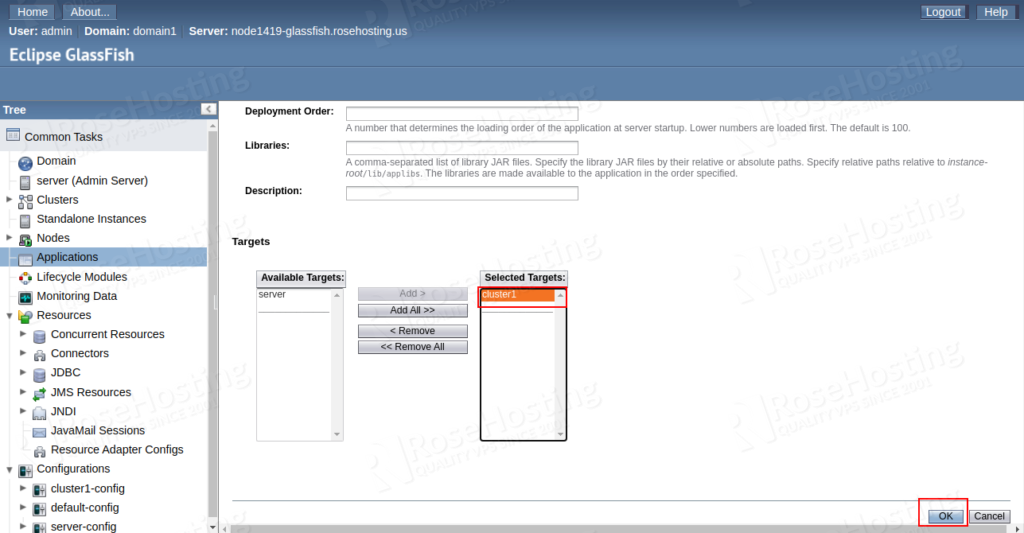
Step 5 – Here, upload the downloaded clusterjsp.ear file to the Packaged File to Be Uploaded to the Server location, provide the application name, enable the availability, set up cluster1 as the application target and click on the OK button. You should see the following page:

Step 6 – Now, open your web browser and open the URL http://glassfish.rosehosting.us/clusterjsp. You should see the following page:
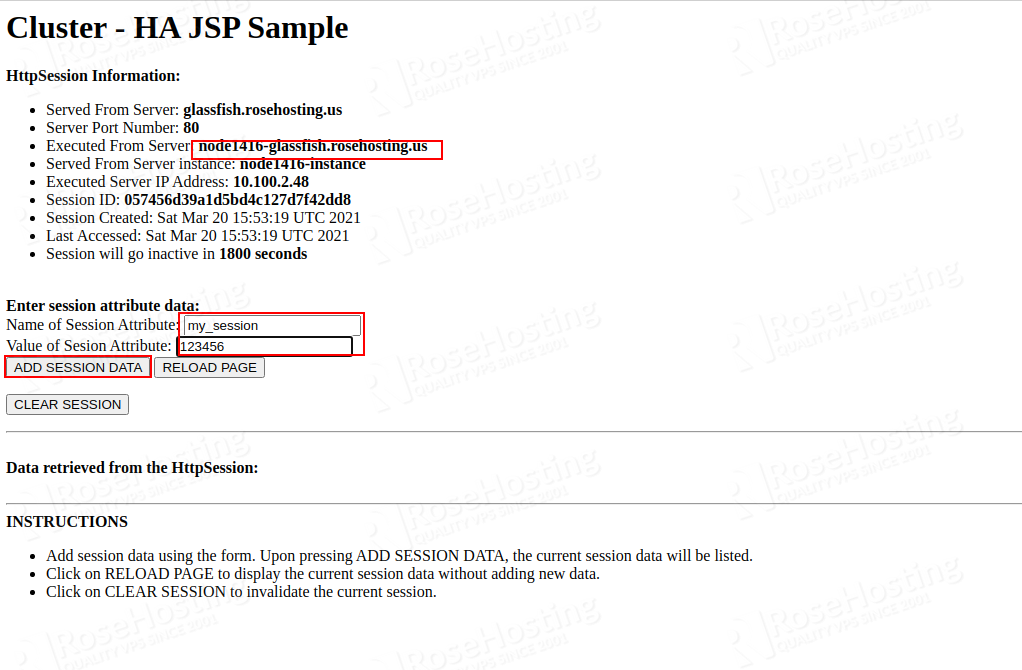
Step 7 – Provide session attribute name, value and click on Add Session Data.
Step 8 – Now, go to the Glassfish admin console and click on the Clusters > cluster1 > Instances tab. You should see the two cluster instance in the following page:
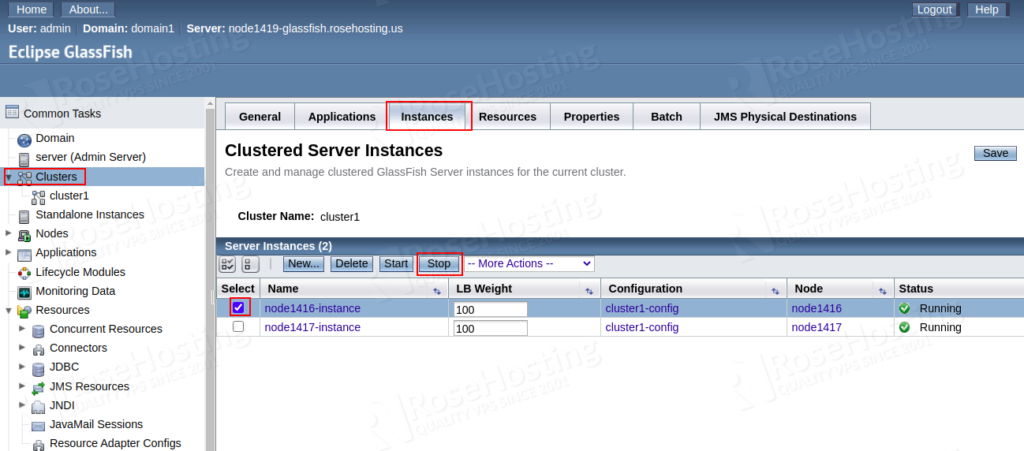
Step 9 – Select the first instance and click on the Stop button to stop the instance.
Step 10 – Now, reload your application at http://glassfish.rosehosting.us/clusterjsp. You should see the following page:
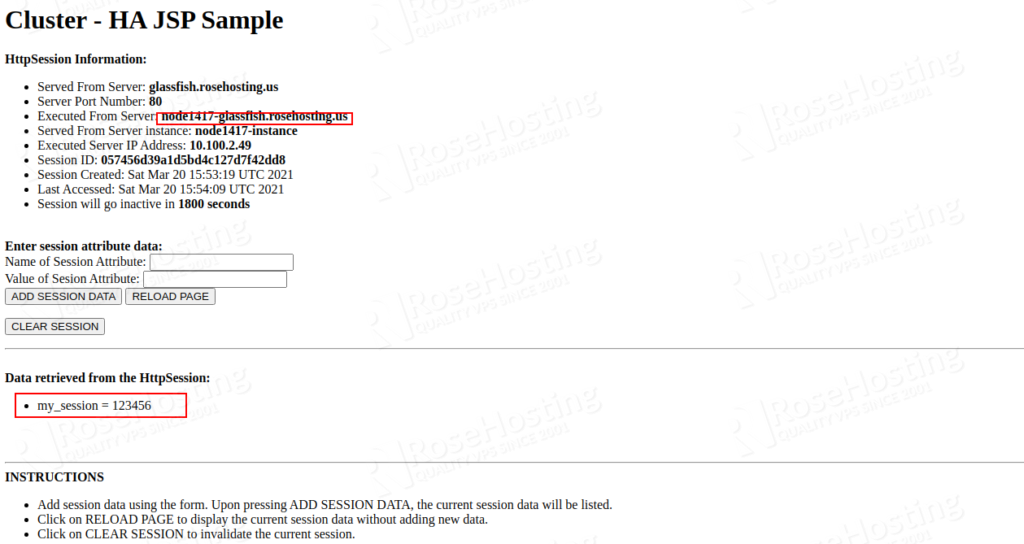
As you can see, your application session being handle by another node and your attribute is still available.
On the Glassfish admin console, click on the Configurations > cluster1-config > Availability Service to access all replication settings:
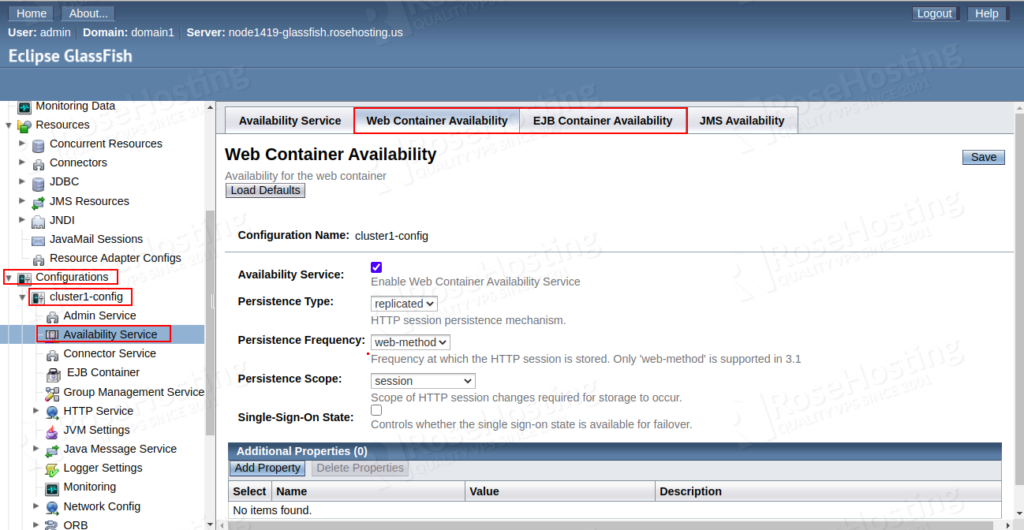
As you can see, there are two replication modes (Web Container Availability and EJB Container Availability) available by default.
Cloning Cluster for A/B Testing
In some cases, you may need to make some changes in your application settings for testing purposes or when you release a new application, it is a good idea to clone your environment and verify the newly implemented changes. This will allows you to test your application without any downtime.
On the Glassfish node, click on the Clone Environment button as shown below:

This will create an exact copy of your Glassfish cluster with all nodes as shown below:

Of course you don’t need to install all of this if you use our managed cloud PAAS hosting, in which case you an simply ask one of our system administrators to set up GlassFish & Payara Auto-Clustering: Running Java EE Highly-Available Applications in the Cloud. They are available 24/7 and always ready to help you out.
PS. If you liked this post, please share it with your friends on the social networks using the buttons below or simply leave a comment in the comments section. Thanks.