Apache Tomcat or Tomcat is a widely known and used Java application server. It is an open-source web server and servlet container developed and maintained by a community of developers of the Apache Software Foundation. In this tutorial, we will guide you through the steps of installing Tomcat on Ubuntu 22.04. At the time of this writing, Tomcat 10 is the latest stable version available to download.
Table of Contents
Prerequisites
- An Ubuntu 22.04 VPS
- Full SSH root access or a user with sudo privileges is required
Step 1. Log in to the server and update
Login to your Ubuntu 22.04 VPS via SSH. In this article, we will use ‘root’ to run the shell commands. If you want to use your regular system user with sudo privileges to run the commands, make sure to append ‘sudo’ in front of the commands.
ssh root@IP_Address -p Port_Number
You need to replace “IP_Address” and “Port_number” with your server’s actual IP address and SSH port number.
Once logged in, you can check whether you have the proper Ubuntu version installed on your server with the following command:
# lsb_release -a
You should get this output:
No LSB modules are available.
Distributor ID: Ubuntu
Description: Ubuntu 22.04 LTS
Release: 22.04
Codename: jammy
To make sure that all installed packages are up to date, we can run these commands.
# apt update
# apt upgrade
Step 2. Install Java
You must have Java runtime environment (JRE) installed on your system. Tomcat 10 requires JRE 8 or higher version installed on your system. Let’s run the command below to install JRE fro Ubuntu repository.
# apt install default-jdk -y
Once installed, we can check the version using this command:
# java --version
It will return an output like this:
openjdk 11.0.15 2022-04-19
OpenJDK Runtime Environment (build 11.0.15+10-Ubuntu-0ubuntu0.22.04.1)
OpenJDK 64-bit Server VM (build 11.0.15+10-Ubuntu-0ubuntu0.22.04.1, mixed mode, sharing)
Step 3. Create a System User
For security reasons, it is not recommended to run Tomcat as user ‘root’, so we will create a new system user to run Tomcat.
# useradd -m -d /opt/tomcat -U -s /bin/false tomcat
After running the command above, the /opt/tomcat directory will be automatically created.
Step 4. Install Tomcat
Instead of installing Tomcat from the Ubuntu repository, we are going to install Tomcat 10 using the binary distribution file. First, we need to download the Tomcat binary distribution file. To check the latest version, you can go to their download page at https://tomcat.apache.org/download-10.cgi.
# wget https://dlcdn.apache.org/tomcat/tomcat-10/v10.0.20/bin/apache-tomcat-10.0.20.tar.gz -O /tmp/tomcat-10.tar.gz
# sudo -u tomcat tar -xzvf /tmp/tomcat-10.tar.gz --strip-components=1 -C /opt/tomcat
With the command above, the binary distribution file is downloaded and extracted in /opt/tomcat and the files/directories are owned by user ‘tomcat’
Step 5. Create a Systemd Service File for Tomcat
To manage Tomcat services, we need to create a systemd service file.
# nano /etc/systemd/system/tomcat.service
Then add the following in to the file
[Unit]
Description=Apache Tomcat
After=network.target

[Service]
Type=forking

User=tomcat
Group=tomcat

Environment=JAVA_HOME=/usr/lib/jvm/java-11-openjdk-amd64
Environment=CATALINA_PID=/opt/tomcat/tomcat.pid
Environment=CATALINA_HOME=/opt/tomcat
Environment=CATALINA_BASE=/opt/tomcat
Environment="CATALINA_OPTS=-Xms512M -Xmx1024M -server -XX:+UseParallelGC"

ExecStart=/opt/tomcat/bin/startup.sh
ExecStop=/opt/tomcat/bin/shutdown.sh

ExecReload=/bin/kill $MAINPID
RemainAfterExit=yes

[Install]
WantedBy=multi-user.target
Save the file and exit.
Run the following command to reload the systemd manager configuration:
# systemctl daemon-reload
To run Tomcat now and make the service run upon reboot, we can run this command:
# systemctl enable --now tomcat
We can check and verify Tomcat service by running this command:
# systemctl status tomcat
It will show you an output like this:
root@ubuntu22:~# systemctl status tomcat
● tomcat.service - Apache Tomcat
Loaded: loaded (/etc/systemd/system/tomcat.service; enabled; vendor preset: enabled)
Active: active (running) since Mon 2022-05-09 11:34:31 UTC; 1s ago
Process: 29526 ExecStart=/opt/tomcat/bin/startup.sh (code=exited, status=0/SUCCESS)
Main PID: 29533 (java)
Tasks: 15 (limit: 4697)
Memory: 85.4M
CPU: 3.575s
CGroup: /system.slice/tomcat.service
└─29533 /usr/lib/jvm/java-11-openjdk-amd64/bin/java -Djava.util.logging.config.file=/opt/tomcat/conf/logging.properties -Djava.util.logging.manager=org.>

May 09 11:34:31 ubuntu22.rosehosting.com systemd[1]: Starting Apache Tomcat...
May 09 11:34:31 ubuntu22.rosehosting.com startup.sh[29526]: Tomcat started.
May 09 11:34:31 ubuntu22.rosehosting.com systemd[1]: Started Apache Tomcat.
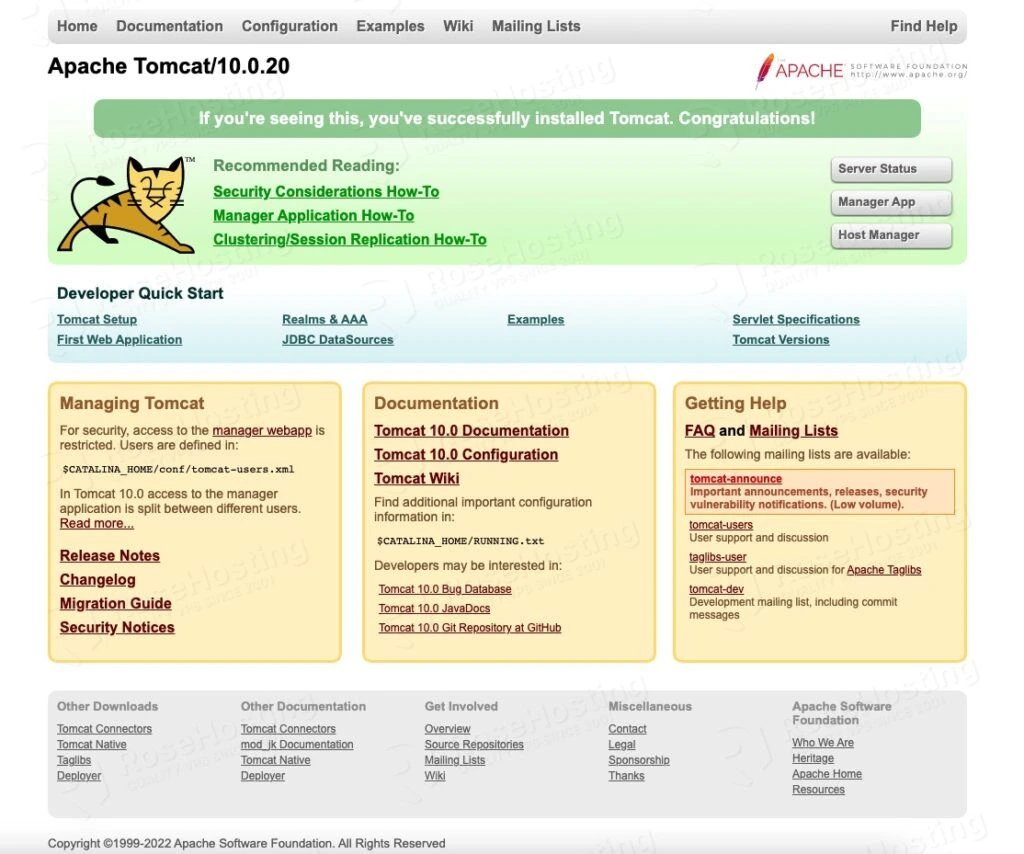
As you can see, Tomcat is now running and listening on its default port 8080. You can open your web browser and navigate to http://YOUR_SERVER_IP_ADDRESS:8080
Step 6. Configure Tomcat
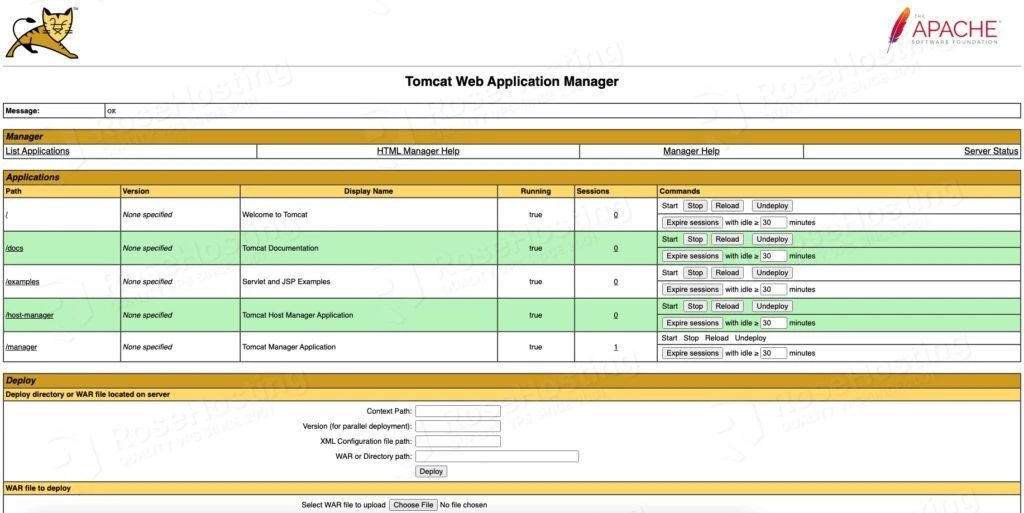
Tomcat Manager is a web interface application that is packaged with Tomcat server. This tool allows us to add, remove and manage Tomcat applications running on the same server.
In order to access the Tomcat Manager App, we need to create a user and use it to log in. Let proceed with editing the tomcat-users.xml file
# nano /opt/tomcat/conf/tomcat-users.xml
Then, add the following content just before the closing line </tomcat-users>:
<role rolename="manager-gui" />
<role rolename="admin-gui" />changes
<user username="admin" password="m0d1fyth15" roles="manager-gui,admin-gui"/>
Make sure to replace m0d1fyth15 with a stronger password.
We would need to make another configuration because by default Tomcat restricts access to the Manager and Host Manager. Tomcat only allows connection from the server IP address itself. To remove the IP address restrictions, open the appropriate context.xml files.
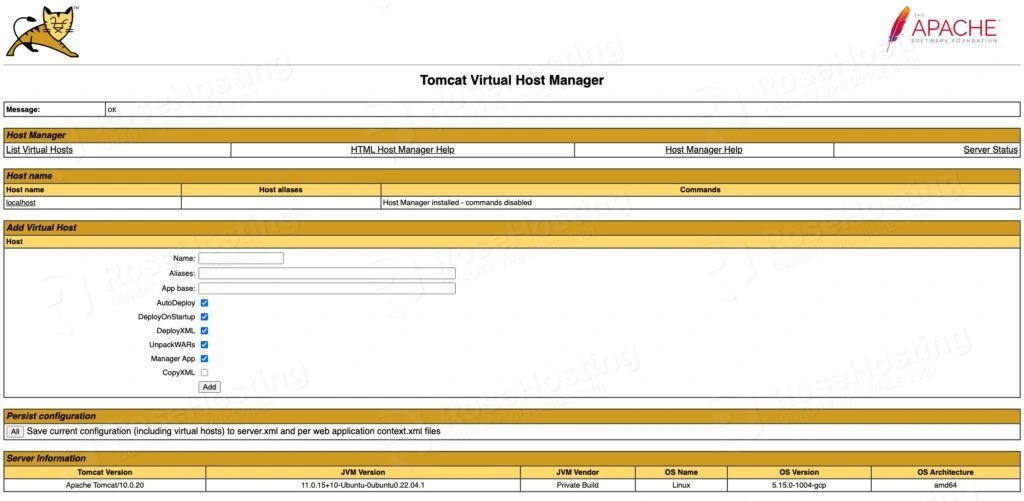
To remove the restriction on the Manager Application, we need to modify /opt/tomcat/webapps/manager/META-INF/context.xml file. And, to remove the restriction on the Host Manager, we need to modify the /opt/tomcat/webapps/host-manager/META-INF/context.xml file.
In the files mentioned above, find these two lines:
<Valve className="org.apache.catalina.valves.RemoteAddrValve"
allow="127\.\d+\.\d+\.\d+|::1|0:0:0:0:0:0:0:1" />
Then comment them out. The lines should look like the following:
<!--
<Valve className="org.apache.catalina.valves.RemoteAddrValve"
allow="127\.\d+\.\d+\.\d+|::1|0:0:0:0:0:0:0:1" />
-->
That’s it, now you should be able to access Tomcat Web Application Manager and Virtual Host Manager using the user credentials in the /opt/tomcat/conf/tomcat-users.xml file.
Congratulation! You have successfully installed Tomcat 10 at http://YOUR_SERVER_IP_ADDRESS:8080 and you can open it using any web browser you like, then build and customize it.
If you are one of our web hosting customers and use our managed Linux Hosting, you don’t have to follow this tutorial and install Tomcat on Ubuntu 22.04 yourself, our Linux admins will set up and configure a Tomcat VPS for you. They are available 24×7 and will take care of your request immediately, and all you need to do is to submit a ticket.
PS. If you liked this post please share it with your friends on social networks or simply leave a reply below. Thanks.


got error :
tomcat.service: Failed at step EXEC spawning /opt/tomcat/bin/startup.sh: No such file or directory
Please make sure that the directory /opt/tomcat/bin exists.