In this guide, we will explain how to install LAMP on Ubuntu 18.04.

Installing LAMP on Ubuntu 18.04 is an easy task and should not take more than 10 minutes. Let’s begin with the installation process.
Table of Contents
Requirements
- Ubuntu 18.04 server
- System user with sudo privileges
Step 1: Update the system
Before continuing with the next steps, make sure your system is up-to-date by running the following two commands:
sudo apt-get update
sudo apt-get upgrade
Always keep your system updated. You can also set up automatic updates. Keeping your system updated ensures that you will stay secure, as well as maximize performance and compatibility with other packages on your system.
Step 2: Install Apache
Apache is the most popular and widely-used web server software in the world. It is fast, secure, reliable, and can be easily customized depending on your needs. On top of that, it’s fairly easy-to-use, making it more accessible to
To install Apache on your Ubuntu 18.04 server, run the following command:
sudo apt-get install apache2
Once the installation is complete, enable the Apache service to start automatically upon system boot. You can do that with the following command:
sudo systemctl enable apache2
To verify that Apache is running, open your web browser and enter your server’s public IP address, (e.g. http://12.12.12.12). If Apache is successfully installed, you should see a message saying “It works!”.
Step 3: Install MySQL
The next step is to install MySQL. It is one of the most popular database management systems and offers a lot of functionality with managing and configuring databases.
To install MySQL on your system, type the following command and enter Y when prompted:
sudo apt-get install mysql-server
During the installation, you will be asked to enter a password for the MySQL root user. Make sure you enter a strong password.
Once the installation is complete, in order to improve the security of your MySQL server, we recommend you to run the following script:
sudo mysql_secure_installation
First, you will be asked about setting up the validate password plugin.
Would you like to setup VALIDATE PASSWORD plugin?(Press y|Y for Yes, any other key for No) :
This plugin checks the strength of a password and allows the users to set only passwords which are secure enough.
Whether to enable this or not is entirely up to you, but do not forget to use strong passwords.
If you choose ‘yes’, you will be asked to choose the level of the password validation policy:
There are three levels of password validation policy:

LOW Length >= 8
MEDIUM Length >= 8, numeric, mixed case, and special characters
STRONG Length >= 8, numeric, mixed case, special characters and dictionary file

Please enter 0 = LOW, 1 = MEDIUM and 2 = STRONG:
Next, you will be asked to change the root password, but since we already created it during the MySQL installation, we can skip this step by pressing Enter.
After this, you will get asked a couple of more questions and it is recommended that you answer ‘yes’ to all of them:
Remove anonymous users? (Press y|Y for Yes, any other key for No) :

Disallow root login remotely? (Press y|Y for Yes, any other key for No) :

Remove test database and access to it? (Press y|Y for Yes, any other key for No) :

Reload privilege tables now? (Press y|Y for Yes, any other key for No) :
Again, we can enable MySQL to start on boot with the following command:
sudo systemctl enable mysql
That’s it MySQL has been installed and secured.
Step 4: Install PHP
The last step in this tutorial is to install PHP.
PHP is a programming language mostly used for developing dynamic websites. Ubuntu 18.04 comes with PHP 7.2 available for install in its default software repositories.
We will also install some of the most common PHP modules:
sudo apt-get install php7.2 libapache2-mod-php7.2 php7.2-mysql php7.2-opcache php7.2-gd php7.2-curl php7.2-cli php7.2-imap
To test whether the PHP is working correctly we will create a file called info.php. Place this file inside the web server root directory.
Open your text editor:
sudo nano /var/www/html/info.php
Enter the following lines and save the file:
<?php
phpinfo();
?>
Restart the Apache server by typing:
sudo systemctl restart apache2
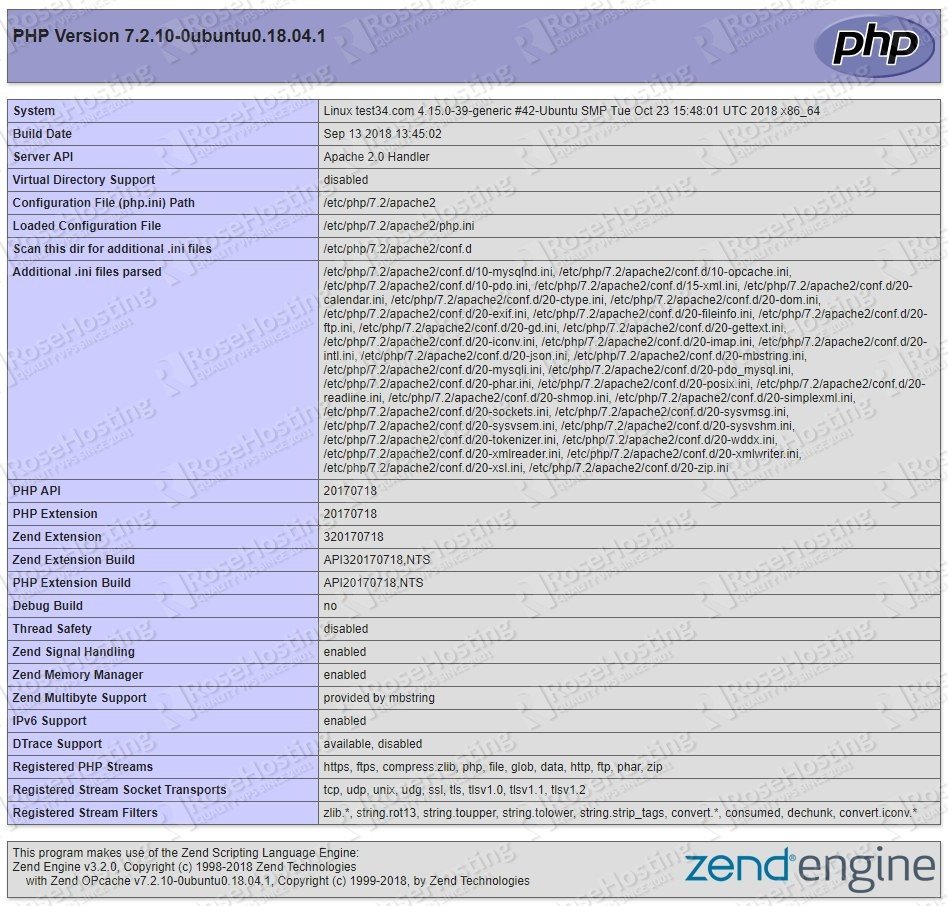
Now, if you navigate to this page: http://your_server_ip_address/info.php in your web browser, you will see the following page showing your current PHP configuration:
This means PHP is working properly.
With this, you have completed the LAMP installation on Ubuntu 18.04. Congratulations!

PS. If you liked this post on how to install a LAMP stack on Ubuntu 18.04, please share it with your friends on the social networks using the buttons below or simply leave a comment in the comments section. Thanks.

