
PrestaShop is a free, open-source e-commerce platform that allows users to create and manage their online store. It is written in PHP and uses a MySQL/MariaDB database to store data.
It offers a range of features, including customizable themes and templates, a user-friendly interface, payment gateways, shipping options, product and inventory management, and marketing tools. It also offers a range of add-ons and modules to extend its functionality and meet the specific needs of businesses.
Table of Contents
Prerequisites
- A server with Debian 11 as OS
- User privileges: root or non-root user with sudo privileges
Step 1. Update the System
Before installing the software, we must update the system packages to the latest available versions.
$ sudo apt-get update && sudo apt-get upgrade
Step 2. Install Apache Web Server
To install the Apache Web server execute the following command:
$ sudo apt install apache2
Once installed, start and enable the service.
$ sudo systemctl enable apache2 && sudo systemctl start apache2
Check if the service is up and running:
$ sudo systemctl status apache2
You should receive the following output:
● apache2.service - The Apache HTTP Server
     Loaded: loaded (/lib/systemd/system/apache2.service; enabled; vendor preset: enabled)
     Active: active (running)
       Docs: https://httpd.apache.org/docs/2.4/
    Process: 3325053 ExecStart=/usr/sbin/apachectl start (code=exited, status=0/SUCCESS)
   Main PID: 3325058 (apache2)
      Tasks: 6 (limit: 2340)
     Memory: 16.5M
        CPU: 186ms
     CGroup: /system.slice/apache2.service
             ├─3325058 /usr/sbin/apache2 -k start
             ├─3325059 /usr/sbin/apache2 -k start
             ├─3325060 /usr/sbin/apache2 -k start
Step 3. Install PHP and extensions
PHP with extensions and can be installed with the following command:
$ sudo apt-get install php php-cli libapache2-mod-php php-common php-curl php-gd php-intl php-mbstring php-mysql php-xml php-zip
To check the installed PHP version, execute the command:
$ php -v
You should get the following output:
PHP 7.4.33 (cli) (built: Feb 22 2023 20:07:47) ( NTS )
Copyright (c) The PHP Group
Zend Engine v3.4.0, Copyright (c) Zend Technologies
    with Zend OPcache v7.4.33, Copyright (c), by Zend Technologies
Step 4. Install the MariaDB database server
To install the MariaDB server execute the following command:
$ sudo apt install mariadb-server mariadb-client
Start and enable the mariadb.service with the following commands:
$ sudo systemctl start mariadb && sudo systemctl enable mariadb
Once your database server is installed, it’s important to run the first-time setup command:
$ mysql_secure_installation
With this command, you configure a new root password for the database server and set important security settings.
Step 5. Create a PrestaShop Database and User
To log into the database command line, run this command:
$ sudo mysql -u root -p
Then execute the commands below:
CREATE DATABASE prestashop;
CREATE USER 'prestashop'@'localhost' IDENTIFIED BY 'StrongPassword';
GRANT ALL PRIVILEGES ON prestashop.* TO 'prestashop'@'localhost';
FLUSH PRIVILEGES;
exit;
Step 6. Install PrestaShop
In this step, we will download the Prestashop core files. Prestashop 1.7.8.8 is the latest version available to download at the time of this writing.
Check out other PrestaShop versions.
$ sudo wget https://download.prestashop.com/download/releases/prestashop_1.7.8.8.zip
Then uncompress the downloaded file.
$ sudo unzip prestashop_1.7.8.8.zip
After unzipping the downloaded file, you will get prestashop.zip, and we will unzip prestashop.zip and store them in /var/www/prestashop
$ sudo unzip prestashop.zip -d /var/www/prestashop
Let’s set the directory permissions accordingly:
$ sudo chown -R www-data: /var/www/prestashop
Step 7. Create Apache Virtual Host File
Go into the Apache directory and create a configuration file for the PrestaShop.
$ sudo nano /etc/apache2/sites-available/prestashop.conf
Open the file, and paste the following lines of code:
<VirtualHost *:80>
ServerName yourdomain.com
DocumentRoot /var/www/prestashop

<Directory /var/www/prestashop>
          Options FollowSymlinks
          AllowOverride All
          Require all granted
</Directory>

ErrorLog ${APACHE_LOG_DIR}/error.log
CustomLog ${APACHE_LOG_DIR}/access.log combined

</VirtualHost>
Then save the file, and close it.
Enable the Apache configuration and apache rewrite module.
$ sudo a2enmod rewrite

$ sudo a2ensite prestashop.conf
Check the syntax:
$ apachectl -t
You should receive the following output:
Syntax OK
If the syntax is OK, restart the Apache service.
# sudo systemctl restart apache2
Step 8. Finish PrestaShop Installation
Access your domain URL. You should see the following screen:
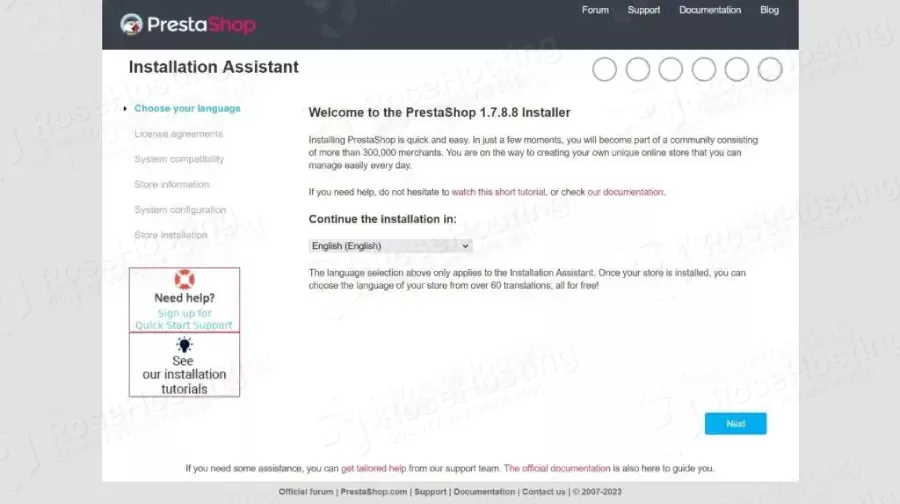
Choose the installation language and click on Next:
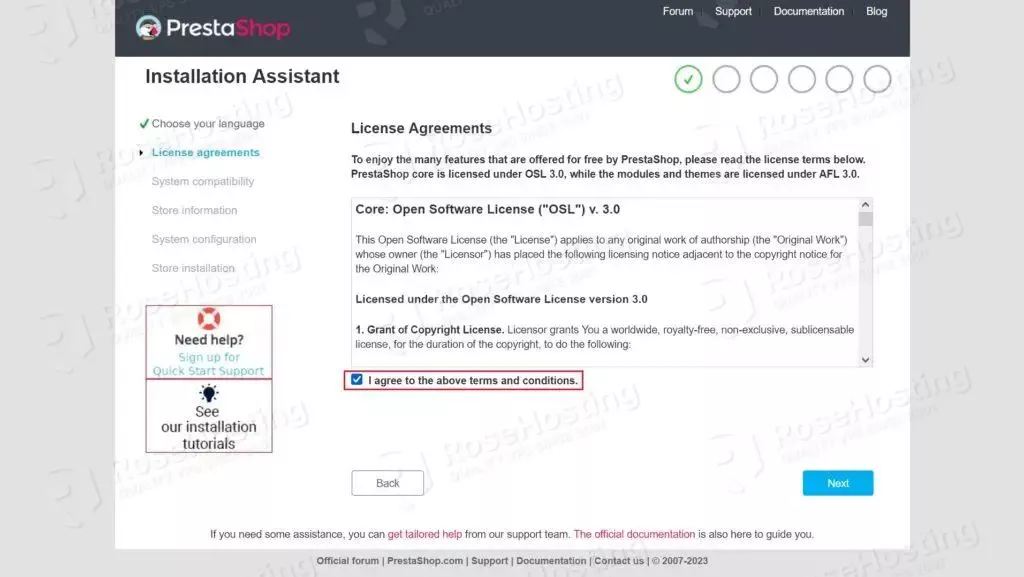
Accept the agreement and then click on Next to continue the installation.
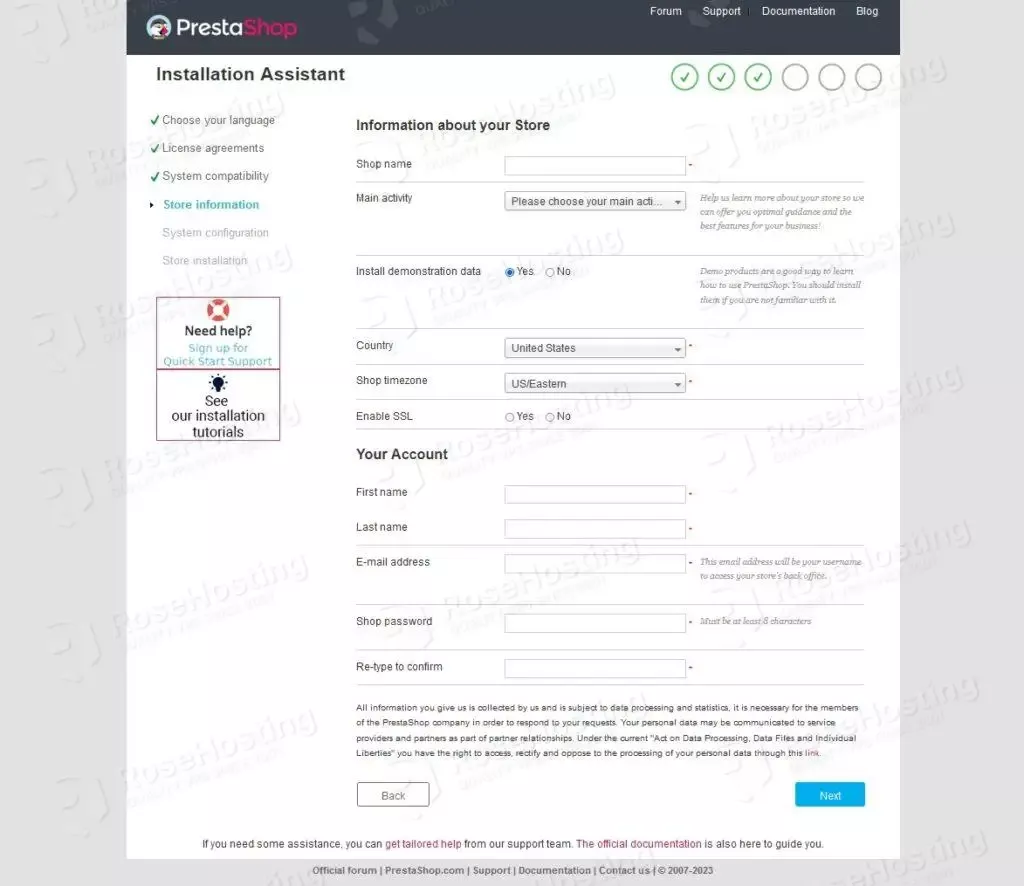
Fill up the form with store details and click on Next to continue.
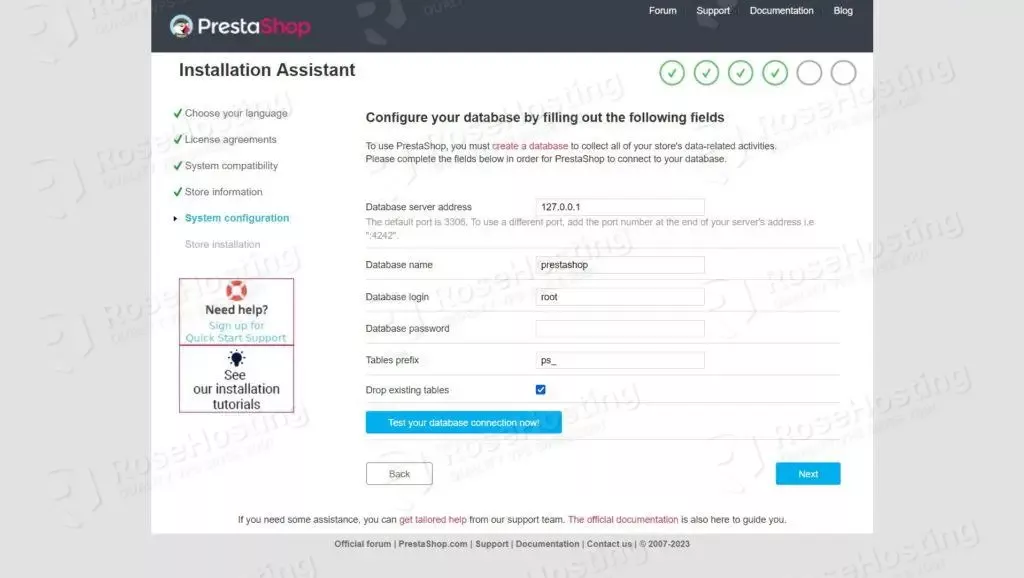
Fill up the database details and check the database connection. If you provide the correct database details, it will show “Database is connected”.
If the database connection is successful, click on Next to continue.
To finalize the installation, the PrestaShop installer script will install all the database tables, modules, themes, etc..
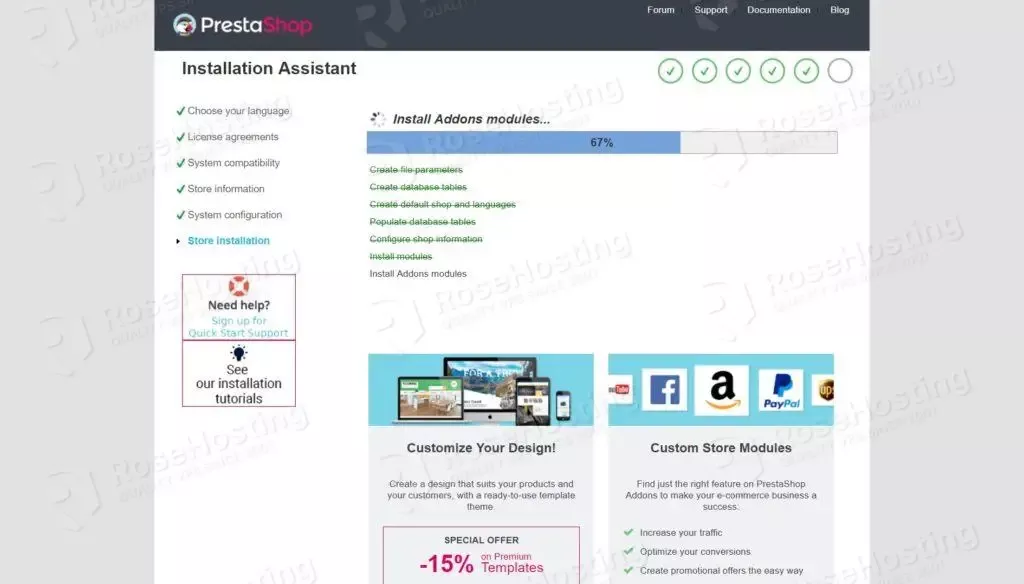
Once the installation is completed, you will see this window.
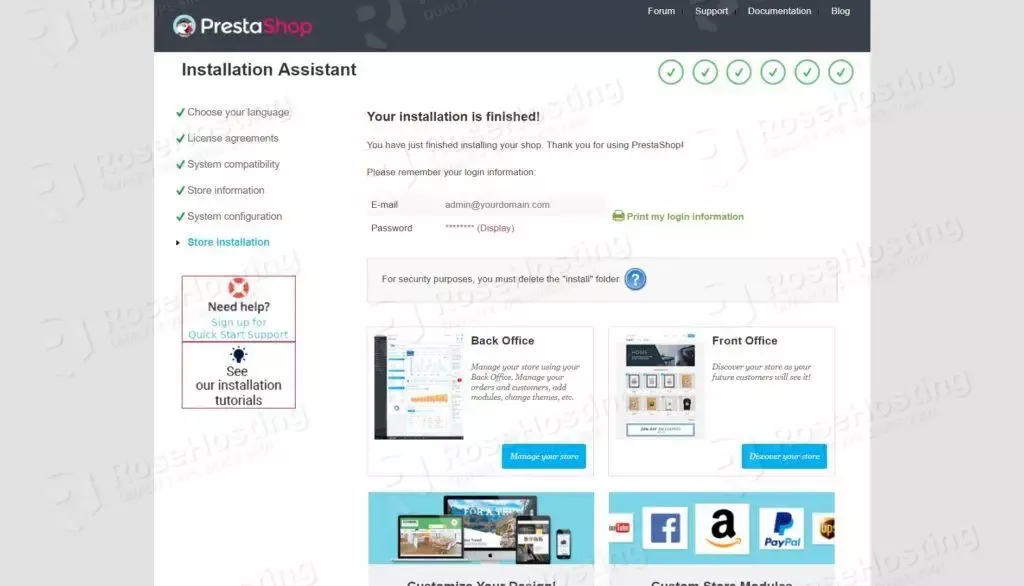
Now delete the install folder from the document root for security purposes.
You can delete the “install” directory by the following command.
$ sudo rm -rf /var/www/prestashop/install/
To access the website backend, you can click on the ‘Manage your store’ button.

That’s it. You successfully installed PrestaShop on Debian 11 OS.
If you do not know how to install PrestaShop, you just need to contact our technical support, who will help you with any aspect of this installation. You just need to sign up for one of our monthly or yearly NVMe VPS plans. Do not hesitate to contact us anytime. We are available 24/7
If you liked this post on how to install PrestaShop on Debian 11 OS, please share it with your friends on social networks or simply leave a reply below. Thanks.