Nginx is a free, open-source, and one of the most popular web servers and reverses proxy servers. Mostly, it is used for load balancing and high-performance websites. It offers a rich set of features including, TCP and UDP proxying, auto-indexing, error code redirection, SSL support, fault tolerance, and many more.
ModSecurity is an open-source web application firewall that protects your web server from different kinds of attacks. You can enable this module with Nginx to block some attacks including, SQL injection, bad user agents, session hijacking, trojans, and more.
RoseHosting cloud provides Nginx Stack (application servers and load balancer) with a built-in ModSecurity module. You just need to enable this module in your container.
In this tutorial, we will show you How to Enable ModSecurity Web Application Firewall inside NGINX Server on the RoseHosting Cloud platform.
Table of Contents
Create an Nginx Load Balancer
Creating a new NGINX-based load balancer is a very simple process at the RoseHosting Cloud platform. You can follow the below steps to create an Nginx load balancer.
Step 1: Log in to the RoseHosting Cloud platform dashboard. You should see the following screen:
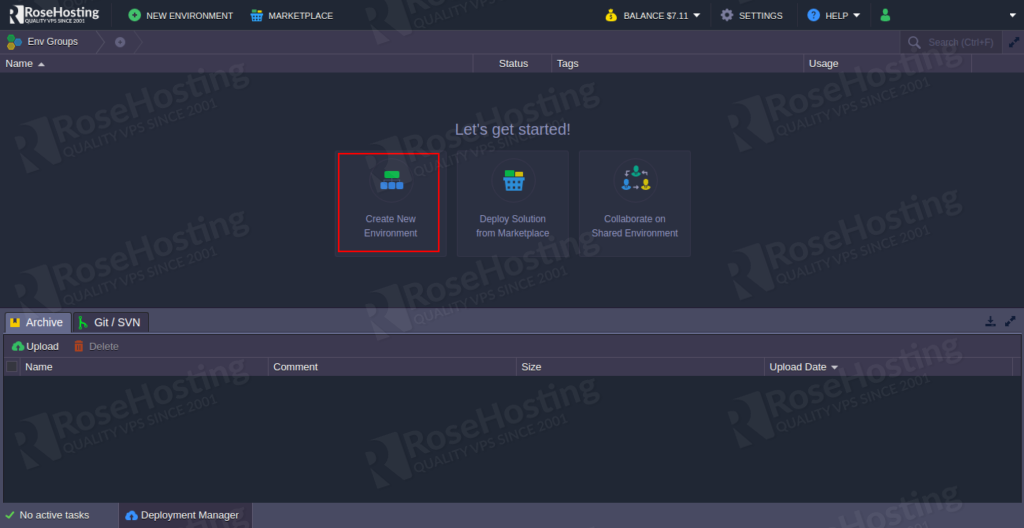
Step 2: Click on the Create New Environment. This will open the topology wizard as shown below:
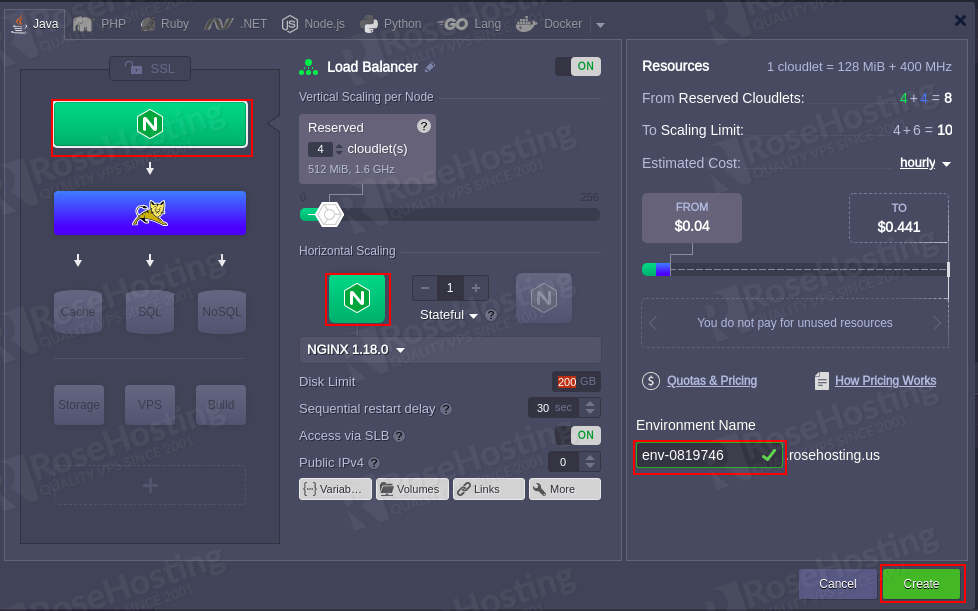
Here, select Nginx in the Balancing section and Horizontal Scaling section. You will also need to define other settings including, cloudlets, disk space, IP addresses, etc. Then, click on the Create button.
You will need to wait for some time to set up the environment. Once the environment has been created. You should see the following screen:
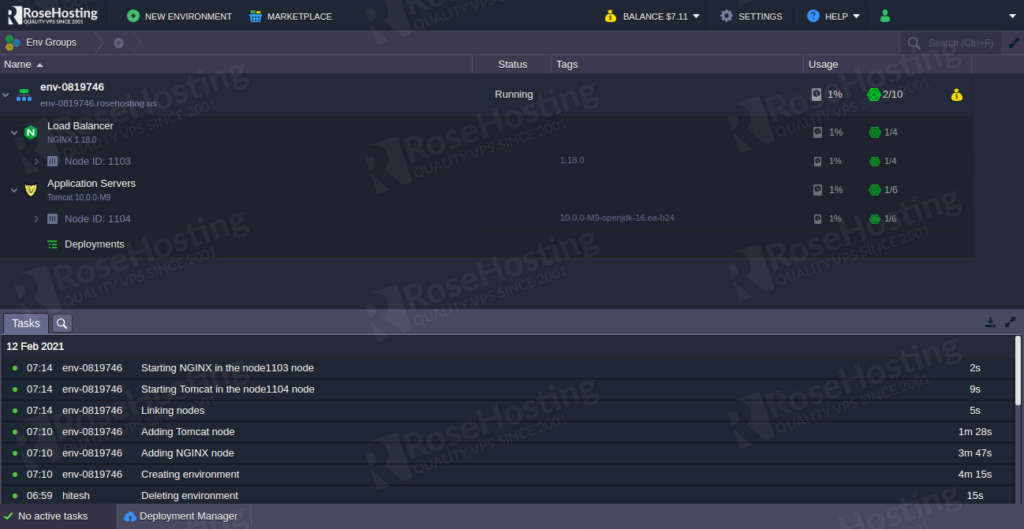
At this point, the Nginx load balancer is ready for you. now, you can enable the ModSecurity module in the Nginx container.
Enable ModSecurity Module in Nginx Server
Next, you will need to edit the Nginx configuration and enable the ModSecurity module. You can follow the below steps to enable the ModSecurity module.
Step 1: On the RoseHosting cloud dashboard, click on the Load Balancer then click on the setting icon. This will open the file browser windows as shown below:
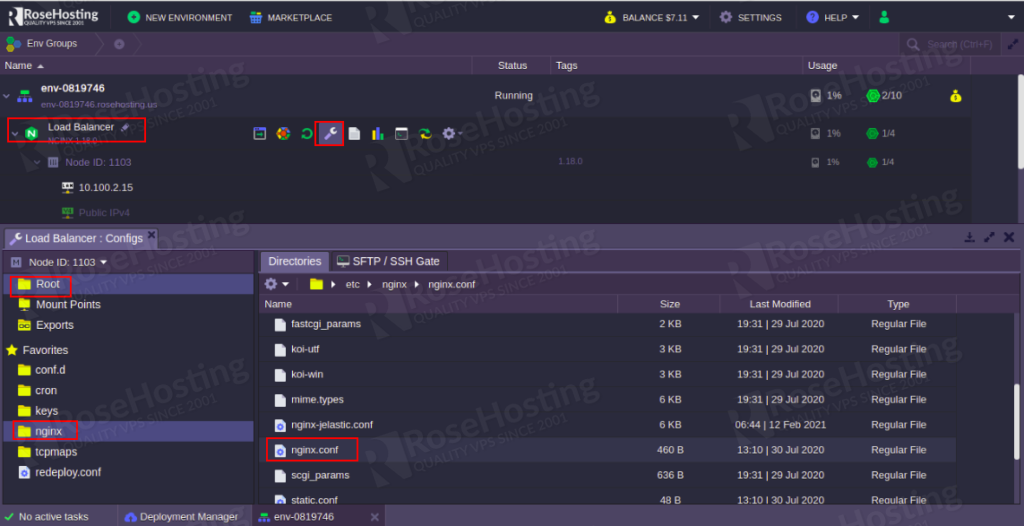
Step 2: Click on the Root => nginx => nginx.conf file to edit the Nginx main configuration file as shown below:
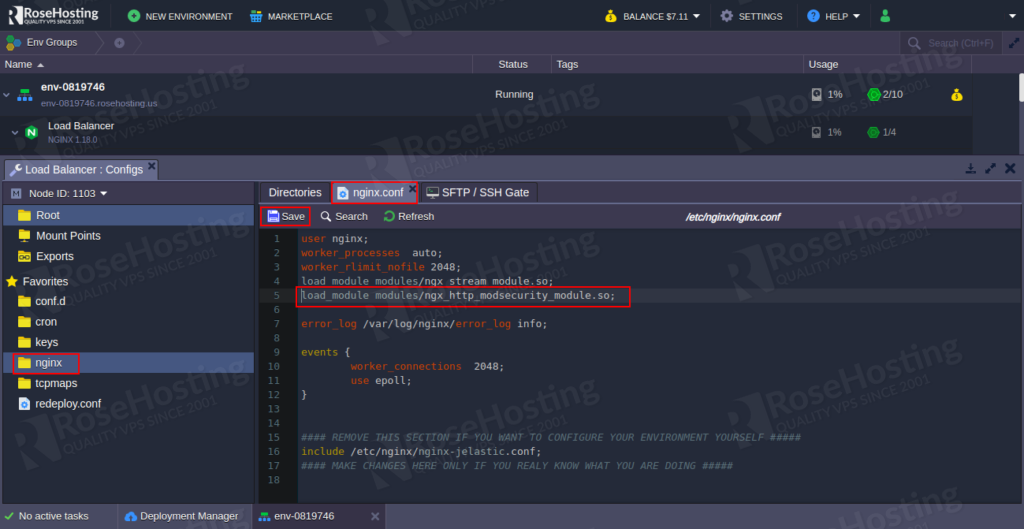
Uncomment the “load_module modules/ngx_http_modsecurity_module.so;” line and click on the Save button to save the changes.
Step 3: Next, click on the Root => nginx => nginx-domain.conf to edit the file as shown below:
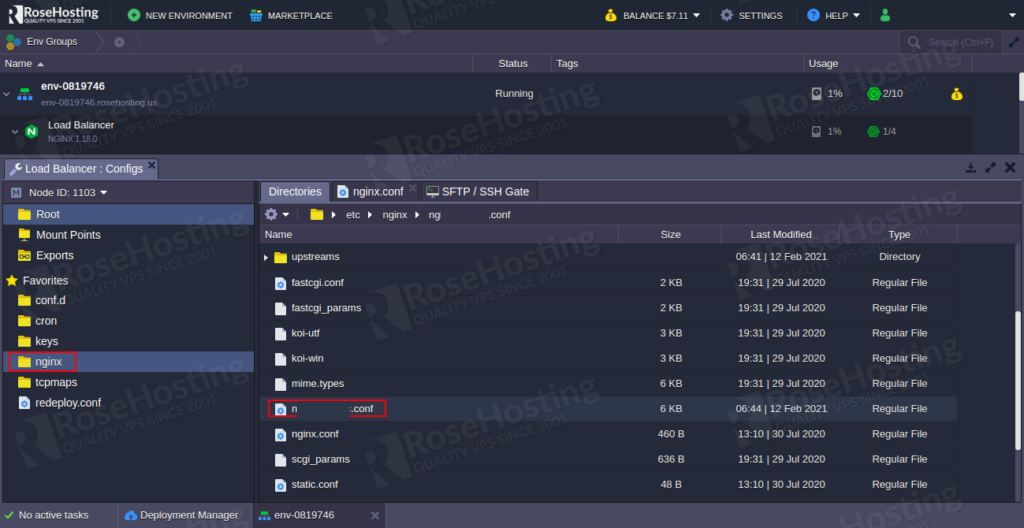
Uncomment the following lines to enable the ModSecurity module:
modsecurity on;
modsecurity_rules_file /etc/nginx/conf.d/modsecurity/modsec_includes.conf;
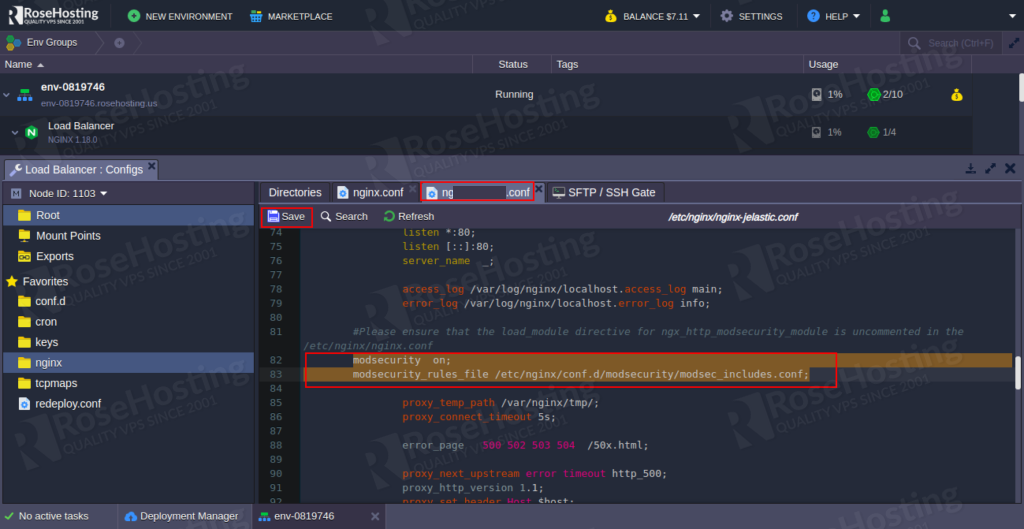
Then, click on the Save button to apply the changes.
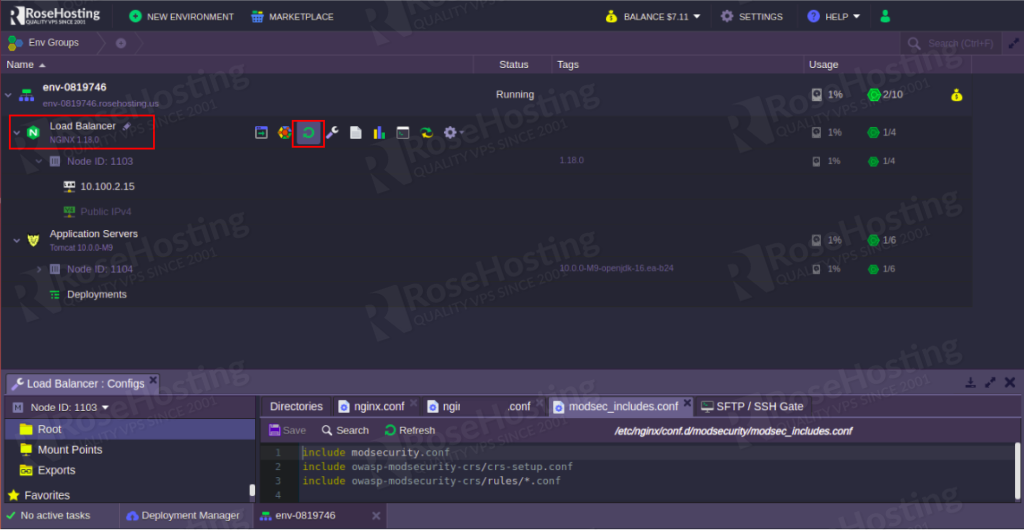
Step 4: Next, click on the Load Balancer and click on the restart icon to apply all configuration changes as shown below:
Step 5: Next, click on the Load Balancer => Terminal icon. This will open the terminal window as shown below:
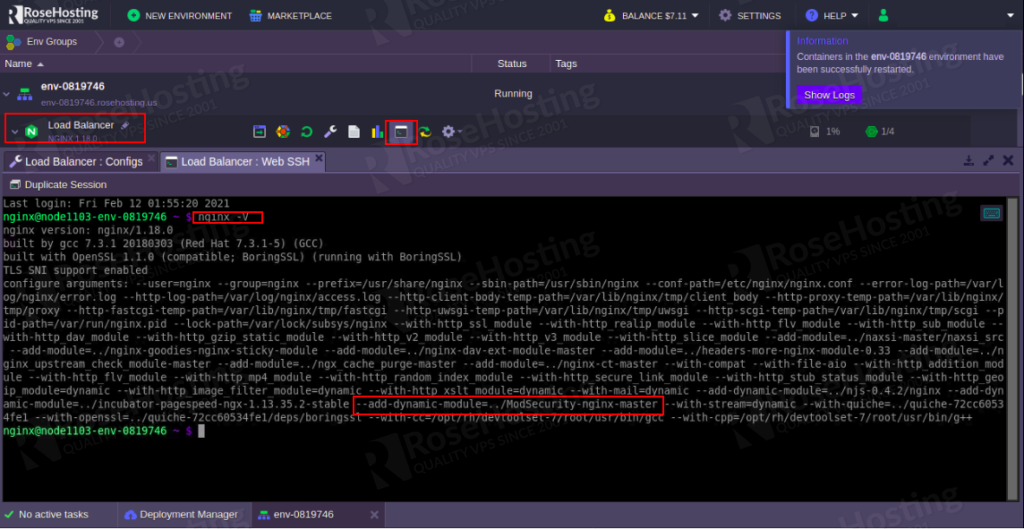
Now, run the nginx -V command to verify whether the ModSecurity module is enabled or not.
Test ModSecurity
At this point, the ModSecurity module is enabled with Nginx. It’s time to test whether it is working or not.
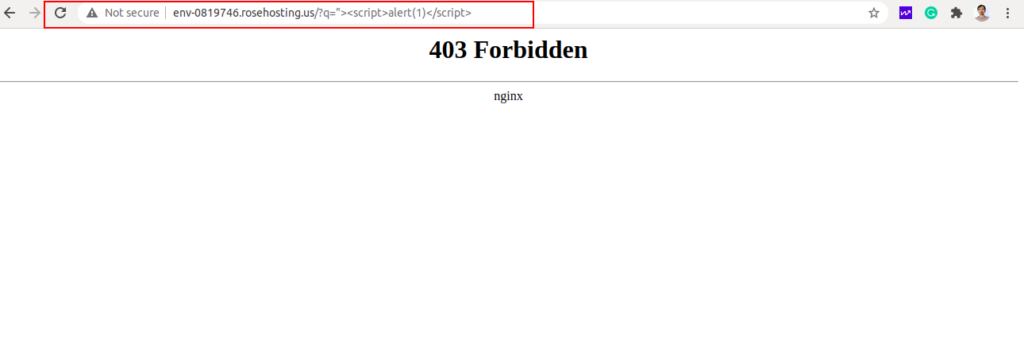
To test it, open your web browser and add the line “/?q=”><script>alert(1)</script>” at the end of your domain like http://env-0819746.rosehosting.us/?q=”><script>alert(1)</script> and hit Enter. You should see the 403 Forbidden error page as shown below:
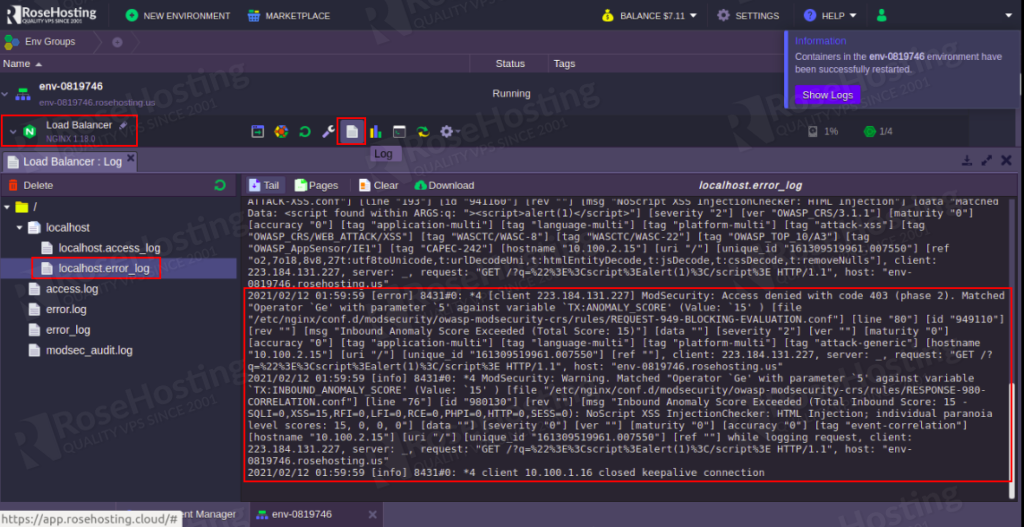
Next, click on the Load Balancer and click on the Log icon. This will open the load balancer log windows. Now, click on the localhost => localhost.error_log. You should see the ModSecurity log in the following page:
Congratulations! you have successfully enabled ModSecurity with Nginx on the RoseHosting cloud platform.
Of course, you don’t have to do any of this if you use our Managed Cloud Hosting, in which case you can simply ask our expert Linux admins to setup this for you. They are available 24×7 and will take care of your request immediately.
PS. If you liked this post please share it with your friends on the social networks using the buttons on the left or simply leave a reply below. Thanks.