In this tutorial, we will show you how to install Feng Office on a CentOS 7 VPS.

Table of Contents
Prerequisites:
Feng Office 3.7.x requires:
- PHP 7 or higher with MySQL, GD, IMAP, curl and xmlrpc PHP extensions.
- Apache Web Server 2.x+ compiled with the ‘mod_rewrite’ module installed in order to use search engine friendly URLs.
- MySQL or MariaDB installed on your Linux server. For the purposes of this tutorial, we will use a CentOS 7 virtual server.
- Full SSH root access or a user with sudo privileges is also required so we can install Feng Office.
Step 1: Connect via SSH
Connect to your server via SSH as the root user using the following command:
ssh root@IP_ADDRESS -p PORT_NUMBER
Remember to replace “IP_ADDRESS” and “PORT_NUMBER” with your actual server IP address and SSH port number. Replace “root” with your admin username if you’re not planning on using the root account.
Before starting with the installation, we need to update all installed OS packages to their latest versions.
We can do this by running the following commands:
yum clean all
yum update
This maximizes compatibility and security across all packages. Once the server OS packages are up to date, we can continue by installing the LAMP stack with Apache, MariaDB, PHP and all the other packages required by Feng Office.
Step 2: Install Apache and MariaDB
We can install Apache2 and MariaDB from the CentOS package repository.
Run the following commands to install Apache2 and MariaDB on the server:
yum install httpd mod_ssl mariadb-server
Enable Apache2 and MariaDB services to start automatically on server boot:
systemctl enable httpd.service
systemctl enable mariadb.service
Step 3: Install PHP 7, PHP Extensions and Other Packages Required by Feng Office
Before starting with the PHP installation, we need to check if there are older versions of PHP already installed on the server:
rpm -qa | grep -i php
Remove the old PHP packages, e.g.:
yum remove php-cli php-common php-mysql php-pdo php
Use the following commands to install PHP 7.1 from the REMI repository:
yum install http://rpms.remirepo.net/enterprise/remi-release-7.rpm
yum-config-manager --enable remi-php71
Continue by installing all the PHP extensions and libraries required by Feng Office:
yum install yum install php php-common php-cli php-json php-mysqlnd php-curl php-opcache php-xml php-xmlrpc php-gd php-mbstring php-pdo
To verify that we are using PHP 7.1, type the following command:
php -v
We should see the following text as the output:
PHP 7.1.29 (cli) (built: May  1 2019 12:06:38) ( NTS )
Copyright (c) 1997-2018 The PHP Group
Zend Engine v3.1.0, Copyright (c) 1998-2018 Zend Technologies
    with Zend OPcache v7.1.29, Copyright (c) 1999-2018, by Zend Technologies
Locate the php.ini configuration file:
php -i | grep php.ini
Configuration File (php.ini) Path => /etc
Loaded Configuration File => /etc/php.ini
Edit the /etc/php.ini configuration file and add/modify the following settings:
max_execution_time = 300
max_input_time = 300
memory_limit = 512M
post_max_size = 128M
upload_max_filesize = 128M
display_errors = Off
html_errors = Off
display_startup_errors = Off
log_errors = On
output_buffering = Off
Restart the Apache web server for the changes to take effect:
systemctl restart httpd.service
Install other packages required by the Feng Office installation:
yum install catdoc xpdf ghostscript ImageMagick wkhtmltopdf
Step 4: Create the Apache Configuration File
Create a new Apache configuration file for the domain/subdomain name that we will be using to access the Feng Office installation. For this tutorial, we will be using ‘fengoffice.domain.com‘. Make sure to replace it with your registered domain name.
vi /etc/httpd/conf.d/feng.conf
Add the following lines:
<VirtualHost *:80>
ServerAdmin admin@fengoffice.domain.com
DocumentRoot /var/www/html/fengoffice/
ServerName fengoffice.domain.com
ServerAlias www.fengoffice.domain.com
<Directory /var/www/html/fengoffice/>
Options FollowSymLinks
AllowOverride All
</Directory>
ErrorLog /var/log/httpd/fengoffice-error_log
CustomLog /var/log/httpd/fengoffice-access_log common
</VirtualHost>
Restart Apache once again for the changes to take effect:
systemctl restart httpd.service
Step 5: Create a MySQL Database
Feng Office requires a MySQL database, so create a new database on your server:
mysql -u root -p
MariaDB [(none)]> CREATE DATABASE fengdb;
MariaDB [(none)]> CREATE USER fenguser@localhost;
MariaDB [(none)]> SET PASSWORD FOR 'fenguser'@'localhost' = PASSWORD("strong-password");
MariaDB [(none)]> GRANT ALL PRIVILEGES ON fengdb.* TO 'fenguser'@'localhost' IDENTIFIED BY 'strong-password' WITH GRANT OPTION;
MariaDB [(none)]> FLUSH PRIVILEGES;
MariaDB [(none)]> quit
Do not forget to replace ‘strong-password’ with an actual strong password.
Open the MariaDB configuration file (/etc/my.cnf):
vi /etc/my.cnf
Then add/modify the following lines in the [mysqld] section:
key_buffer = 256M
max_allowed_packet = 500M
thread_stack = 256K
thread_cache_size = 120
max_connections = 500
query_cache_limit = 1M
query_cache_size = 64M
slow_query_log = 1
slow_query_log_file = /var/log/mysql/mysql-slow.log
long_query_time = 2
log_error = /var/log/mysql/error.log
Restart the MariaDB Server for the changes to take effect:
systemctl restart mariadb.service
Step 6: Install Feng Office on CentOS 7
Download the latest version of Feng Office Community Edition available at https://www.fengoffice.com/web/community/downloads.php in a directory on the server and extract it using the following commands. We’ve pre-inserted the download link for the latest version in the command below:
wget -O fengoffice.zip --no-check-certificate https://www.fengoffice.com/web/reference.php?dest=latest_version
unzip fengoffice.zip -d /var/www/html/
mv /var/www/html/fengoffice-3.*/ /var/www/html/fengoffice/
chown apache:apache -R /var/www/html/fengoffice/
The other commands unzip the downloaded archive, rename the folder to something cleaner, and change the owner of the folder to Apache so that the server can read the files.
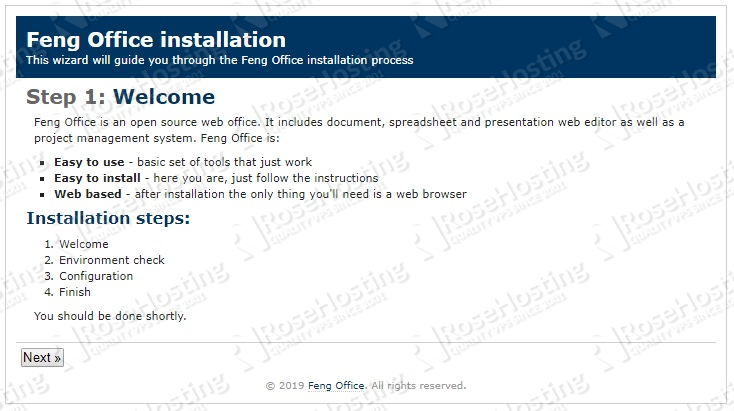
Open http://fengoffice.domain.com in your favorite web browser and start the installation process:
Click on the ‘Next’ button.
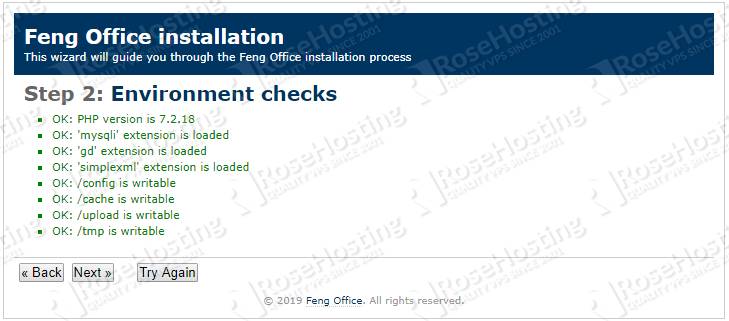
If all of the requirements are met, click on the ‘Next’ button.
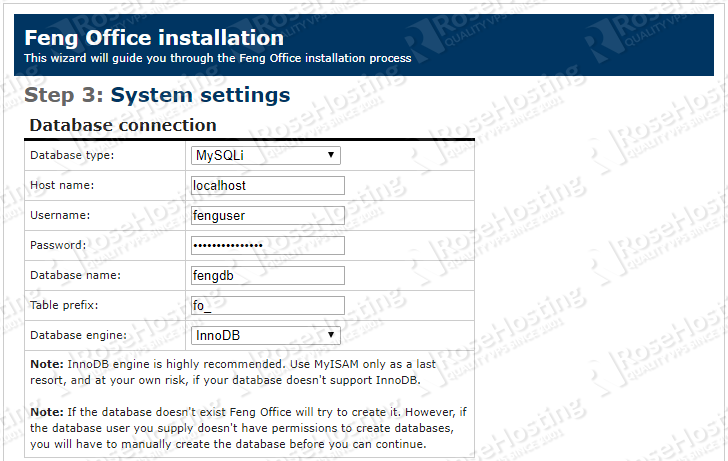
On the next page, enter your MariaDB username, password, and database name.
Please note, the ‘core_dimensions’ plugin is compulsory so you have to install it. You might want to install the ‘workspaces’ and ‘mail’ plugins too.
Then, click on the ‘Finish’ button.
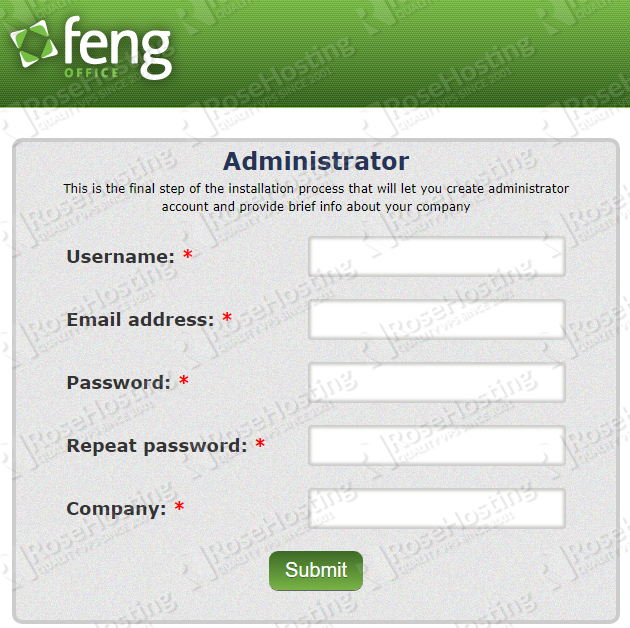
Feng Office will then ask you to create an administrator account.
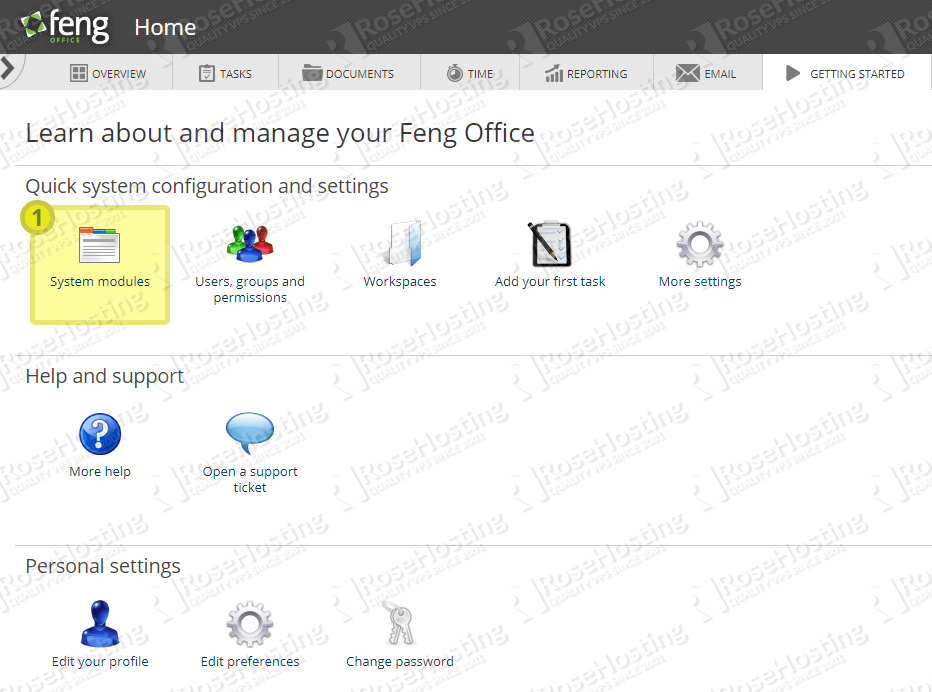
Once you complete that form, you’re finished with the installation process. The Feng Office installation is now complete. You can now log in to the Feng Office administrator back-end and configure it according to your needs.

PS. If you liked this post on how to install Feng Office on a CentOS 7 VPS or if you found it helpful, please share it with your friends on the social networks using the share shortcuts below, or simply leave a comment in the comments section. Thank you.
