
In this article, we are going to explain about installing Icinga 2 Monitoring Software on Ubuntu 20.04.
Icinga is an open-source and cross-platform monitoring tool that monitors network resources, generates performance data, sends notifications about outages and etc. It is one of the most popular monitoring tools on the internet that provides high availability and distributed monitoring. Besides the installation, we will explain in more detail the configuration and accessing the Icinga through the web interface.
Icinga 2 installation may take up to 40 minutes but don’t worry it is very easy and straightforward. Let’s Start
Table of Contents
Step 1. Update the System
We assume that you have a fresh installation of Ubuntu 20.04 and that’s why we need to update the system to the latest software updates.
sudo apt update -y && sudo apt upgrade -y
Step 2. Install MariaDB as a database server
sudo apt install mariadb-server -y
Once, the installation is complete start the service.
sudo systemctl start mariadb
Verify that the service is up and running:
sudo systemctl status mariadb
You should see the following output:
root@vps:~# sudo systemctl status mariadb
● mariadb.service - MariaDB 10.3.31 database server
Loaded: loaded (/lib/systemd/system/mariadb.service; enabled; vendor preset: enabled)
Active: active (running) since Wed 2021-10-13 21:03:58 UTC; 1min 14s ago
Docs: man:mysqld(8)
https://mariadb.com/kb/en/library/systemd/
Main PID: 120943 (mysqld)
Status: "Taking your SQL requests now..."
Tasks: 31 (limit: 4617)
Memory: 67.6M
CGroup: /system.slice/mariadb.service
└─120943 /usr/sbin/mysqld
Step 3. Install Apache2 as a Web Server
sudo apt install apache2 -y
Once, installation is completed start the service:
sudo systemctl start apache2
Enable the service to start on system boot:
sudo systemctl enable apache2
Check, if service is up and running:
sudo systemctl status apache2
You should see the following output:
root@vps:~# sudo systemctl status apache2
● apache2.service - The Apache HTTP Server
Loaded: loaded (/lib/systemd/system/apache2.service; enabled; vendor preset: enabled)
Active: active (running) since Tue 2021-10-12 15:24:12 UTC; 1 day 5h ago
Docs: https://httpd.apache.org/docs/2.4/
Main PID: 68804 (apache2
Tasks: 9 (limit: 4617)
Memory: 22.1M
CGroup: /system.slice/apache2.service
Step 4. Install PHP with dependencies
First, we need to install the required dependencies:
sudo apt install software-properties-common
Since the latest version of PHP is PHP8.0 we need to add the Ondrej repository manually before we install it:
sudo add-apt-repository ppa:ondrej/php
Now, you can install PHP8.0 with all required dependencies:
sudo apt install php php-curl php-gd php-mbstring php-xml php-xmlrpc php-soap php-intl php-zip php-cli php-mysql php8.0-common php8.0-opcache php-gmp php-imagick -y
Verify that the PHP8.0 is installed with the following command:
php -v
You should see the following output:
root@vps:~# php -v
PHP 8.0.11 (cli) (built: Sep 23 2021 21:26:24) ( NTS )
Copyright (c) The PHP Group
Zend Engine v4.0.11, Copyright (c) Zend Technologies
with Zend OPcache v8.0.11, Copyright (c), by Zend Technologies
We need to modify some changes in the php.ini file before we proceed with the Icinga2 installation:
sudo nano /etc/php/8.0/apache2/php.ini
Uncomment the cgi.fix_pathinfo and set it to 0.
cgi.fix_pathinfo=0
Save and close the file.
Step 5. Add Icinga2 Repository
Manually add the Icinga2 repository with the following command:
sudo curl https://packages.icinga.com/icinga.key | apt-key add -
Create the repository file for Icinga2:
sudo nano /etc/apt/sources.list.d/icinga-focal.list
Add the following lines of code:
deb http://packages.icinga.com/ubuntu icinga-focal main
deb-src http://packages.icinga.com/ubuntu icinga-focal main
Save the file, close it and update the system.
sudo apt update -y
Step 6. Install Icinga2
Finally, after all requirements are installed we are ready to install the Icinga monitoring software on our Ubuntu 20.04:
sudo apt install icinga2 monitoring-plugins -y
Start and Enable the service:
sudo systemctl start icinga2 && sudo systemctl enable icinga2
Check, if the service is up and running:
sudo systemctl status icinga2
The following output should be displayed:
root@vps:~# sudo systemctl status icinga2
● icinga2.service - Icinga host/service/network monitoring system
Loaded: loaded (/lib/systemd/system/icinga2.service; enabled; vendor preset: enabled)
Drop-In: /etc/systemd/system/icinga2.service.d
└─limits.conf
Active: active (running) since Wed 2021-10-13 21:20:21 UTC; 2min 50s ago
Main PID: 136092 (icinga2)
Status: "Startup finished."
Tasks: 20
Memory: 14.0M
CGroup: /system.slice/icinga2.service
Step 7. Install and Enable the Icinga2 IDO MySQL module
We need to install this module because the IDO database is used as a backend by Icinga Web 2:
sudo apt install icinga2-ido-mysql -y
On the first window, you need to select “Yes” and hit Enter.

On the second window, you need to select “No” and hit Enter.

Once, the installation is completed, log in to manually create a database and user for Icinga2.
sudo mysql -u root -p
Once logged in, enter the following lines:
CREATE DATABASE icinga2;
GRANT ALL ON icinga2.* TO 'icinga2'@'localhost' IDENTIFIED BY 'YourStrongPasswordHere';
FLUSH PRIVILEGES;
EXIT;
Now, next step is to import the IDO schema:
sudo mysql -u root -p icinga2 < /usr/share/icinga2-ido-mysql/schema/mysql.sql
If the command is executed successfully you should receive nothing as output:
root@vps:~# sudo mysql -u root -p icinga2 < /usr/share/icinga2-ido-mysql/schema/mysql.sql
Enter password:
root@vps:~#
Let’s move on and enable the IDO MySQL Module. Open the ido-mysql.conf file and set the database name, user and password that you created a while ago.
sudo nano /etc/icinga2/features-available/ido-mysql.conf
Set the correct credentials, you created a while ago:
/**
* The db_ido_mysql library implements IDO functionality
* for MySQL.
*/
library "db_ido_mysql"
object IdoMysqlConnection "ido-mysql" {
user = "icinga2",
password = "YourStrongPasswordHere",
host = "localhost",
database = "icinga2"
}
Save the file, close it and enable the ido-mysql module.
sudo icinga2 feature enable ido-mysql
You should receive the following output:
root@vps:~# sudo icinga2 feature enable ido-mysql
Enabling feature ido-mysql. Make sure to restart Icinga 2 for these changes to take effect.
Restart the Icinga2 service:
sudo systemctl restart icinga2
Step 8. Install Icinga Web 2
First, we need to install it with the following command:
sudo apt install icingaweb2 icingacli libapache2-mod-php -y
Next, we need to create a database manually:
sudo mysql -u root -p
Once, logged in to MySQL, execute the following commands:
CREATE DATABASE icinga2web;
GRANT ALL ON icinga2web.* TO 'icinga2web'@'localhost' IDENTIFIED BY 'YourStrongPasswordHere';
FLUSH PRIVILEGES;
EXIT
Next, we need to create a token that will be used in the next steps while configuring the web interface:
sudo icingacli setup token create
You should receive a random token and you need to save it for later use:
root@vps:~# sudo icingacli setup token create
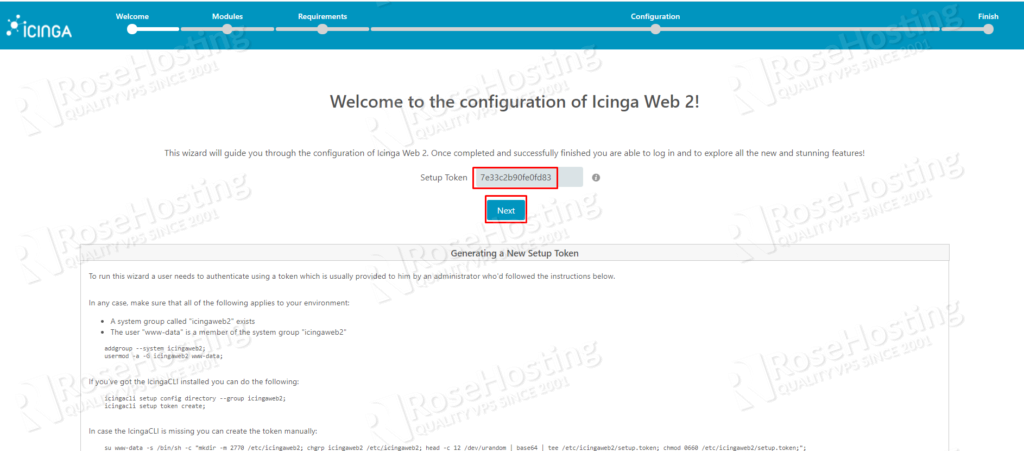
The newly generated setup token is: 7e33c2b90fe0fd83
Step 9. Access and setup Icinga Web 2 in the browser
To access the fresh installation of Icinga2 access the following URL:
http://your_server_ip_address/icingaweb2/setup
You should see the Welcome page of Icinga.
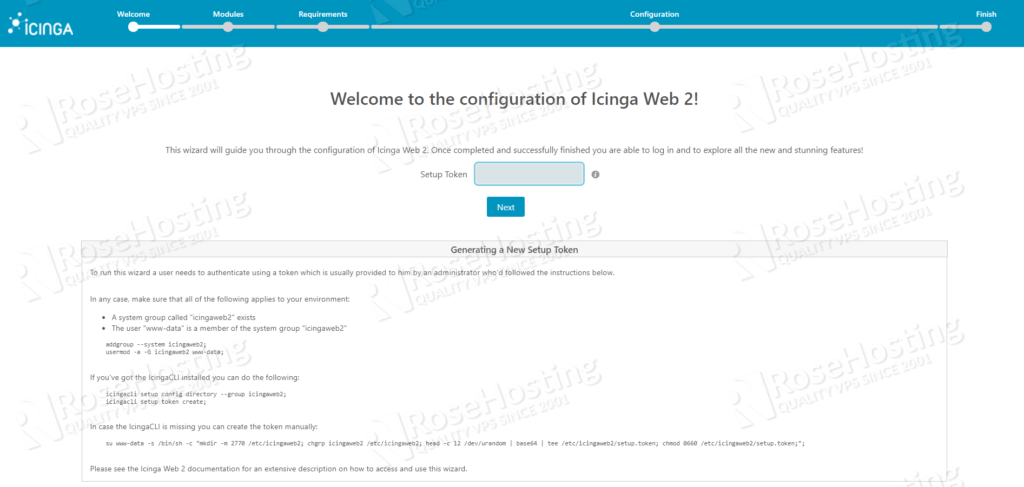
Paste the token generated before and click on the “Next” button.
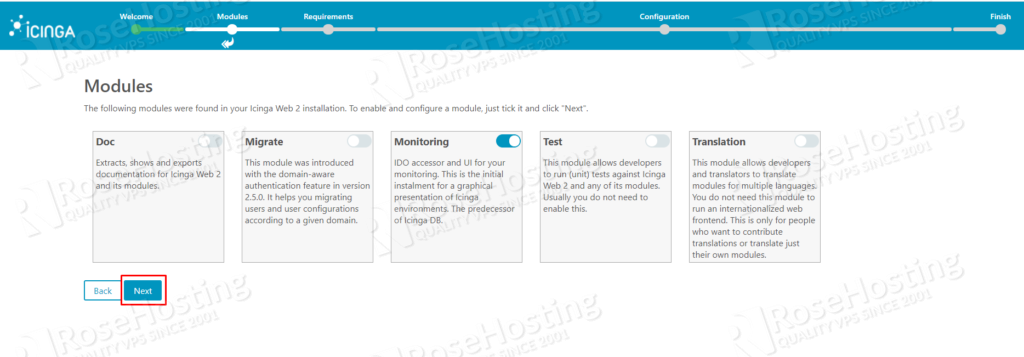
On the Module tab click on “Next” button.
On the PHP dependencies tab click on the “Next” button as well.

On the Authentication tab click on the “Next” button and be sure to be selected “Database” as an Authentication Type.

In the next tab enter the required fields with the database credentials you created before validating the configuration and click on the “Next” button.
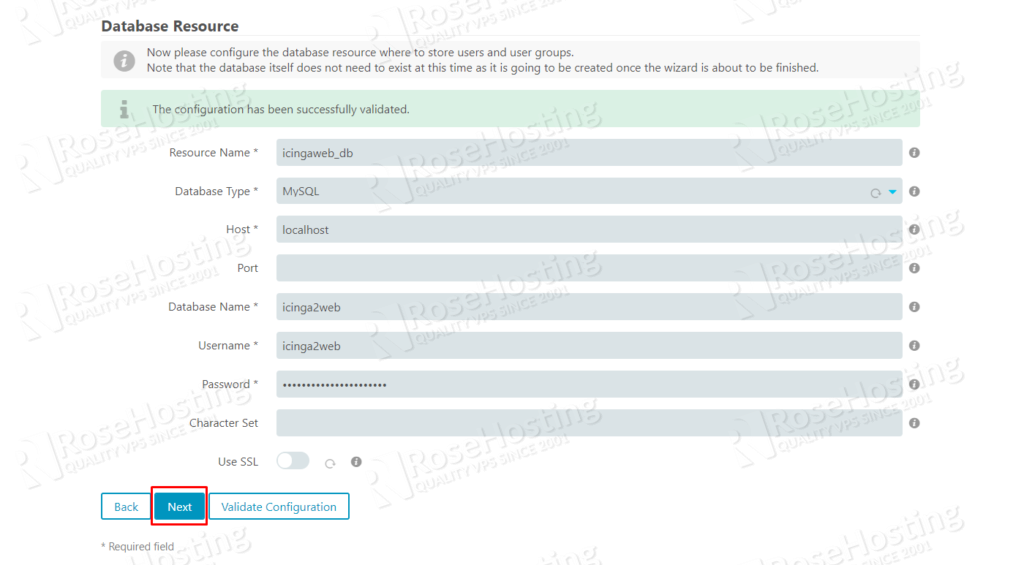
On the Authentication Backend tab, click on the “Next” button, once you verify that the correct database name is entered in the “Backend Name” field.

On the Administration tab enter your Icinga 2 Web username and password.

On the Application Configuration tab click “Next“.
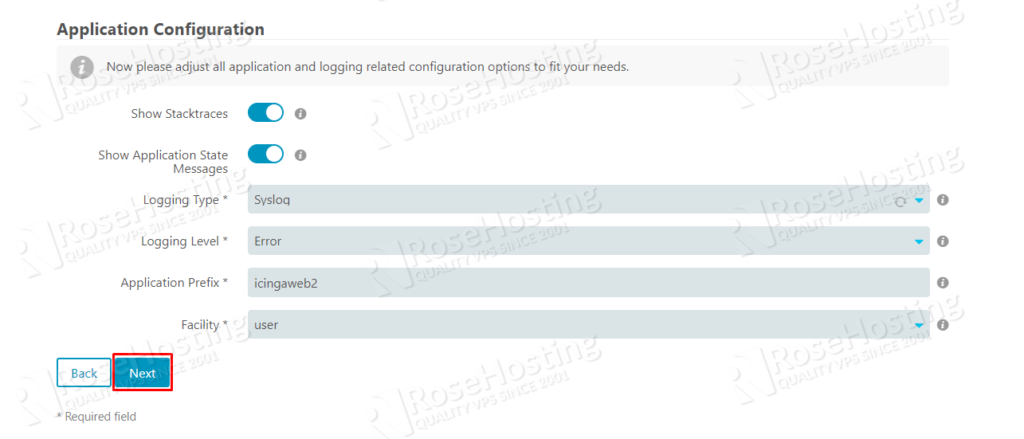
On the next tab click “Next” as well.

On the next tab click “Next“.

In the Monitoring IDO Resource tab fill the information for IDO database you created before.
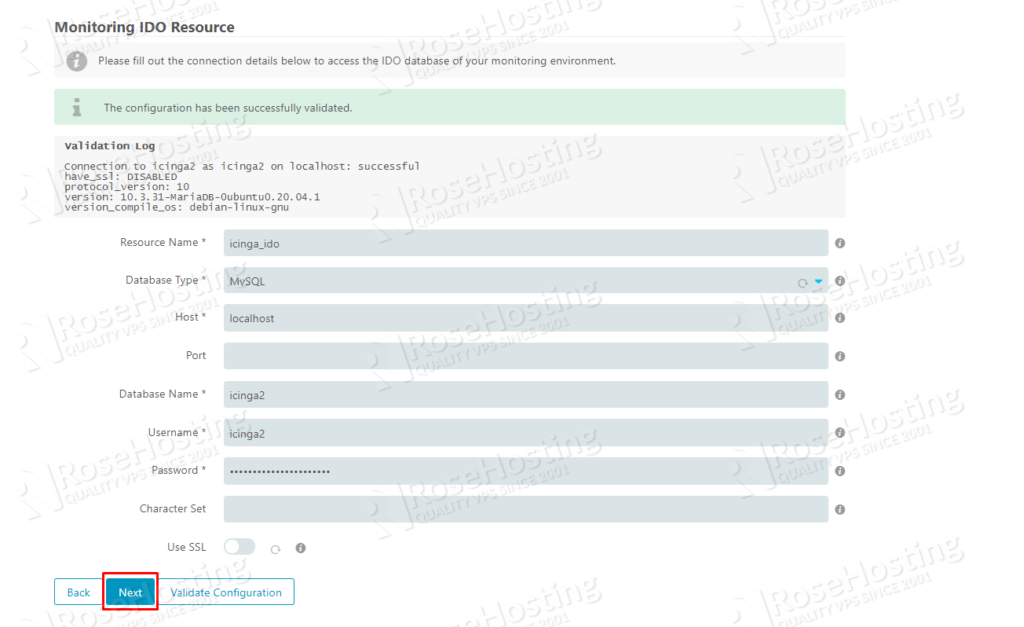
In the Command Transport tab select “Local Command File” as a Transport Type and click on “Next“.

In the Monitor Security tab click on the “Next” button”.

Review All modules and click on “Finish” button.

Congratulations! You successfully installed Icinga Web 2. You can log in now by clicking on the “Login to Icinga Web2” button.

Enter the credentials and hit on the “Login” button.
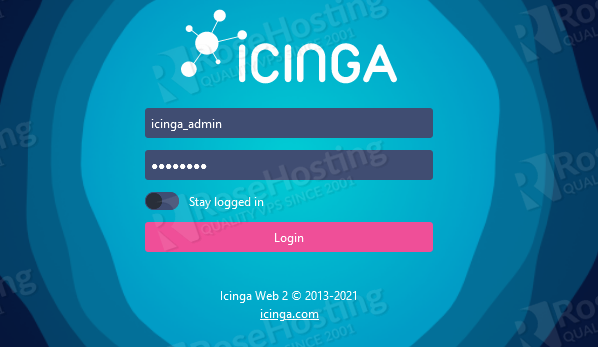
You should see the following screen.

Done. You successfully installed and configured Icinga 2 monitoring software on Ubuntu 20.04.
Of course, you don’t have to install Icinga 2 on Ubuntu 20.04. If you use one of our Linux VPS Hosting plans, you can simply ask our expert Linux admins to install it for you. They are available 24/7 and will take care of your request immediately.
If you liked this post on how to install Icinga 2 on Ubuntu 20.04, please share it with your friends on the social networks using the buttons on the left or simply leave a reply below. Thanks.