Dotclear is an open source web publishing software written in PHP, created to allow anyone publish websites, regardless of their technical skills.
This tutorial was tested and written for a Debian VPS, but it should work on any Linux distribution.
This install guide assumes that Apache, MySQL and PHP are already installed and configured on your Dotclear virtual server. At the time of writing this tutorial, the latest stable version of Dotclear is 2.8 and it requires:
- PHP 5.2 or higher with the domxml, iconv, mbstring, MySQL, simplexml, SPL (standard PHP library) extensions enabled, ob_ function support and utf8 support on preg_ functions. Also, it is useful to have the PHP GD2 library enabled too.
- Apache Web Server >= 2.0 compiled with mod_rewrite module and with the following directives allowed: DirectoryIndex, Deny, Allow, Options, Order, AddHandler, RewriteEngine, RewriteBase, RewriteCond and RewriteRule.
- MySQL with InnoDB, PostgreSQL or SQLite installed on your virtual server.
So, let’s start with the installation procedure. Download the latest version of Dotclear available at ‘http://download.dotclear.org/’ to a directory of your virtual server and extract it using the following commands:
cd /opt/
wget http://download.dotclear.org/latest.tar.gz
tar -xvzf latest.tar.gz
mv /opt/dotclear/ /var/www/html/dotclear/
chown www-data:www-data -R /var/www/html/dotclear/
Move the Dotclear installation files to the document root directory defined in the virtual host directive above:
mv /opt/ /var/www/html/dotclear/
Set the proper ownership of Dotclear files and directories:
chown -R www-data /var/www/html/dotclear/
Dotclear requires a database to store it’s data, so create a new MySQL database for Dotclear to use and assign a user to it with full permissions:
mysql -u root -p
mysql> CREATE DATABASE dotcleardb;
mysql> GRANT ALL PRIVILEGES ON dotcleardb.* TO 'dotclearuser'@'localhost' IDENTIFIED BY 'Y0ur-Passw0rd' WITH GRANT OPTION;
mysql> FLUSH PRIVILEGES;
mysql> quit
Create a new virtual host directive in Apache. For example, create a new Apache configuration file named ‘dotclear.conf’ on your virtual server:
touch /etc/apache2/sites-available/dotclear.conf
Then, run the following command:
ln -s /etc/apache2/sites-available/dotclear.conf /etc/apache2/sites-enabled/dotclear.conf
Alternatively, use the a2ensite to enable the dotclear.conf configuration in Apache:
sudo a2ensite dotclear.conf
Edit the ‘dotclear.conf’ configuration file:
vi /etc/apache2/sites-available/dotclear.conf
and add the following lines to it:
<VirtualHost *:80>
ServerAdmin admin@yourdomain.com
DocumentRoot /var/www/html/dotclear/
ServerName yourdomain.com
ServerAlias www.yourdomain.com
<Directory /var/www/html/dotclear/>
Options FollowSymLinks
AllowOverride All
</Directory>
ErrorLog /var/log/apache2/yourdomain.com-error_log
CustomLog /var/log/apache2/yourdomain.com-access_log common
</VirtualHost>
Restart the Apache web server for the changes to take effect:
systemctl restart apache2.service
Open your favorite web browser and navigate to http://yourdomain.com . Once you do that, you will be taken to the first page of the Dotclear web installer. Enter the MySQL database information:
Database type: MySQLi
Database Host Name: localhost
Database Name: dotcleardb
Database User Name: dotclearuser
Database Password: Y0ur-Passw0rd
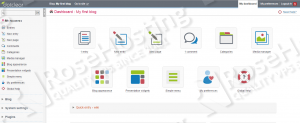
Click continue, create an administrator user account, then log in to the Dotclear administration back-end using the newly created account and start managing your Dotclear based blog.
That is it. The installation of Dotclear is complete.
Of course you don’t have to do any of this if you use one of our Linux VPS Hosting services, in which case you can simply ask our expert Linux admins to install Dotclear for you. They are available 24×7 and will take care of your request immediately.
PS. If you liked this post please share it with your friends on the social networks using the buttons on the left or simply leave a reply below. Thanks.
