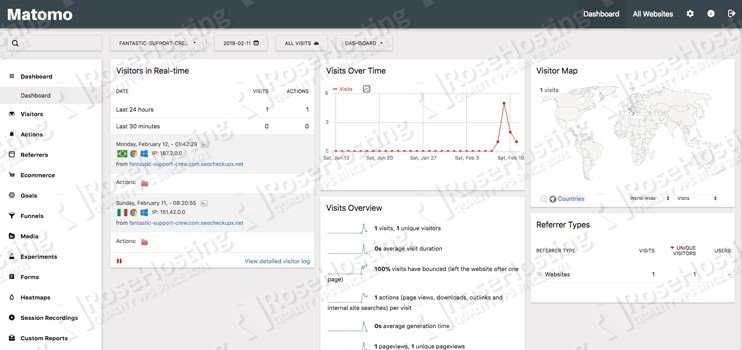
This tutorial explains the process of installing an open source web analytic application named Matomo (formerly known as Piwik) on a CentOS 7 VPS. Matomo helps you gather and analyze important information about your website visitors. Matomo features tracking of visits, goals, conversion rates, A/B Testing, funnels, heatmaps, downloads, keywords, and many more. Let’s get started with the installation of Matomo on your CentOS 7 server.
Requirements
In order to run Matomo on your CentOS 7 VPS you need the following requirements pre-installed:
- Web Server: Apache >= 2.0 compiled with mod_rewrite module, or Nginx
- PHP >= 5.59 (PHP 7.0 or above is recommended), with the following PHP extensions enabled: XML (Expat), curl, GD Graphics Library version 2.0.x+ and mbstring.
- MySQL 5.5 or later is recommended, or MariaDB installed on your CentOS virtual server.
- CentOS 7 VPS with root access enabled
1. Login via SSH
Log in to your CentOS 7 VPS via ssh as user root
ssh roo@IP_Address -p Port_number
2. Update all packages
Once you are logged in to the server run the following command to make sure that all installed packages are up to date
yum clean all
yum update
3. Install LAMP stack
As mention in the requirements section of the tutorial, a LAMP stack (Apache, MySQL/MariaDB and PHP) is required to run Matomo on the server. We will start with installing Apache web server
yum -y install httpd
After the Apache installation is complete, start the Apache web server and enable it to start upon server boot
systemctl enable httpd
PHP version 7.1 is not available in the default CentOS 7 repositories so we will use the Remi repository.
To install and enable both EPEL and Remi repositories run the following command:
yum install epel-release
rpm -Uhv https://rpms.remirepo.net/enterprise/remi-release-7.rpm
yum-config-manager --enable remi-php71
You can now proceed and install PHP 7.1 and all necessary PHP modules using the following command:
yum install php php-common php-mbstring php-gd php-curl php-mysql php-xml
During the installation, the yum package manager will prompt you to install the Remi GPG Signing key. Accept the key by typing ‘y’ and the package manager will install all necessary PHP extensions.
In order to complete the LAMP installation, install MariaDB database server using the following command:
yum -y mariadb mariadb-server
Start the MariaDB service and set it to start on reboot
systemctl start mariadb
systemctl enable mariadb
Run the ‘mysql_secure_installation’ post installation script provided by MariaDB to strengthen the security of the database server and set a root password. You can use the following options:
Set root password? [Y/n] Y
Remove anonymous users? [Y/n] Y
Disallow root login remotely? [Y/n] Y
Remove test database and access to it? [Y/n] Y
Reload privilege tables now? [Y/n] Y
4. Install Matomo on CentOS 7
Matomo is not available in the official CentOS 7 repositories, so we will have to download Matomo from the official website page at https://builds.matomo.org/ and extract the Matomo archive to a directory on the server by executing the following commands:
cd /opt
wget https://builds.matomo.org/piwik.zip -O matomo.zip
unzip matomo.zip -d /var/www/html/
mv /var/www/html/piwik/ /var/www/html/matomo/
This will create a new directory named ‘matomo’ containing the necessary files and directories.
Change the ownership of the matomo directory
chown -R apache:apache /var/www/html/matomo
5. Configure Apache to serve Matomo
Now we will have to setup the Apache configuration so it can serve the Matomo directory, add the following contents below to the /etc/httpd/conf.d/matomo.conf file with nano or your favorite editor:
# vi /etc/httpd/conf.d/matomo.conf
Add the following lines:
<VirtualHost *:80>
ServerAdmin admin@your-domain.com
DocumentRoot /var/www/html/matomo
ServerName your-domain.com
ServerAlias www.your-domain.com
Alias /matomo “/var/www/html/matomo/”
<Directory /var/www/html/matomo/>
Options +FollowSymlinks
AllowOverride All
</Directory>
ErrorLog /var/log/httpd/matomo-error_log
CustomLog /var/log/httpd/matomo-access_log common
</VirtualHost>
Save the changes and restart the Apache web server for the changes to take effect:
systemctl restart httpd
6. Create a MySQL database for Matomo
Log into MySQL with the root account:
# mysql -u root -p
Now we will create a MySQL database for Matomo using the following query:
mysql> CREATE DATABASE matomo;
Then execute the following query to add a separate user for Matomo that will interact with the database:
mysql> GRANT ALL PRIVILEGES ON matomo.* to 'matomo'@'localhost' IDENTIFIED BY '5tr0ng_Pa55w0rd';
Execute the following command to apply the privileges we set:
mysql> FLUSH PRIVILEGES;
Now we can exit the MySQL session:
mysql> quit
You can now open a web browser and access the Matomo application at http://your-domain.com
From here you can finish the setup by following the steps below:
- Matomo will check to make sure that your server meets the Matomo requirements. If everything is OK, click Next
- Enter localhost or 127.0.0.1 as database server, then enter a database username and password, database name, and once you have filled in the form, click Next
- You should receive a message: ‘Tables created with success!’. Click on the Next button once again
- Enter a username, password and email address for the administrator user account
- On the next page, set up the Website name and URL you want to track.
That’s it, now you should have successfully installed Matomo on your CentOS 7 server. You need to add the JavaScript tracking code on every page of your website before the closing tag so you can track and analyze the websites. You can now log in to the Matomo administration back-end and add more websites and start tracking and analyzing the website traffic. To access Matomo official documentation, please navigate to Matomo Official Documentation

PS. If you liked this post on how to install and configure Matomo on a CentOS VPS, please share it with your friends on the social networks using the buttons on the left or simply leave a reply below. Thanks.

