
Rocket.Chat is a free and open-source chat and messaging application built with Meteor. It is an alternative to Slack and allows you to chat with other members, make video and audio calls, create channels and private groups, share files, and folders and many more. It is self-hosted and helps your team to communicate and share ideas on desktop and mobile devices.
In this tutorial, we will show you how to deploy Rocket.Chat with Nginx as a reverse proxy on CentOS 8.
Table of Contents
Prerequisites
- A CentOS 8 VPS.
- Access to the root user account (or access to an admin account with root privileges)
Step 1: Log in to the Server & Update the Server OS Packages
First, log in to your CentOS 8 server via SSH as the root user:
ssh root@IP_Address -p Port_number
You will need to replace ‘IP_Address‘ and ‘Port_number‘ with your server’s respective IP address and SSH port number. Additionally, replace ‘root’ with the username of the admin account if necessary.
Before starting, you have to make sure that all CentOS packages installed on the server are up to date. You can do this by running the following commands:
dnf update -y
Step 2: Install Required Packages
First, you will need to install some packages required to install Rocket.Chat in your system.
First, install EPEL repo with the following command:
dnf install epel-release -y
After installing, EPEL repo, install Nginx web server and development tools with the following command:
dnf install nginx curl GraphicsMagick gcc-c++ -y
dnf groupinstall 'Development Tools'
Once all the packages are installed, start the Nginx service and enable it to start at system reboot:
systemctl start nginx
systemctl enable nginx
Step 3: Install Node.js
Next, you will need to install Node.js in your system. By default, the latest version of Node.js is not available in the CentOS 8 default repository. So you will need to enable the Node.js module in your system. You can enable the Node.js version 12 module with the following command:
dnf module enable nodejs:12
Next, install the Node.js with the following command:
dnf install nodejs -y
After installing Node.js, verify the installed version of Node.js with the following command:
node --version
You should get the following output:
v12.18.4
Step 4: Install and Configure MongoDB
Rocket.Chat uses MongoDB as a database backend. So you will need to install it in your system.
First, create a MongoDB repo with the following command:
nano /etc/yum.repos.d/mongodb-org.repo
Add the following lines:
[mongodb-org-3.6]
name=MongoDB Repository baseurl=https://repo.mongodb.org/yum/redhat/$releasever/mongodb-org/3.6/x86_64/ gpgcheck=1 enabled=1 gpgkey=https://www.mongodb.org/static/pgp/server-3.6.asc
Save and close the file then install the MongoDB server with the following command:
dnf install mongodb-org -y
Once installed, start the MongoDB service and enable it to start at system reboot with the following command:
systemctl start mongod
systemctl enable mongod
Next, you will need to define replica set in MongoDB. You can define it with the following command:
nano /etc/mongod.conf
Add the following lines:
replication:
  replSetName: "myreplica01"
Save and close the file then restart the MongoDB service to apply the changes:
systemctl restart mongod
Next, login to MongoDB shell and initiate the replica set with the following command:
mongo

> rs.initiate()
You should get the following output:
{
    "info2" : "no configuration specified. Using a default configuration for the set",
    "me" : "127.0.0.1:27017",
    "ok" : 1,
    "operationTime" : Timestamp(1604905164, 1),
    "$clusterTime" : {
        "clusterTime" : Timestamp(1604905164, 1),
        "signature" : {
            "hash" : BinData(0,"AAAAAAAAAAAAAAAAAAAAAAAAAAA="),
            "keyId" : NumberLong(0)
        }
    }
}
Next, exit from the MongoDB shell with the following command:
myreplica01:SECONDARY> exit
Step 5: Install Rocket.Chat
First, you will need to create a separate user to run Rocket.Chat. You can create it with the following command:
useradd -m -U -r -d /opt/rocket rocket
Next, add the rocket user to the Nginx group with the following command:
usermod -a -G rocket nginx
Next, give proper permission to the /opt/rocket directory with the following command:
chmod 750 /opt/rocket
Next, switch the user to rocket and download the latest version of Rocket.Chat with the following command:
su - rocket
curl -L https://releases.rocket.chat/latest/download -o rocket.chat.tgz
Next, extract the downloaded file with the following command:
tar zxf rocket.chat.tgz
Next, move the extracted directory to Rocket.Chat:
mv bundle Rocket.Chat
Next, change the directory to Rocket.Chat server and install required modules with the following command:
cd Rocket.Chat/programs/server
npm install
Next, exit from the rocket user with the following command:
exit
Step 6: Create a Systemd Service File for Rocket.Chat
Next, you will need to create a systemd service file to manage the Rocket.Chat service. You can create it with the following command:
nano /etc/systemd/system/rocketchat.service
Add the following lines:
[Unit]
Description=Rocket.Chat server
After=network.target nss-lookup.target mongod.target

[Service]
StandardOutput=syslog
StandardError=syslog
SyslogIdentifier=rocketchat
User=rocket
Environment=MONGO_URL=mongodb://localhost:27017/rocketchat ROOT_URL=http://chat.example.com:3000/ PORT=3000
ExecStart=/usr/local/bin/node /opt/rocket/Rocket.Chat/main.js

[Install]
WantedBy=multi-user.target
Save and close the file then reload the systemd daemon with the following command:
systemctl daemon-reload
Next, start the Rocket.Chat service and enable it to start at system reboot with the following command:
systemctl start rocketchat
systemctl enable rocketchat
You can now verify the status of the Rocket.Chat with the following command:
systemctl status rocketchat
You should get the following output:
● rocketchat.service - Rocket.Chat server
   Loaded: loaded (/etc/systemd/system/rocketchat.service; disabled; vendor preset: disabled)
   Active: active (running) since Mon 2020-11-09 02:01:10 EST; 28s ago
 Main PID: 65031 (node)
    Tasks: 11 (limit: 25014)
   Memory: 573.6M
   CGroup: /system.slice/rocketchat.service
           └─65031 /usr/local/bin/node /opt/rocket/Rocket.Chat/main.js

Nov 09 02:01:33 centos8 rocketchat[65031]: ➔ |      MongoDB Version: 3.6.20                         |
Nov 09 02:01:33 centos8 rocketchat[65031]: ➔ |       MongoDB Engine: wiredTiger                     |
Nov 09 02:01:33 centos8 rocketchat[65031]: ➔ |             Platform: linux                          |
Nov 09 02:01:33 centos8 rocketchat[65031]: ➔ |         Process Port: 3000                           |
Nov 09 02:01:33 centos8 rocketchat[65031]: ➔ |             Site URL: http://chat.example.com:3000/  |
Nov 09 02:01:33 centos8 rocketchat[65031]: ➔ |     ReplicaSet OpLog: Enabled                        |
Nov 09 02:01:33 centos8 rocketchat[65031]: ➔ |          Commit Hash: e37d7ba8ed                     |
Nov 09 02:01:33 centos8 rocketchat[65031]: ➔ |        Commit Branch: HEAD                           |
Nov 09 02:01:33 centos8 rocketchat[65031]: ➔ |                                                      |
Nov 09 02:01:33 centos8 rocketchat[65031]: ➔ +------------------------------------------------------+
Step 7: Configure Nginx as a Reverse Proxy
At this point, Rocket.Chat is started and listening on port 3000. Next, you will need to configure Nginx as a reverse proxy to access the Rocket.Chat using port 80.
First, create an Nginx virtual host configuration file with the following command:
nano /etc/nginx/conf.d/rocket.conf
Add the following lines:
upstream rocketchat_backend {
  server 127.0.0.1:3000;
}

server {
    listen 80;
    server_name chat.example.com;

    location / {
        proxy_pass http://rocketchat_backend/;
        proxy_http_version 1.1;
        proxy_set_header Upgrade $http_upgrade;
        proxy_set_header Connection "upgrade";
        proxy_set_header Host $http_host;

        proxy_set_header X-Real-IP $remote_addr;
        proxy_set_header X-Forward-For $proxy_add_x_forwarded_for;
        proxy_set_header X-Forward-Proto http;
        proxy_set_header X-Nginx-Proxy true;

        proxy_redirect off;
    }
}
Save and close the file then restart the Nginx service to apply the changes:
systemctl restart nginx
Step 8: Configure Firewall
Next, you will needto allow port 80 through firewalld. You can allow it with the following command:
firewall-cmd --zone=public --add-port=80/tcp --permanent
Next, reload the firewalld to apply the changes:
firewall-cmd --reload
Step 9: Access Rocket.Chat
Now, open your web browser and access the Rocket.Chat using the URL http://chat.example.com. You should see the following screen:
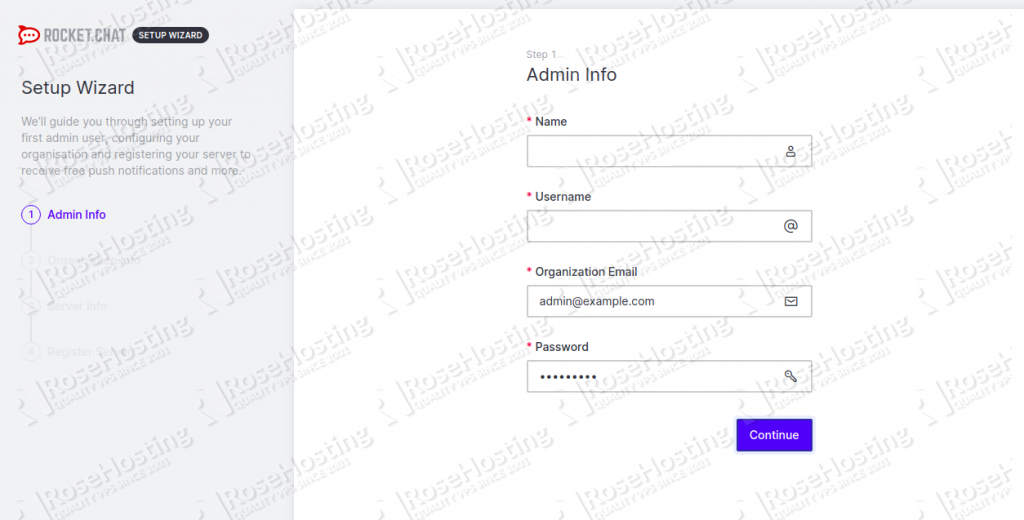
Provide your admin information and click on the Continue button. You should see the following screen:
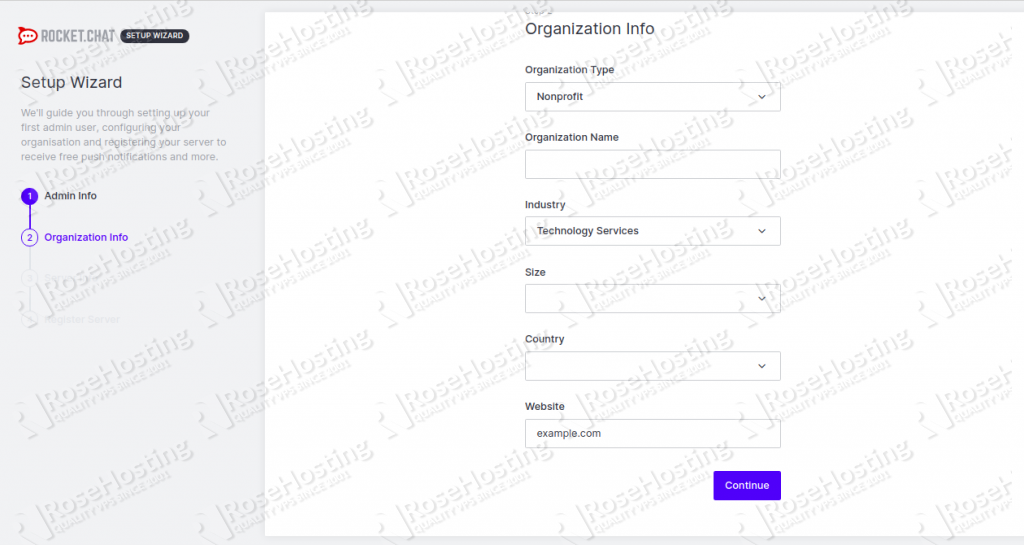
Provide your Organization information and click on the Continue button.
On the next page, provide your server information and click on the Continue button:
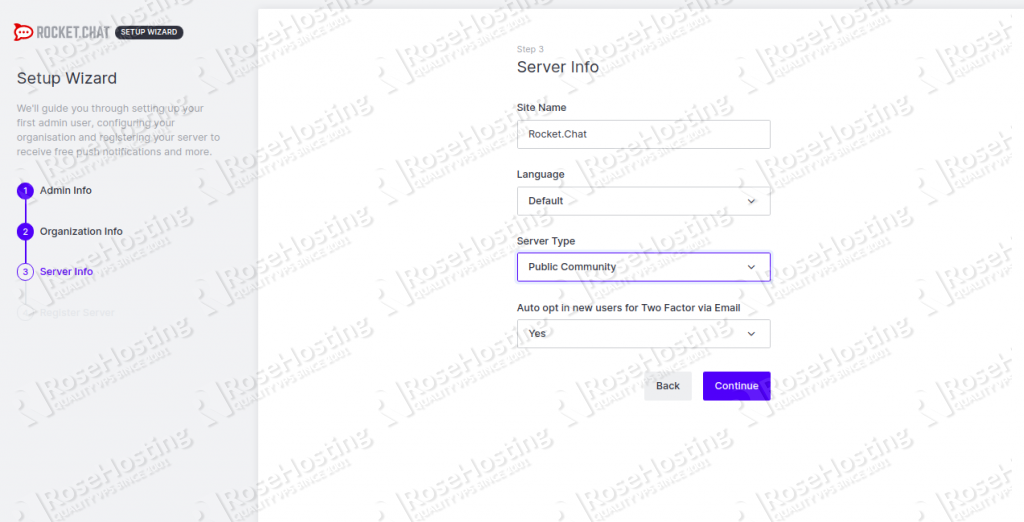
Now, register your server and click on the Continue button. You should see the following screen:
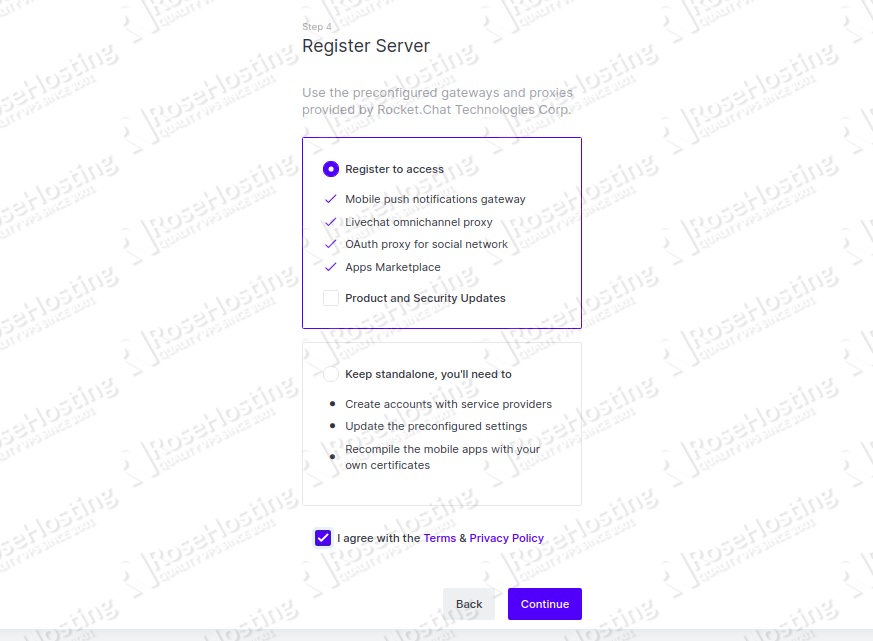
Click on the Continue button. You should see the following screen:
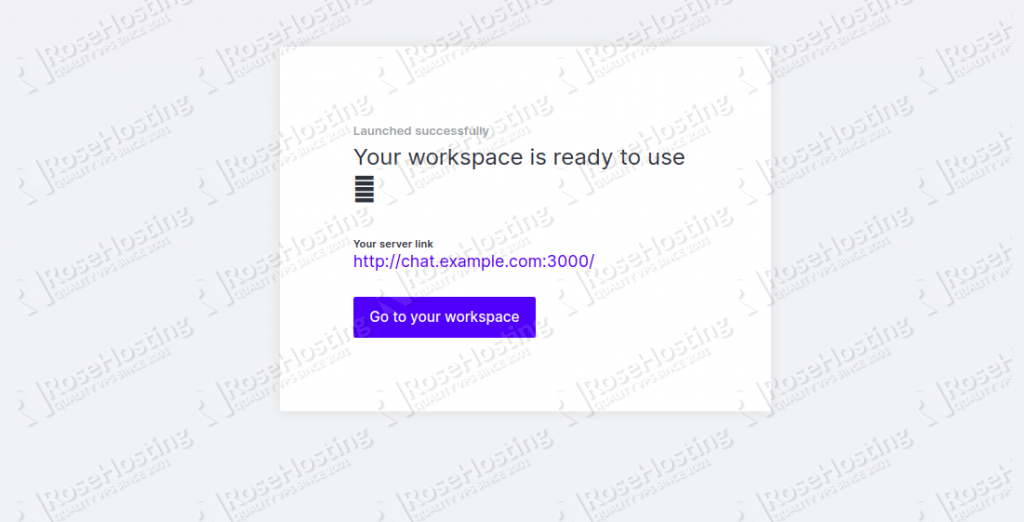
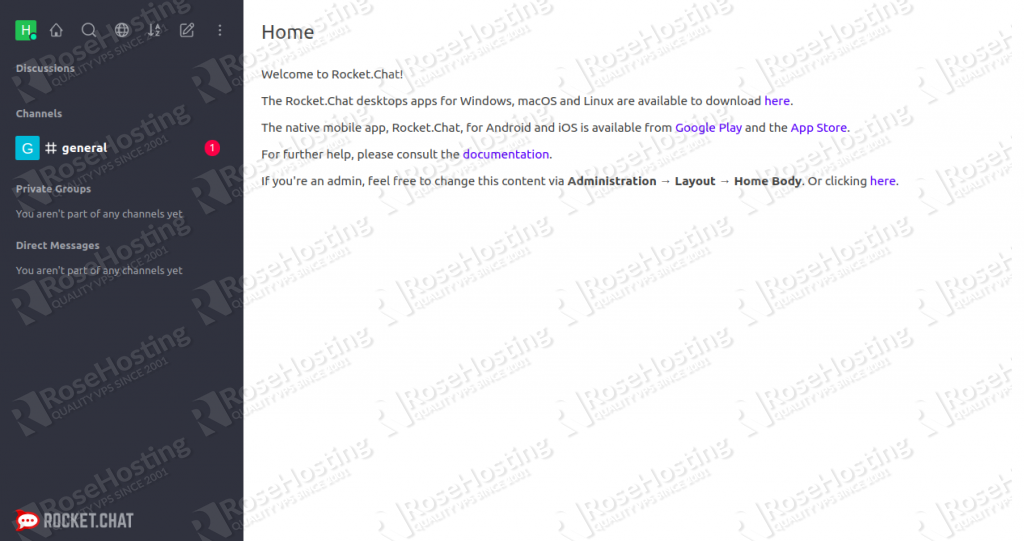
Click on the Go to your workspace. You should see the Rocket.Chat dashboard in the following screen:
Of course, you don’t have to install Rocket.Chat on CentOS 8, if you use one of our Managed

CentOS Hosting plans, in which case you can simply ask our expert Linux admins to install Rocket.Chat on CentOS 8 for you. They are available 24×7 and will take care of your request immediately.
PS. If you liked this post on how to install Rocket.Chat on CentOS 8, please share it with your friends on the social networks using the buttons on the left or simply leave a reply below. Thanks.