In this tutorial, we will guide you through the steps of installing Bludit on a Debian 9 VPS.

Table of Contents
Prerequisites
- A Debian 9 VPS. For the purposes of this tutorial we will use our SSD 1 VPS hosting plan.
- SSH access with root privileges (or access to an admin account with sudo privileges)
- PHP 5.6 or greater with mbstring, GD, DOM, XML and JSON PHP extensions enabled.
- Apache web server 2.0 or higher compiled with mod_rewrite module. Alternatively, we can use PHP Built-in web server, Nginx or Lighttpd as a web server.
Step 1: Log in via SSH and Update the System
Log in to your Debian 9 VPS using SSH.
ssh root@IP_Address -p Port_number
Don’t forget to replace “IP_Address” and “Port_number” with the proper values for your VPS.
You can check whether you have the proper Debian version installed on your server with the following command:
# lsb_release -a
You should get this output:
Distributor ID: Debian
Description: Debian GNU/Linux 9.9 (Stretch)
Release: 9.9
Codename: stretch
Then, run the following command to make sure that all installed OS packages on the server are updated to their latest available versions:
apt update
apt upgrade
You can also enable automatic updates on your Debian 9 VPS by following one of our previous tutorials.
With that out of the way, we can start installing the packages that we’ll need.
Step 2: Apache Web Server Installation
To install the Apache web server, run the following command:
apt-get install apache2
After the installation is complete, you should enable Apache to start automatically upon server boot with:
systemctl enable apache2
You can also check the status of your Apache service with the following command:
systemctl status apache2
Output:
● apache2.service - The Apache HTTP Server
   Loaded: loaded (/lib/systemd/system/apache2.service; disabled; vendor preset: enabled)
   Active: active (running) since Wed 2019-08-07 03:34:36 CDT; 3min 47s ago
 Main PID: 429 (apache2)
   CGroup: /system.slice/apache2.service
           ├─429 /usr/sbin/apache2 -k start
           └─430 /usr/sbin/apache2 -k start
Step 3: Install PHP 7.2
PHP 7.2 is not available through the Debian built-in repositories, so we will use a third-party repo instead. If you already have PHP 7.2, you can skip this step. PHP 7.2 can be installed using a third-party repo. To do this, install the ‘software-properties-common’ and few other packages packages:
apt-get install software-properties-common apt-transport-https lsb-release ca-certificates
Then, add the repo and update your sources:
wget -O /etc/apt/trusted.gpg.d/php.gpg https://packages.sury.org/php/apt.gpg
echo "deb https://packages.sury.org/php/ $(lsb_release -sc) main" > /etc/apt/sources.list.d/php.list
apt-get update
Finally, install PHP 7.2 using the following command:
apt-get install php7.2 php7.2-cli php7.2-common
To install the required PHP 7.2 extensions, you can use the following command:
apt-get install php7.2-mbstring php7.2-gd php7.2-json php7.2-intl php7.2-curl php7.2-xml php7.2-zip
Use the following command to check the PHP version currently installed on your server:
php -v
You should receive the following output:
PHP 7.2.20-2+0~20190725.24+debian9~1.gbp69697c (cli) (built: Jul 25 2019 11:53:56) ( NTS )
Copyright (c) 1997-2018 The PHP Group
Zend Engine v3.2.0, Copyright (c) 1998-2018 Zend Technologies
with Zend OPcache v7.2.20-2+0~20190725.24+debian9~1.gbp69697c, Copyright (c) 1999-2018, by Zend Technologies
Disable PHP 7.0 in Apache and enable PHP 7.2:
a2dismod php7.0
a2enmod php7.2
Also, enable the mod_rewrite module in Apache if it is not enabled yet:
a2enmod rewrite
Then, restart Apache2 for the changes to take effect:
service apache2 restart
Step 4: Download and Install Bludit
At the time of writing this tutorial, the latest stable version is Bludit. Download the latest stable version of Bludit to the /var/www/html directory. The download link has been added to the command for you:
cd /var/www/html
wget https://s3.amazonaws.com/bludit-s3/bludit-builds/bludit_latest.zip
Extract the ‘bludit_latest.zip’ archive and rename the directory:
unzip bludit_latest.zip
Create a .htaccess file in the /var/www/html/bludit/ directory (you can use your preferred text editor if you like):
vi /var/www/html/bludit/.htaccess
Add the following text to the file:
AddDefaultCharset UTF-8

<IfModule mod_rewrite.c>

# Enable rewrite rules
RewriteEngine on

# Deny direct access to .txt files
RewriteRule ^bl-content/(.*)\.txt$ - [R=404,L]

# All URL process by index.php
RewriteCond %{REQUEST_FILENAME} !-f
RewriteRule ^(.*) index.php [PT,L]

</IfModule>
Save and close the file.
Change the permissions of the files and directories inside the /var/www/html/bludit directory so the web server user (www-data) can access them:
chown www-data: -R /var/www/html/bludit
Step 5: Create an Apache Configuration File
Now we will configure the Apache configuration file for Bludit. This file will control how users access Bludit content. Run the following commands to create a new configuration file called bludit.conf
nano /etc/apache2/sites-available/bludit.conf
Then copy and paste the content below into the file and save it. Replace the yourdomain.com string with your own domain name and directory root location.
<VirtualHost *:80>
ServerAdmin admin@yourdomain.com
DocumentRoot /var/www/html/bludit/
ServerName yourdomain.com
ServerAlias www.yourdomain.com

<Directory /var/www/html/bludit/>
Options FollowSymlinks
AllowOverride All
Require all granted
</Directory>

ErrorLog ${APACHE_LOG_DIR}/yourdomain.com_error.log
CustomLog ${APACHE_LOG_DIR}/yourdomain.com_access.log combined

</VirtualHost>
Save the file and enable the newly created Apache configuration and restart Apache for the changes to take effect.
a2ensite bludit
systemctl restart apache2
Step 6: Access Bludit
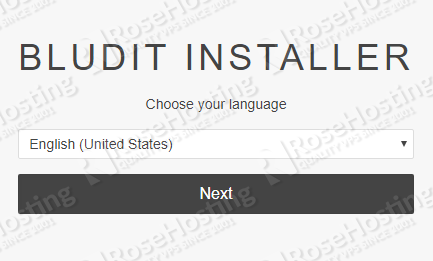
Now, open your web browser and type the URL of your server. In our case, the URL is http://yourdomain.com/. You will be redirected to the Bludit installer page (http://yourdomain.com/install.php):
Select the Language during the install process, then create a new administrator user account.
That’s it. If you followed all of the instructions properly now you should be able to access the administrator back-end at http://yourdomain.com/ admin and start using Bludit.

PS. If you liked this post on how to install Bludit on Debian 9, please share it with your friends on the social networks using the buttons below or simply leave a reply in the comments sections. Thanks.

