In this tutorial, we are going to install osTicket on AlmaLinux and explain in step-by-step detail how to configure it with the LAMP stack.
osTicket is an open-source support ticketing system written in PHP which supports MySQL or PostgreSQL as database types.osTicket has many features such as Advanced Search, Ticket Filters, Service Level Agreements, Custom Columns and Queues and etc. In this tutorial, we are going to use MariaDB as a database and Apache as a web server.
Installing osTicket on AlmaLinux is a very easy and straightforward process that can take up to 20 minutes. Let’s get started!
Table of Contents
Prerequisites
-
- A server with AlmaLinux as OS
- User privileges: root or non-root user with sudo privileges
</ul
Step 1. Update the System
Since we have a fresh installation of AlmaLinux, we need to update the packages to the latest versions available:
sudo dnf update -y && sudo dnf upgrade -y
Step 2. Install Dependencies
We need to install the required dependencies before we start with the LAMP stack.
sudo dnf install yum-utils curl wget unzip -y
Step 3. Install Apache2 Web Server
To install the Apache2 execute the following command:
sudo dnf install httpd -y
To start and enable the apache service, execute the commands below:
sudo systemctl start httpd && sudo systemctl enable httpd
Check the status of the Apache service:
sudo systemctl status httpd
You should receive the following output:
[root@vps ~]# sudo systemctl status httpd
● httpd.service - The Apache HTTP Server
   Loaded: loaded (/usr/lib/systemd/system/httpd.service; enabled; vendor preset: disabled)
  Drop-In: /usr/lib/systemd/system/httpd.service.d
           └─php-fpm.conf
   Active: active (running) since Sun 2022-04-10 04:51:53 CDT; 1h 32min ago
     Docs: man:httpd.service(8)
 Main PID: 677 (httpd)
   Status: "Total requests: 13; Idle/Busy workers 100/0;Requests/sec: 0.00234; Bytes served/sec:  10 B/sec"
    Tasks: 278 (limit: 23716)
   Memory: 52.3M
   CGroup: /system.slice/httpd.service
Step 4. Install PHP with Modules
To install the latest PHP8.0 along with the modules, execute the commands below:
sudo dnf install -y https://rpms.remirepo.net/enterprise/remi-release-8.rpm

sudo dnf update -y

sudo dnf module reset php -y

sudo dnf module enable php:remi-8.0 -y

sudo dnf install php php-{mysqlnd,pear,imap,cgi,gettext,common,curl,intl,zip,opcache,apcu,gd} -y
Step 5. Install MariaDB Database Server
To install the MariaDB database server execute the following commands:
sudo dnf install mariadb mariadb-server -y
To start and enable the mariadb service, execute the commands below:
sudo systemctl start mariadb && sudo systemctl enable mariadb
Check the status of the MariaDB service:
sudo systemctl status mariadb
You should receive the following output:
[root@vps ~]# sudo systemctl status mariadb
● mariadb.service - MariaDB 10.3 database server
   Loaded: loaded (/usr/lib/systemd/system/mariadb.service; enabled; vendor preset: disabled)
   Active: active (running) since Sun 2022-04-10 06:36:15 CDT; 26s ago
     Docs: man:mysqld(8)
           https://mariadb.com/kb/en/library/systemd/
 Main PID: 14335 (mysqld)
   Status: "Taking your SQL requests now..."
    Tasks: 30 (limit: 23716)
   Memory: 81.9M
   CGroup: /system.slice/mariadb.service
           └─14335 /usr/libexec/mysqld --basedir=/usr
Step 6. Create osTicket database and user
To create the MariaDB database, database user and grant permissions to that user, log in to the MariaDB console and execute the commands below:
CREATE DATABASE osticket;
GRANT ALL PRIVILEGES ON osticket.* TO osticket@localhost IDENTIFIED BY "YourStrongPasswordHere";
FLUSH PRIVILEGES;
EXIT;
Step 7. Install osTicket
In this step we need to download the latest version of osTicket, unzip it in the /var/www/html directory on the server, create the configuration file, and assign the right permissions:
cd /var/www/html

curl -s https://api.github.com/repos/osTicket/osTicket/releases/latest | grep browser_download_url | cut -d '"' -f 4 | wget -i -

unzip osTicket-v1.16.1.zip -d osTicket

cp /var/www/html/osTicket/upload/include/ost-sampleconfig.php /var/www/html/osTicket/upload/include/ost-config.php
Step 8. Create Apache Virtual Host File
We need to create Apache virtual host configuration file in order can access the osTicket via the domain name:
sudo nano /etc/httpd/conf.d/osticket.conf
Paste the following lines of code:
<VirtualHost *:80>
     ServerName yourdomain.com
     DocumentRoot /var/www/html/osTicket/upload
     <Directory /var/www/html/osTicket/>
          Options FollowSymlinks
          AllowOverride All
          Require all granted
     </Directory>

     ErrorLog /var/log/httpd/yourdomain.com_error.log
     CustomLog /var/log/httpd/yourdomain.com.log combined
</VirtualHost>
Save the file, close it and restart the httpd.service.
sudo systemctl restart httpd
Step 9. Finish the osTicket installation
Now, you can finish the osTicket installation by accessing the URL at http://yourdomain.com
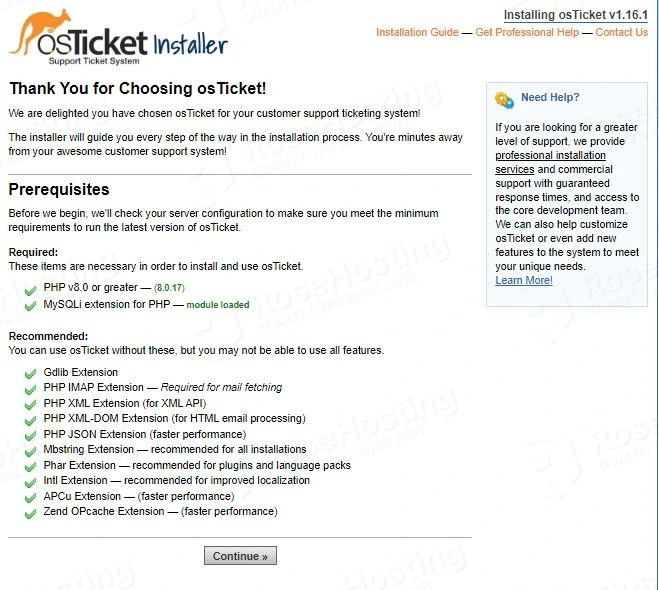
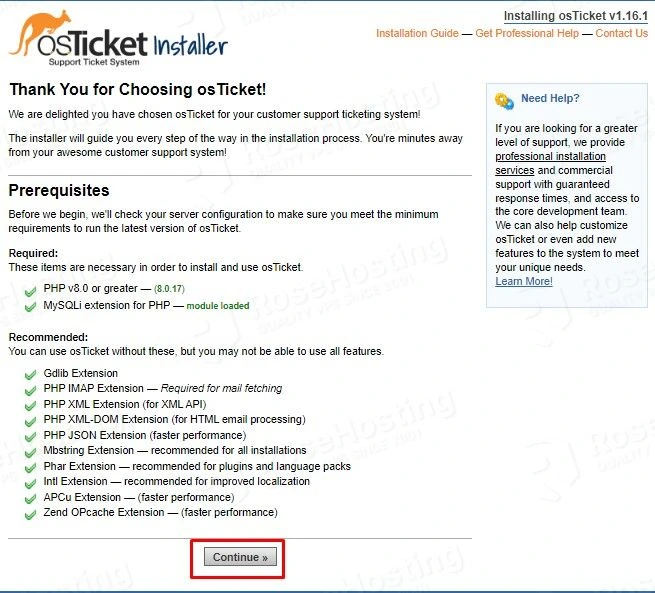
Since the PHP modules are already installed hit on the “Continue” button:
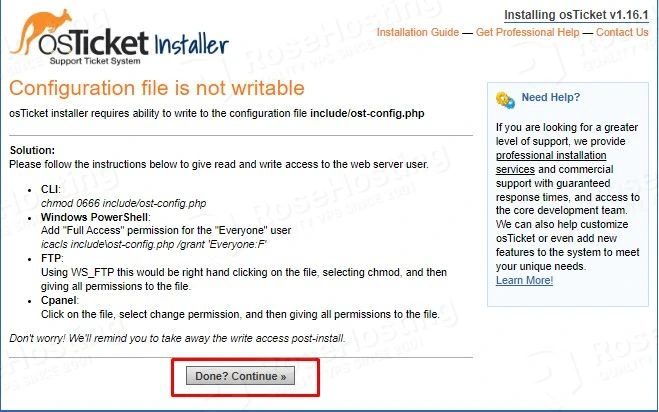
On the next window click on the “Done? Continue >>” button, once you set 666 permissions to include/ost-config.php file.
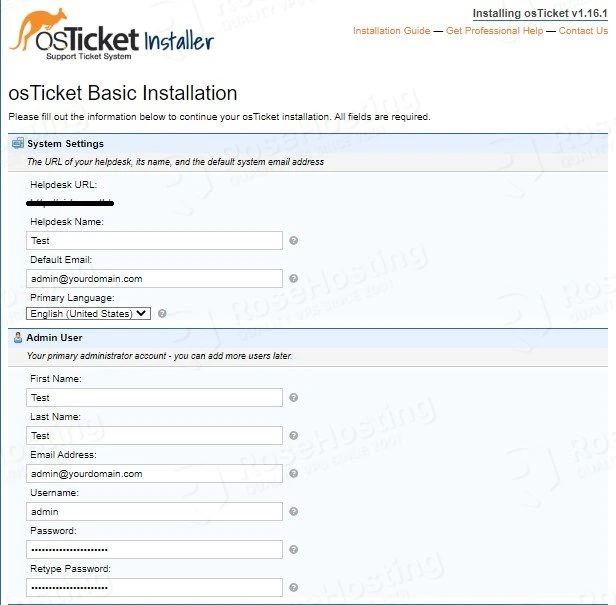
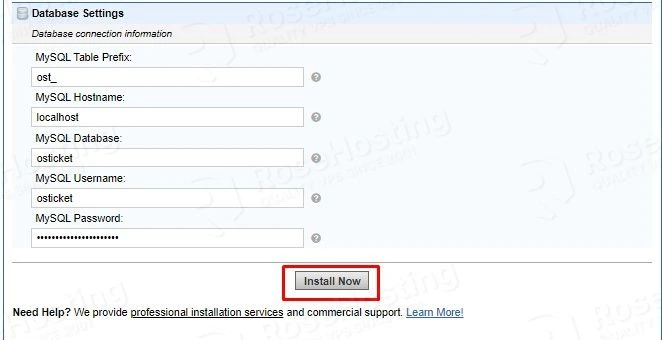
On the next window, there are input fields, that need to be filled, with information such as username, password, email, and the MariaDB credentials, you set before in Step 6. above. Once everything is filled up, click on the “Install Now” button.
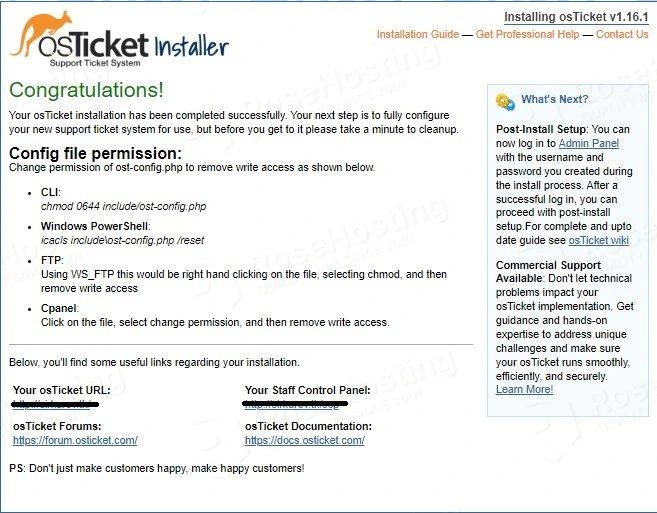
On the last window, will be the message about the successful installation and your osTicket URLs.
Congratulations! You successfully installed and configured the osTicket system on AlmaLinux. If you find it difficult to install, you can always contact our technical support and they will do the rest for you. We are available 24/7.
If you liked this post on how to install osTicket on AlmaLinux, please share it with your friends on social networks or simply leave a reply below. Thanks.

