In this tutorial, we are going to install the LOMP stack on Ubuntu 22.04 OS.
The LOMP stack stands for Linux, Openlitespeed, MySQL, and PHP. This stack is very often used where we need to gain better performance of our complex website. Openlitespeed is the Web server where the requests are handled, MySQL is the database storage system, and PHP is the programming language that is integrated well with Openlitespeed.
Installing the LOMP stack is a very easy process that may sometimes take up to 45 minutes. Let’s get started!
Table of Contents
Prerequisites
- A server with Ubuntu 22.04(at least 1GB of RAM)
- A valid domain name pointed to the server IP address
- User privileges: root or non-root user with sudo privileges
Step 1. Update the System
Before we can continue with installing the LOMP stack, we need to update the system to the latest version.
sudo apt-get update -y && sudo apt-get upgrade -y
Step 2. Install Openlitespeed
Before we install the Openlispeed web server, there are some dependencies that need to be installed.
sudo apt-get install build-essential libexpat1-dev libgeoip-dev libpcre3-dev zlib1g-dev libssl-dev libxml2-dev rcs libpng-dev build-essential libexpat1-dev libgeoip-dev libpng-dev openssl autoconf g++ make openssl libssl-dev libcurl4-openssl-dev libcurl4-openssl-dev pkg-config libsasl2-dev libzip-dev libxml2-dev sqlite3 libsqlite3-dev libonig-dev libpcre3-dev libudns-dev zlib1g-dev libssl-dev libxml2 libxml2-dev rcs libpng-dev -y
The next step is to download manually the installation of Openlitespeed since there is still no repo available for Ubuntu 22.04
 cd /opt

sudo wget wget https://openlitespeed.org/packages/openlitespeed-1.7.16.tgz
Once the installation is downloaded, you need to extract it with the following command:
tar -xvzf openlitespeed-1.7.16.tgz
To start the OpenLiteSpeed installation, go into the openlitespeed directory and execute the following command:
cd openlitespeed/

sh install.sh
The installation will start and you should receive the following output:
Target_Dir:/usr/local/lsws User:nobody Group:nogroup
Admin:admin Password:NjMyMzNm AdminSSL:yes ADMIN_PORT:7080
LSINSTALL_DIR:/opt/openlitespeed
TEMP_DIR:/tmp/lshttpd PID_FILE:/tmp/lshttpd/lshttpd.pid

-e Installing, please wait...
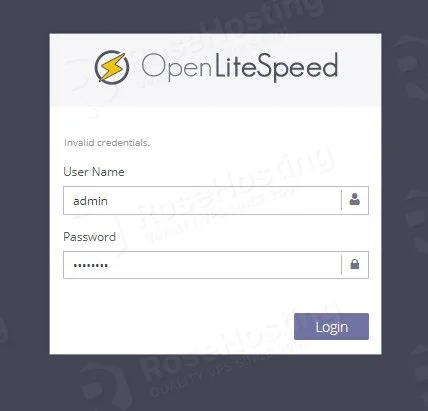
As you can see, there is a randomly generated admin password that you can use once the installation is completed. After successful installation, you should see the following output:/p>
Updating lscmctl script...
Done!

-e Installation finished, Enjoy!

-e Your webAdmin password is NjMyMzNm, written to file /usr/local/lsws/adminpasswd.
Now, we need to start the openlitespeed service.
sudo systemctl start openlitespeed
To check if the service is up and running, execute the command below:
sudo systemctl status openlitespeed
You should receive the following output:
root@host:/opt/openlitespeed# systemctl status openlitespeed
● lshttpd.service - OpenLiteSpeed HTTP Server
     Loaded: loaded (/lib/systemd/system/lshttpd.service; enabled; vendor preset: enabled)
     Active: active (running) since Tue 2022-07-05 13:36:20 UTC; 26s ago
    Process: 88814 ExecStart=/usr/local/lsws/bin/lswsctrl start (code=exited, status=0/SUCCESS)
   Main PID: 88839 (litespeed)
     CGroup: /system.slice/lshttpd.service
             ├─88839 "openlitespeed (lshttpd - main)"
             ├─88849 "openlitespeed (lscgid)"
             ├─88878 "openlitespeed (lshttpd - #01)"
             ├─88879 "openlitespeed (lshttpd - #02)"
             ├─88880 "openlitespeed (lshttpd - #03)"
             ├─88881 "openlitespeed (lshttpd - #04)"
             └─88882 lsphp "" "" "" "" "" "" "" "" "" "" "" "" "" "" "" "" "" "" "" "" "" "" "" "" ""

Jul 05 13:36:18 host.test.vps systemd[1]: Starting OpenLiteSpeed HTTP Server...
Now you can access the OpenLiteSpeed at http://YourIpAddress:7080 using the admin password that you saved before.
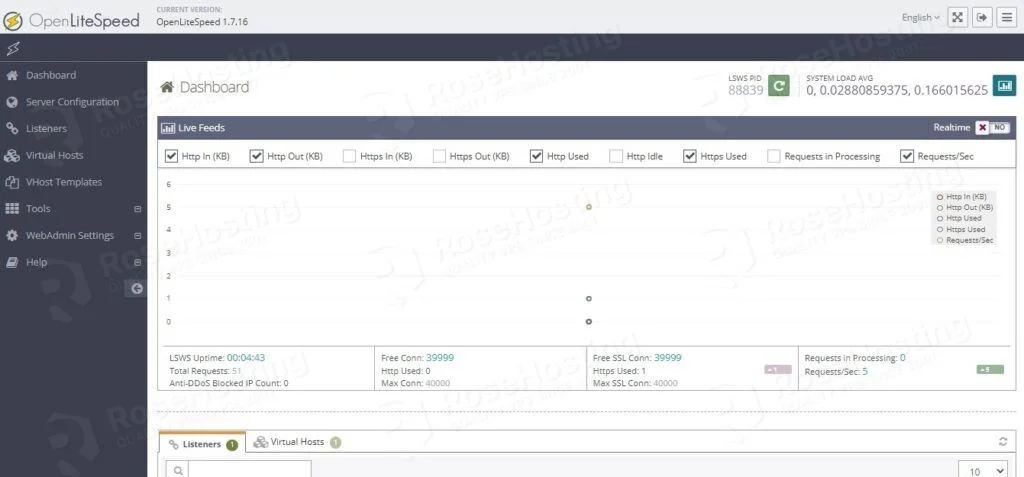
Once logged in, you will see the following screen:
Step 3. Change the HTTP port
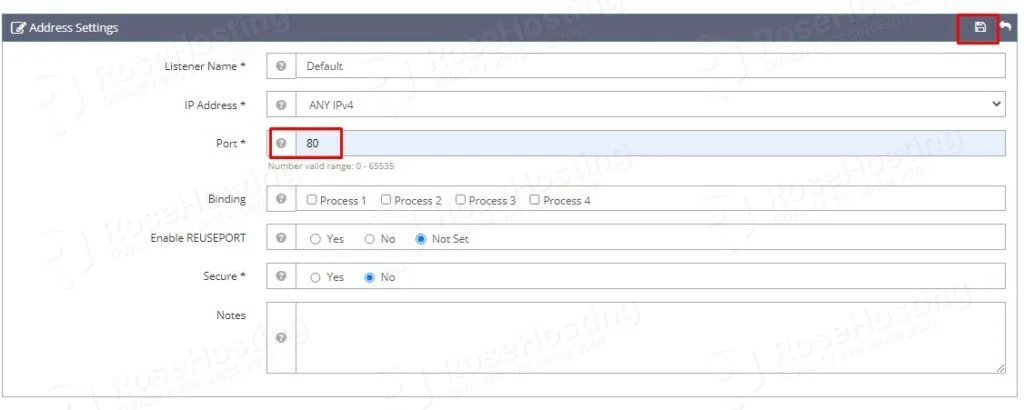
By default, the newly installed Openlitespeed, is using the port “8080”. To change this port to the default HTTP port 80 do the following:
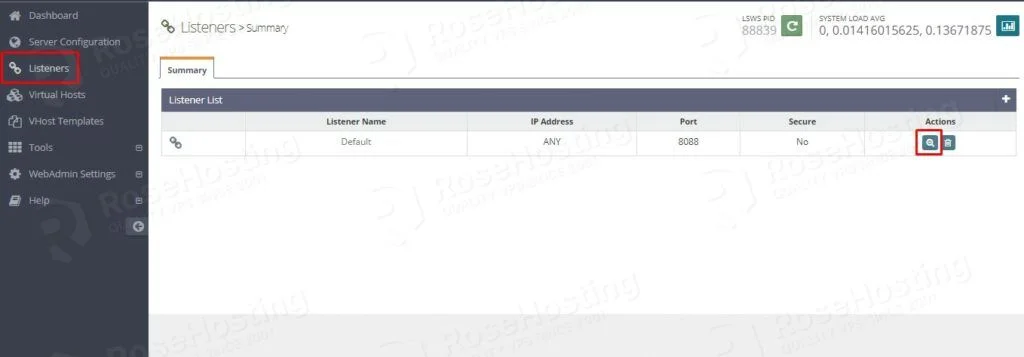
On the left menu, click on “Listeners,” and on the Actions tab on the table, click on the “View” button.
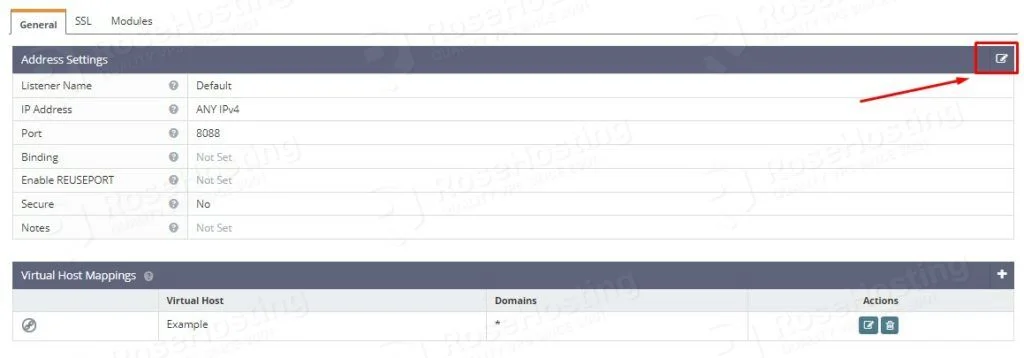
Then click on the “Edit” button:
Change the port from 8088 to 80. Once changed save the changes as described in the picture below:
<i
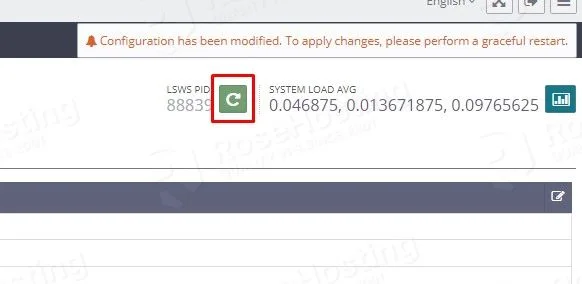
When the changes are made you need to restart the Openlitespeed service by clicking on the green restart button.
Step 4. Install MariaDB database server
MariaDB database server can be installed with the following command:
sudo apt install mariadb-server -y
Start and enable the mariadb.service with the following commands:
sudo systemctl start mariadb.service && sudo systemctl enable mariadb.service
Check the status of the mariadb.service
sudo systemctl status mariadb.service
You should receive the following output:
root@host:/opt/openlitespeed# sudo systemctl status mariadb
● mariadb.service - MariaDB 10.6.7 database server
     Loaded: loaded (/lib/systemd/system/mariadb.service; enabled; vendor preset: enabled)
     Active: active (running) since Tue 2022-07-05 13:59:43 UTC; 13s ago
       Docs: man:mariadbd(8)
             https://mariadb.com/kb/en/library/systemd/
   Main PID: 89583 (mariadbd)
     Status: "Taking your SQL requests now..."
      Tasks: 16 (limit: 4579)
     Memory: 57.2M
        CPU: 3.513s
     CGroup: /system.slice/mariadb.service
             └─89583 /usr/sbin/mariadbd
Step 5. Install and compile PHP8 for OpenLiteSpeed
By default, PHP8.0 is not added to the OpenLiteSpeed repository for Ubuntu 22.04 yet. We need to compile it through the OpenLiteSpeed GUI through the following steps:
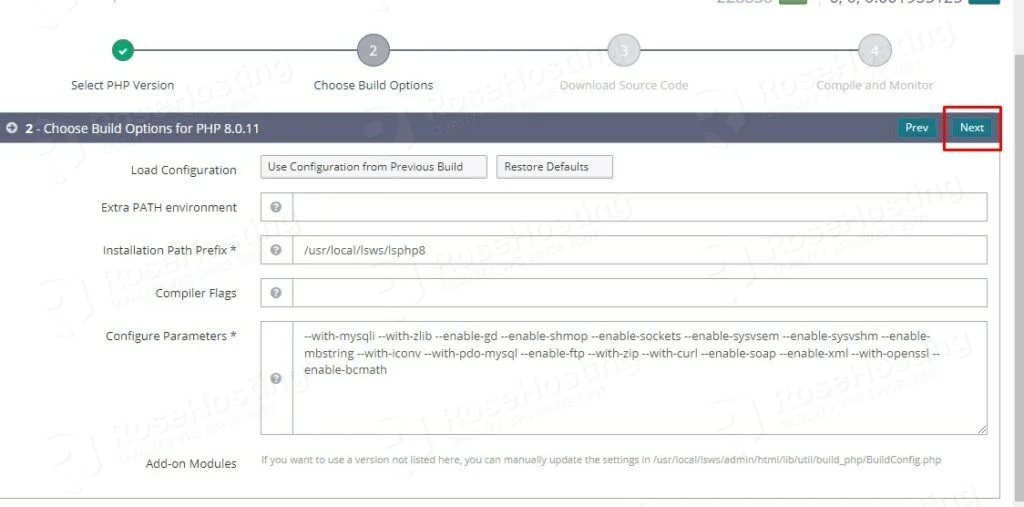
On the left menu, click on Tools —> Compile PHP and choose PHP8.0 from the dropdown menu as described below. Click on the Next button.
Then leave the default settings and click on the Next button:
Once the PHP is compiled, you will need to log in to your server via SSH and execute the following command manually:
/usr/local/lsws/phpbuild/buildphp_manual_run.sh
This command will be given in the third window.
After successful building, you will receive the output as described on the picture below:
Congratulations! You successfully installed the LOMP stack on Ubuntu 22.04
If you find installing or configuring it difficult, please contact our technical support, and they will do the rest for you. All you need to do is to sign up for one of our NVMe VPS plans and submit a support ticket. We are available 24/7.
